Flymo EasiLife 800 Robotic Lawn Mower – Cuts Up to 800 sq m Ultra Quiet Mowing, Manicured Lawn, Bluetooth Application Control, Safety Sensors, Hose Washable, Lifestyle Functions, Frost Sensor

Flymo – The Lawn Care Experts
Flymo EasiLife 800 Robotic Lawn Mower
Day or night, rain or shine, the Flymo EasiLife 800 robotic lawnmower automatically cuts the grass for you so you don’t have to. It independently mows a lawn of up to 800m², cuts any garden shape and tackles slope gradients of up to 35%. Designed with quick installation in mind – simply install the hidden boundary wire to define the cutting area and off it goes.
- Pin Protection for your security.
- Tilt, Lift and Collision sensors for your safety.
- Hose washable for your convenience.
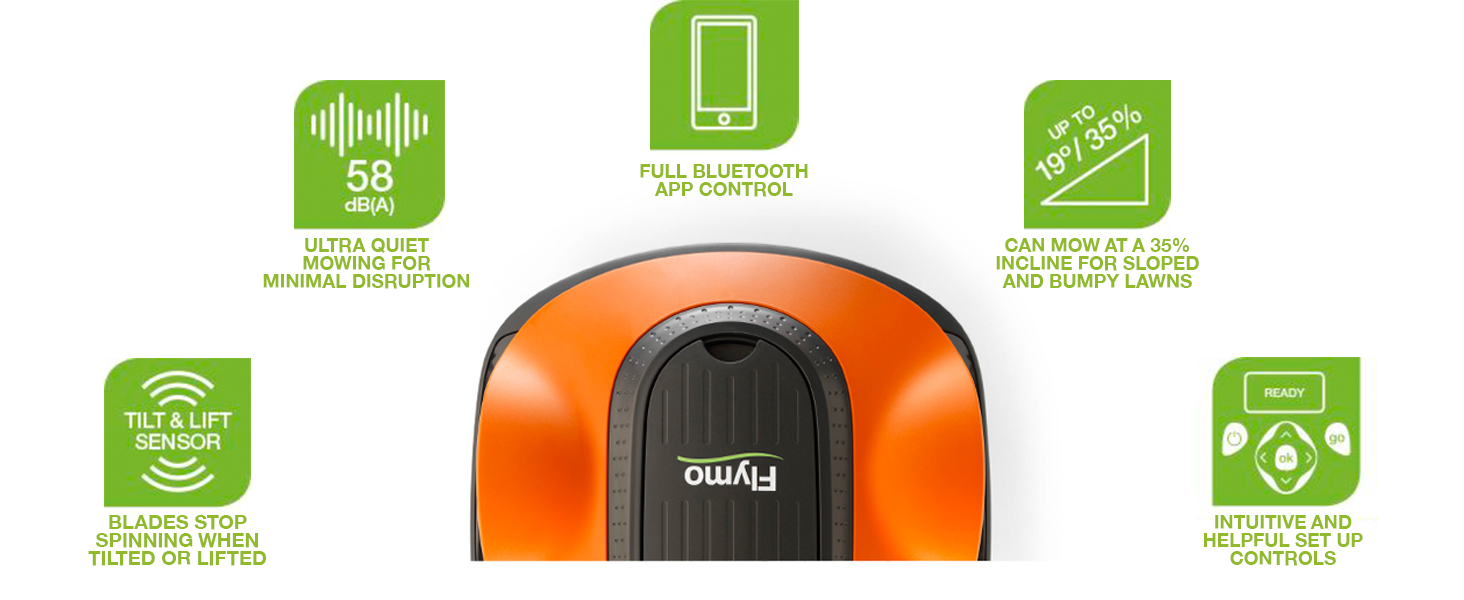
Features intuitive Assist-U interface for easy scheduling, monitoring and communication with the mower from the onboard keypad & LCD display or via the smartphone app. It also comes with LawnSense and FrostSense to automatically adapt cutting schedule based on weather and lawn growth conditions.
-
Where do the grass clippings go?
A Healthier, Greener Lawn
No need to empty a grassbox or dispose of grass clippings, its regular cutting technique returns fine grass clippings back into the lawn which acts as a natural fertilizer and improves grass quality.
-
Does it have extra functions?
Extra Mowing Flexibility
It’s functions are designed to fit around your life: Spot Cut, Override, Park or Second Area.
-
Can it mow in the rain?
Adaptive mowing whatever the weather
Detecting grass growth, it automatically adjusts the schedule to suit conditions, ensuring an even cut and protects the lawn.
-
Can it mow my irregular shaped lawn?
Mows every corner of the lawn
Perfect for imperfect lawns, the EasiLife robotic mower can navigate across lumps, bumps and inclines of up to 35% so you can have a perfect finish.
-
How easy is it to install and program?
Intuitive controls and quick scheduling
Install the boundary wire to define the cutting area and program the mower in 3 easy steps.
Why Choose a Robotic Lawn Mower?
Why Flymo?
Finding the right robotic mower for your lawn can be daunting, and it’s important for you to find a lawn mower that fits your lifestyle. Robotic lawn mowers are ideal for those of us that want to spend less time mowing our lawn, and more time relaxing and doing the things you love…


What robot best suits me?
Assist-U LCD Screen | Interface | Push & GO |
35% | Slope Performance | 25% |
800m2 | Working Area | 150m2 |
16cm | Cutting Width | 16cm |
20-50mm | Cutting Height | 20-50mm |
| | Smartphone App | |
| | Lifestyle Features | |
Assist-U LCD Screen | Interface | Push & GO |
35% | Slope Performance | 25% |
800m2 | Working Area | 500m2 |
16cm | Cutting Width | 16cm |
20-50mm | Cutting Height | 20-50mm |
| | Smartphone App | |
| | Lifestyle Features | |
- Flymo Easilife GO 150

- Flymo Easilife GO 500

| Weight: | 11.4 kg |
| Size: | 800 m² Cutting Area |
| Dimensions: | 55 x 38 x 23 cm; 11.44 Kilograms |
| Model: | 9705132-01 |
| Colour: | Orange and Grey |
| Manufacture: | Husqvarna UK |
| Colour: | Orange and Grey |
| Size: | 800 m² Cutting Area |
5.0 out of 5 stars Great Mower, easy to set-up
Overall, an excellent mower.
very easy to set-up once you know what you are doing. recommend researching a little to unsure right first time.
The instruction where excellent and easy to follow.
only issue I had was actually speaking to someone over the phone when I encountered a couple of set-up problems – that said, plenty of helpful tips online and on flymo website.
5.0 out of 5 stars Never underestimate a droid
We have a fairly large, irregular shaped lawn with a lot of trees and other obstacles, so I wasn’t sure how well the mower would cope, but it’s been running most of the summer and it’s doing a great job.
Installation on a larger lawn was a reasonable amount of work to bury the boundary and guide wires, but you only need an edging tool. Once set up it works great. I need to rescue it once every couple of weeks if it gets wedged against a tree, but it’s saved me so much time and effort.
Great product, would definitely recommend.
5.0 out of 5 stars Love it.
I nearly nocked it down a star for having to source my own optional extra boggly eyes. And while I think they should be included with every unit I’m not sure that’s fair to flymo.
Set up is a faff, but a couple of hours and it’s done.
I had to redo the set up annoyingly as there is a typo in the quick start guide which puts the decimal point in the wrong place for distance on the wire…. Which was honestly infuriating. But now it’s set up and been going for 6 ish weeks that’s a distant memory.
Just use the trimmer now to go around the edge once week and it’s done.
After a few issues with the boundary wire, and a few emails to flymo, I finally got ‘Mowses’ up and running.
I have a large garden with various obstacles in the lawn (trees, bird feeder etc….). I have found this mower frees up so much time, that I can now relax and enjoy the garden a bit more.
I buried the guide wire, time consuming, but worth the effort. A top tip, is to purchase some clear 4mm tubing, for ‘islands’ around tree’s. I threaded one side of the cable through the tubing and taped the ‘return’ cable to the side of the tubing, so the wires do not cross each other are a perfect distance from each other, enabling the robotic lawnmower to cross the buried cable, with no issues.
Here’s the link to the tubing I purchased. 4mm ID x 6mm OD – 10m Length PVC Clear Hose Vinyl Tubing, Food Grade Plastic Flexible Tube Pipe for Transfer Water Oil air https://amzn.eu/d/8jMX9Qi
I am overall very happy with the Flymo. I have a small square lawn and didn’t come up against any major issues with the set up. I used YouTube videos instead of the basic instructions that come in the box.
1 week in and the mower is doing a great job going out daily and keeping my grass at a constant hight (hiding all the weeds) with no issues of it getting stuck or parking itself to charge.
The one thing that I find extremely frustrating and why it’s not 5 stars is that the software artificially LIMITS THE FREQUENCY YOU CAN MOW. I can get around 3 hours a day from mine, the manual doesn’t actually define the limit (annoying and sneaky) so I’ve had to use trial and error with the scheduling to work it out. I can only assume this is a commercial decision to force customers to pay more for the same product if you have a larger lawn. It feels like owning a car but only being able to use it for a set number of hours a day.
As said I am happy and the lawn looks great so it’s non issue for me but MAKE SURE YOU HAVE THE CORRCT LAWN SIZE because this is sneaky commercial marketing from Flymo.
Had this in a few months now, apart from a small Bluetooth issue which affected iPhones this mower has been absolutely faultless. worth noting my lawn is pretty smooth the only place it gets stuck is the legs on trampoline. I surface mounted all the cables rather than bury them as most have advised, I haven’t had any cable issues at all. When laying the wire I did take mower over on lowest setting first, then put pegs round the perimeter then added in the wire last and finished tapping the pegs in. This took about an hour to lay 250m I have now hidden the mower under the decking and added a secondary area which has been straight forward. After a few months I have rarely engaged with the mower apart from clearing the grass out from underneath, changing the grass height and blades, however as the cable beds i it can create slack areas I would just add an extra peg in as a tensioner every couple off days but this only last a couple weeks. When originally purchasing the mower I was concerned about trailing grass clippings into the house but that hasn’t been the case at all. It does take a bit of time balancing how often and long the mower runs for. I now run mower at 5am for 60 mins, this way I know there isn’t any dog mess around or fear or it running over the dogs tail as the mower can creep up on you I’m sure it would be safe regardless as the safety features are pretty good, but the time scheduled removes any doubt. In wet wether you can get the odd clump of grass but this hasn’t been an issue for us, biggest issue I have now is trimming the edges but this takes a couple of minutes. All in all I highly rate this and wouldn’t hesitate to buy again. Worth noting it will not stripe the lawn nor can you control where it’s goes, it basically bounces round of the cables for the time determined in the app, it’s quiet enough to run any time of the day although if running infrequently it will be noisier when chopping longer grass and will also leave more clumps, I run mine everyday for an hour.
This robotic mower has taken the work out of mowing the lawn, I haven’t had to do it myself for the past 12 months! My only gripe is that the instruction manual is not very intuitive, or clear. I recommend looking at YouTube videos for tips on setting up the boundary wire etc, and yes it is a good few hours of work. No real need to Bury the wire, as over the course of a few weeks it pretty much bury’s itself as the grass grows around it. Most negative reviews on here are clearly as a result of not having installed the product correctly, or incorrect usage. E.g. if a review says that the mower doesn’t leave the docking station, i reckon i’d be able to fix it. There will always be those people even if the instructions were good. The instructions however could be a lot better, with clear step by step instructions, and operation of the mower explained more clearly .
Purchased this a while ago but have only got round to installing it this month. My garden is probably approaching if not slightly over the 800m2 recommended for this mower, happy to report that despite this it is doing a great job. I had to purchase additional boundary wire and pegs to cover the area I wanted, I got these in a kit off of Amazon, I also purchased a garage for ‘Ralph’ as well, in theory he doesn’t need one as he is water resistant but it does keep the weather extremes at bay and protects the base. My lawn is two large oblongs separated by a path which is only at a level that can be crossed at one end. Half of one is an orchard so due to falling branches apples etc. the robot Ralph will not be mowing this part. In order to mow the lawns effectively I set up two zones by using the mower guide wire, using this facility you can tell the mower to travel along the guide wire a certain distance before starting mowing. I split the time on the two sections so that Ralph spends 60% of his time on the large lawn and 40% on the smaller one, to get to the second area Ralph is programmed to travel 90 meters along the guide wire before starting to mow (this puts him in the middle of the second zone). Initially I had an issue with the mower not learning the guide wire properly it was supposed to follow the wire till it hit the place where it joined the Boundary wire, it did not make it all the way along. A discussion with Flymo technical established that max guide wire is 300m, his includes a section of the boundary wire which is not made clear. Anyway tweaked the length and it works OK now. The boundary wire is the most tedious of the installation process as you have to go right round the perimeter that you want to mow within, a bit of a back breaking job on my lawn but did it in about 4 hours. I also left some spare lengths of boundary as I went in a corner for example so that any changes could more easily be accommodated. It is important that the boundary wire is set at the correct distance from edges and obstacles, a cardboard ruler is included to help. Where the guide and boundary wire crossed the concrete path I cut a groove so that they are out of harms way and not a trip hazard. The mower has been out in all weathers including torrential rain, the only issue was that the really wet grass sticks around the cutting disc, simple enough to wipe away periodically. Security wise they are pin protected and Flymo will only give help with pin retrieval with definite proof of purchase, I have also included an Apple Air Tag as a tracker in case it gets half inched. It will be of no use to a thief but I would want it back of course. It is set to mow from 9am till 18:30 and this is doing a good job, the grass never looks that good in pictures and videos, mine included, but in real life the lawn is looking better and better. It mows for around 90 mins. then pops back for a 60min. recharge before hitting the road again. It is really therapeutic to watch a bit mesmerising, I was using a ride on mower previously but this is way way cheaper given the price of fuel. All in all I am very pleased with Ralph he is a great time saver.
So far, this has been one of my favourite purchases to date.
I love cutting grass but a heavy workload, lack of free time available and the fact that we don’t often get dry sunny days to cut grass up here in Scotland, meant that this was a great solution to maintaining our garden throughout the grass-growing seasons and although it comes at a cost – if it stands the test of time, it wont take long for it to pay for itself.
Pro’s
– once you have it all set up its so good.
– You can set a schedule or timetable and it will go out and do its thing before returning to the base to charge.
– There is an app that’s ok – I dont often use it after setting up the scheduling but you have an element of control over it.
– its quiet, really quiet – when its out cutting, it doesn’t even disturb birds in the garden, the dog if she’s out and it will have no affect on interrupting conversations if you have anyone round sitting in the garden.
– little to no grass cuttings to contend with. (unless your grass is too long to begin with – I’d suggest you cut the grass before first use and let the mower maintain that).
Con’s
– so, you have to install a wire around the perimeter of the area to be cut.
– You can use the provided stakes to pin it down, which is easy enough but be warned that on the lowest/shortest cutting setting (we found the longer and medium setting too long) it cut the cable in places – so burying it is probably the best solution and that is a rubbish task to carry out, essentially going round with an edging tool and pushing the cable into the ground, all the way around. Its boring and time consuming but worth it.
– You essentially have 3 spinning blades that cut the grass to a length and if like us, you choose to have the mower out every day – its really just nipping the top off the grass. Theres no vacuum or catch bag, so the grass just lands on the grass, essentially self-replenishing itself. It does however mean that any footwear that crosses it, will bring an element of grass back indoors (particularly when the grass is damp/wet).
– like a traditional mower – grass does accumulate underneath and you will from time to time have to clean the undercarriage.
Neither Pro nor Con
– you’ll need an outside power source
– the optional flymo cover is expensive. I didn’t like the idea of no cover at all, given the weather conditions up north and so went with the purpose made one by Flymo, thinking that it would connect to the charging base but to my disappointment it is a free-standing structure that is in no way connected to the device – so a cheaper or DIY alternative should be considered.
Great product - dodgy app
If you’re unsure about robot mowers, don’t be – they do pretty much all you’d want and the Flymo is no different. It comes out and munches the grass automatically, keeping the grass nice and tidy.
You need to spend a little time setting up, but once you get it figured out it is great.
The App however is a bit dodgy, mainly because it doesn’t reliably connect to the mower (Bluetooth connection).
The main idea of the app is to be able to connect remotely when within a reasonable distance, so one can send the mower out, bring it home to its dock or adjust the schedule. However the only way to get the thing to connect is to go outside and wake it up by pressing some of the buttons on the actual mower. Then the app connects. This is obviously rubbish, especially if it’s raining and cold outside.
I would hope Flymo will sort this. Would it put me off buying again? No. But I may try a different brand next time.
After reading various reviews, recommendations and the instructions! It was actually quite a simple set up, although timely. With quite a large patch of grass it did take a while to pin all the wiring down and following advice to dig a little below the surface so it sits away from the blades that may cause any issues, possibly even longer! But the mower, aka Mo has been running smoothly for several weeks now and doing a fantastic job! I’m am so happy I have not once had to worry about the grass since he joined my garden, although I do need to trim the edges as it does not go all the way up to the walls, but my grass has event started to thicken up and where I had a lot of patches before these have mostly gone. Healthier, happier grass that’s for sure. The app is straight forward to use once you have it set up, although you do need to be close to the mower, since my grass is actually on the third tier of my whole garden I do have to go outside to get a bit closer for it to connect, since it’s Bluetooth & not wifi. It’s a lot quieter than expected too so I barely notice him working away in the background. And works perfectly on level 2 setting, I don’t need to go down to level 1. I would thoroughly recommend for any garden to make life easier, and to take away that chore of mowing! Especially when it doesn’t need to be emptied either. I enjoy much more time on the grass and playing with the kids instead! Just be sure to give yourself plenty of time to set up, but once done I haven’t had to do anything again, it just does its job and sits happily on its charging Dock in between.
performs well overall. Its nice and quiet and does a good job in our garden.
The issue with this mower is that what they don’t tell you is that it will refuse to operate for more than 2 hours in a given day and will tell you that the operating limit has been reached and will refuse to work for 24 hours after this (so if you exceed the limit close to midnight – it may refuse to work for 2 days after this). This is purely a software restriction installed to make you buy the “bigger” models (all GO models have the exact same hardware – the only difference is the level of time restriction in the firmware). This needs to be considered as if you run the machine with default settings (where it wants to run all night) it can leave the machine out of action every 2nd day. You cannot force it to cut once this limit is reached, the manual modes are all locked out once the limit is reached. That said if you set it to 1 hour a day max, and run it every couple of days, it should do fine in a small garden but I hate this concept / implementation of DRM.
Product support is dire, they don’t reply to messages at all.
Installation is a long process, as you have to bury the boundary wire really (they will show that you don’t have to do this just lay it on the surface, but if you do this, its very easy to get the wire cut especially if your lawn is not dead flat).
The supplied power cord is VERY short (2 meters) and you’ll probably need to purchase a larger wire which are pretty expensive too unless you can put your base station right by an external power source.
The android / apple app is a must really but the Bluetooth range is pretty short here, so forget operating it from indoors, you have to go stand by the machine really to get it to connect.
The Good
+It cuts the grass really well
+It’s quiet and reliable
The Not so good
– It takes time to install the guide wire, but that’s only a small amount of time in comparison to all the time saved mowing in the future
– The software is awful – really awful.
– It works on Bluetooth, so you need to be close to it to make it respond – wifi would have been a better choice here, though to be fair, most cannot see their wifi network in their garden.
– The instruction manual is overwhelming, unnecessarily complicated and a complete mystery
– Tech support is nonexistent – many hours on hold for nothing.
All the above are not insurmountable, and once you know, and work within these limits, the actual job the product does is very good.
You Should Know
. You will need to buy the house for it / a house for it. The Flymo house is good, but is another 108 on top of an already expensive product.
. The blades need replacing – not a bad thing, but another cost.
. The guide wire needs to be well buried, and tightly pegged. If it isn’t, the mower actually chews its way through the cable.
. The instructions are contradictory about a guide wire and a loop wire. Simply, the Loop wire goes around the edge and defines the area to mow. The Guide wire runs roughly through the middle of the space and divides the area into 2 zones – this enables you to mow one half then the other. Nothing more complex than that (despite the instruction manual’s best efforts!)
I purchased this back in March of 2022 when it was on offer. I was slightly concerned as 1, this is the first robot mower and 2, we do have an incline half way down our lawn. So I was unsure if it would cope.
Initially I thought once it had arrived to just pop Larry the lawn (named the mower) out on the garden and test if it can go up the slope, but you have to set everything up before Larry was even able to switch on.
Set up did take a while, around an hour. Our garden measures around 30 metres long and 10 mtrs wide, and there are a couple of areas I wanted to stop Larry from venturing. Once the boundary wire was down it was a case of getting Larry ready to go, my advice is RTFM (read the F Manual) it isn’t something you can guess your way through.
Any once all set up, the app for the phone is pretty good and does what it needs, we set Larry off and luckily he dealt with the incline really well so no issues there. Larry goes out twice a day and easily covers all of the lawn, rain or shine he is out there.
This is by far the best money I have spent, no more hefting the large petrol mower onto the lawn, Larry is almost silent too, so can go out at any time of the day or night.
And 4 months in, the lawn is looking better than ever, the moss which has always been a huge issue is disappearing, this could be down to the regular mowing or the grass clippings mulching back into the lawn. Our garden is set up in such a way that Larry gets pretty close to the edges so I have no need to go out and strim after. The only slight issue we have had is where Larry has gone through the wire a few times, so make sure you leave some slack near the base station. It is easy to re-connect using the spare wire connectors that come with it.
So all in all a great purchase. I would highly recommend.
I bought this mower to help me out whilst on crutches but I was rather sceptical. We have the worst lawn ever — a very complicated shape with a pond and various trees and bushes, paths and drop off edges, full of lumps and bumps from moles and a visit from some cows so it’s all up and down — really dreadful.
It has been running a few weeks now. I’m so impressed with this mower and my lawn has honestly never looked better. The Flymo works very hard to free itself from all our lumps and dips and I hardly ever have to rescue it. It’s hard to believe it could do the job when you watch it trundling around but it absolutely does. It will be even better when I’m better and can smooth out some of the bigger dips.
It reads the weather and avoids the rain and super-sun. It’s really quiet, so it never disturbs us.
Flymo provide loads of very helpful videos so you have every chance of understanding the product before making a purchase, but there is one thing they don’t tell you until you read the whole manual — the best place to place your charging station is in the shade, so you need to think about this when you are planning your loop. There is a failsafe that shuts down the charger if the battery is too hot. I wish I had realised this beforehand. I will get it a little garage to deflect the sun.
My only other criticism is that the supplied pegs for pinning down the guide wires are rather short. I knew I would need more than were supplied, and the unbranded extras I purchased were 50% longer and stayed down better.
Probably one of the best things I've ever bough
Life changing – never have to cut the grass now, just strim the edges every few weeks. Garden is always ready for use. Also use the ‘secondary area’ function to do our front garden too where you manually lift it into the second area and then move it back to main area after its done – really not a big hassle. Have not given 5 stars because mine curves to the right and tech support said it shouldn’t do that – so I am in the process of having it looked at by one of their service agents. But I don’t think it actually affects it’s cutting ability anyway because the grass looks fine enough to me. Took about 5 hours to set it up but once that was done, there’s little else to do. I also had to set up an outdoor plug socket which is a necessity – you can’t charge it in doors and then take it outside.
Great bit of kit but ensure you pick the right size for your law
Takes a while to initially set up, I chose to bury the boundary cable which does take time but worth it as there is no danger of cutting it later.
The only thing I find a little frustrating, I would like to set a schedule for a couple of hours in the morning then the same later in the evening. Once the mower has done the first two hours it returns to its docking station and cannot be used again that day, App says it’s reached it’s daily limit, this situation is not mentioned in the manual. I emailed technical support but not heard anything back 3 weeks later. I presume it is factory set to ensure they can have different size mowers and can charge more for longer running units.
The App is a little clunky and could be very much better but without it, setting schedules etc would be very difficult. This only works via Bluetooth so if your docking station is at the bottom of the garden you will need to get in range to change any settings or schedules.
Also you will need an outside electrical socket, depending where you want to put the docking station so this could add to the initial cost.
Watch the price too, back in April this was 375.00 and now in June it’s 200.00 more. I guess, out of the mowing season they reduce the price to continue to move them.
Saying all this, the lawn is in the best condition it’s ever been, lush and green and no cuttings to get rid of. The unit is also good fun and my grandson loves it!
If you can get this at the right price, have the time and effort to set it up and have an electric socket where you want to position the docking station, I would recommend.
Update 29/6/22
Flymo support have finally got back to me and all they say is this model will mow for 2 hours a day, maximum. This means it is more important to get the correct unit for your lawn size.
Money well spe
Could I live without this little guy? Absolutely not.
The mower is fantastic, goes out twice a day and maintains the grass. We have dogs and our grass has been in terrible condition for years, since getting this mower the grass quality is certainly improving!
Setting up with the wiring was a little tricky at first but honestly nothing too complex. No problems with him so far!
Meet Unicorn, the barber of the Law
I’ve had this Robot for just over a week so it’s a little early for a review of longevity or lawn quality but I will edit it in future months.
First off, the instructions and installation details were very simple to follow. Out of the box you have everything you need. Plenty of boundary and guide wire and more than enough pegs should you use them.
My lawn is very small, probably about 40msq so the Easylife Go 150 is perfect. I needed a solution to losing space for a petrol mower and this seemed the logical step. As you can see by the video, the lawn is flat to a paved pathway, so digging a small trench around the boundary allows the robot to move effortlessly over the edging. I now only need to trim when the edge creeps onto the path. I would’ve had to do that with a traditional mower anyway so no issues there.
As for the docking station, I didn want it on the lawn as it would be a trip hazard for little ones. The solution was to take out the mortar in the path and lay the guide/boundary wire accordingly. As you can see in the picture (where the mortar is darker) I have repointed the path and the robot has no issues detecting it and stopping. It finds the docking station every time and doesn’t ever collide with the garage wall.
Securing it to the floor, I have used the plastic pegs it came with but drilled into the slabs, then using a rubber mallet, gently hammered them in. They are firm enough to keep the docking station in place, but loose enough for me to take them out for winter.
So far so good. It’s only been a week but I am very impressed with Unicorn (named by a little one). They cut tirelessly and seem to get the job done. I’m not entirely convinced the blades which came with it are the best, there are more than a handle of uprooted grass roots which it appears to have torn out rather than cut. I may pay for higher quality blades when then need replacing just to see if the cut is better or whether it’s just the robot itself.
I will review this again after the summer to see if I’m still as happy with it then.
*Edit 25/5/22
I’ve added an additional photo to show a bumper I have added to Unicorn. This is to prevent further scratching when it collides with our plant bed sleepers which run down one side of the garden. It was only causing minor damage to the front, but this prevents it complete without hindering the mower at all.
If you have any raised areas which the mower will impact with, I would suggest adding a similar bumper to prevent scratching.
A great source of satisfaction after hours of installatio
I come from the throw away the instructions and get the thing going school.Sadly no good for this.
Laying the perimeter wire took a while but i used a kitchen knife to cut the turf and slip it inside,all i thought was good.
I got the tree obstacles all wrong and ended up just taking it out – it happily bumps into them and moves elsewhere,not sure its worth the effort of avoiding them.To be honest i’d probably have let it just hit my fences and dwarf walls and reduced the strimming with hindsight but i’ll know for next time.
My biggest mistake was not emptying the box properly – didn’t realise there was a great big plastic sheet that attaches to the charging station stopping the mower knocking the charger over every time.
After a week of correcting my mistakes its now out every day for an hour or so at 4pm prompt (remember to set date/time properly-mine was in 2002).
Like others have said,it’s very satisfying to watch it on it’s travels while avoiding the hard work.
I’m 8 stone heavier and have a gin and tonic addiction.
Time saver extraordinaire
Awesome bit of kit that is saving me hours a week . Hate mowing so boring. Set up was easy. Just follow the ruler for the boundary. Guide wire was easy too . Just make sure you push down fully on the coupler. I also buried it so as not to have the mower chop it to pieces.
App is easy to use and install. The mower is scheduled to go out and mow on the highest setting until either the boundary wire gets grown over or I decide to bury it. Can’t fault the little thing. Watching it do its work in the sun with a pop is weirdly satisfying too.
As a long time robot hoover user I’ve had my eye on one of these for a long time. I finally bought one and so far am glad that I did.
Overall i am extremely impressed, I can now go away and not worry about coming home to an overgrown lawn. I also don’t need to worry about collecting and dealing with grass clippings because it all gets mulched as it goes. I’d recommend this to anyone.
Initial setup, lessons learned… so unlike my robot hoover, this lawnmower requires you to install a boundary wire around the perimeter of the garden and around any obstacles you don’t want it to run into. You can either cut a groove in the lawn and place it in that, or use the supplied stakes to hold it down while you wait a few weeks for the grass to grow over it and pull it down. I opted for a groove which i thought might take me a couple of hours maximum to create. Over a day later and with some help I completed the wire lay! A couple of weeks later I needed to adjust parts and add a guide wire and do opted this time to just stake it down – this was much much easier! if you take this option, leave the cutting height at its highest to avoid risking cutting the wire while it beds in.
Wire placement – the boundary wire needs to be a set distance away from the edge. The distance is adjustable between 20cm to 30cm in the app, but has to be the same everywhere. If you have any cut borders you’ll want it to stop before it drops its wheel into it because it will struggle to get back out of anything more than a 2cm drop. Obstacles over 2cm in height don’t need the wire if you don’t mind the lawnmower colliding gently with them and changing course (small trees are fine).
Guide wire – I thought this might be optional, but the mower is not very clever and really struggles to find its dock without it. Again this is nothing like my hoovers which easily dock. You will need to install the guide wire which also helps guide it to other parts of the lawn if like me you have a side section.
Noise – it is fairly quiet. I can hear it from inside if it is quiet inside, but nothing that bothers me at all.
Coverage – on my first few cuts I let it run 6 hours a day. It will cut for about 1 hour, charge for an hour and then come back out. Mine is the 500 model and I suspect the only difference is the amount of boundary wire you get in the pack and not the battery size. I now cut for about 2 hours a day (which means setting it for 4 hours to allow for charging) and it seems to cover it very well.
Dog poo – I have a Labrador so I try to pick up daily if he has poo’d on the lawn. I have missed a poo a couple of times now and the mower just drives through it. The blades on these are small almost razor blades, so it doesn’t explode the dog poo everywhere, it just gets smeared about a bit and dragged over the wheels. You can hose the machine down so its easy to clear up.
A great bit of kit and means I can spend my garden time doing other things.
Far better than I expected
I like gadgets
But they’re often more fun than useful
This little beastie is both. I have an acre of garden, mostly lawn. Far bigger than the 500m2 it’s designed for. I also set it up in April with long, wet grass. I was totally unfair.
But he just trundles on and on and with each cut makes his life easier, so each time he can trundle further and do more
The grass is a lovely length and evenly cut. It’s actually better than the results from my ride on, as the 500 copes with all the little undulations and hills without beaching or bottoming
Setting up the wire was two days work and I did bury it using an edging spade. But not one problem since. And I sit here with a nice cold Sauvignon and a warm glow as I watch my lawn being beautifully cut
Thoroughly recommend
It only took a couple of hours to get the robot mower up and running, at least in our small back garden. I pinned down the wire initially, just to make sure everything worked and I had the distance from the edge correct. All seemed well so tomorrow I will bury the cables. One criticism of the installation was to do with the power cable, it comes with the terminators fixed and they are quite large (relative to the cable size). If like me you want to connect the power to an inside plug socket, you have to drill a huge hole through a brick wall to be able to pass the tiny cable through. If the terminator on the end that connects to the power adapter were not fixed and could be removed and reconnected, it would make that job much easier. Probably it would be better to install an external socket, I assume the power adapter is waterproof, at least it looks that way.
In the Amazon comparison with alternative products, it states that the cut width is 60cm. When I saw it I did think it was dubious and sure enough I was correct. If you choose this product because of the cutting width please be aware that the figure of 60cm is incorrect, it is more like 20cm (similar to its competitors). I was pleased to note that machine is actually made by Husqvarna. I believe that Flymo is a subsidiary of Husqvarna. Husqvarna were early into the robot mower scene and my hope is that they have been able to produce a reliable machine.
After completing the installation, I was all set to give it a test run. I went on to the app, set it to overide the preset schedule, told it to run for an hour and pressed Start. Nothing happened, it told me that it was scheduled to start at a later time. I tried a number of other times to get it to run manually but to no avail. I sat down, about 2 metres away from the charging station, to read more of the instruction manual. Stood up to look at the machine and to my surprise it was off at the other end of the garden and had started to do its stuff. That’s how quiet the machine is! My guess is that the machine had to be charged to a minimum of 80% before it would set off but I couldn’t find anything about that in the manual.
Watching the little machine go about its business was quite comical and fun. The boundary wire which I had placed at about 20cm from the edges of the grass appeared to work well. I hadn’t realised that the machine stops to turn once the machine was half way across the wire so you might end up with the wheels ending up in your flower beds. It seemed to be able to climb out easily enough though.
I had the machine on its highest cut height of 50mm (factory setting) and it was quite a dry day so none of the grass was especially taxing for the machine. How it will work in the damp with slightly thicker grass remains to be seen. The blades on these machines are tiny so I would suggest getting some spare replacements especially if you have and stones or worm-casts. After it completed its first outing, it had cut most of the grass, just a few areas of uncut grass. My guess is that if the grass is being cut every day then the randomness of the movement of the mower will likely get all the bits it missed before and so will become unnoticeable. The machine does have a tendency to cut over areas that have already been cut but I’m guessing the software isn’t that sophisticated to map the lawn and know where it has been!
Next I intend to lay the boundary wire for our front garden and add it into the back garden loop. This will be a secondary area and my understanding is that I should be able to set the machine to secondary setting, move the machine to the secondary area and hit Start, it will carry on cutting the front grass until the battery runs out or I stop it.
All in all my first impressions are good for our small, not so lush, grassed areas.
I cannot justifiably comment on the set-up process because I enlisted the help of my 2 sons in law for this. They seemed to find it easy enough, and very reasonable for me, at the cost of a Sunday lunch!
I find the app and scheduling really quite straight forward, so Maurice the mower now wends his happy little way around my lawn on a regular basis. Obviously it lacks stripes, but who cares, when it’s neatly mowed? Frankly ensuring our Beagle’s “calling cards” are removed before he’s due to mow is far more trouble!
Thus far he appears to be way more reliable than either of my ex-husbands, and complains significantly less too! What’s not to love?
Saving time & a talking point!
Robbie (as we’ve called him) has been with us a few weeks now, and we love him! He potters around & keeps the lawn (and the dog) in check, making sure i don’t have to get the big mower out, sort out the extension leads, ensure there is room in the bin for grass cuttings, and generally wasting an afternoon!
Got my kids to help with burying the guide wire, and connecting up, so it was an easy job for them whilst i supervised with a cuppa from the comfort of my garden sofa!
Since then he’s been doing his thing, and the children think he’s brill (the kids are 20 & 22) and video him for their social media, prompting lots of ‘you are so posh’ responses apparently. No, not posh, just lazy! Friends think he is great & are looking for their own robot mower now.
I’ve started building him a little wooden garage for far less money than the moulded plastic cover that flymo suggest, so i’ve had fun doing that instead of mowing the lawn!
Great purchase, would recommend to anyone who is very busy, or lazy!
Any misgivings? No. Although i think he secretly fancies the barbeque – he seems to be down in that area of the lawn quite a bit!