TRONXY X5SA PRO 3D Printer With Titan Core XY Structure With OSG External Dual-axis Guide, Double Z Axis DIY Assembly and Resume Printing 330x330x400mm,Support TPU/PLA/ABS/PETG Filament


- Tronxy Store is the first of TRONXY 3D PRINTER on Amazon. We have more than 20 technicians who provide professional technical support to our customers. TRONXY strives to provide high quality, economical 3D printers and excellent technical support to customers.
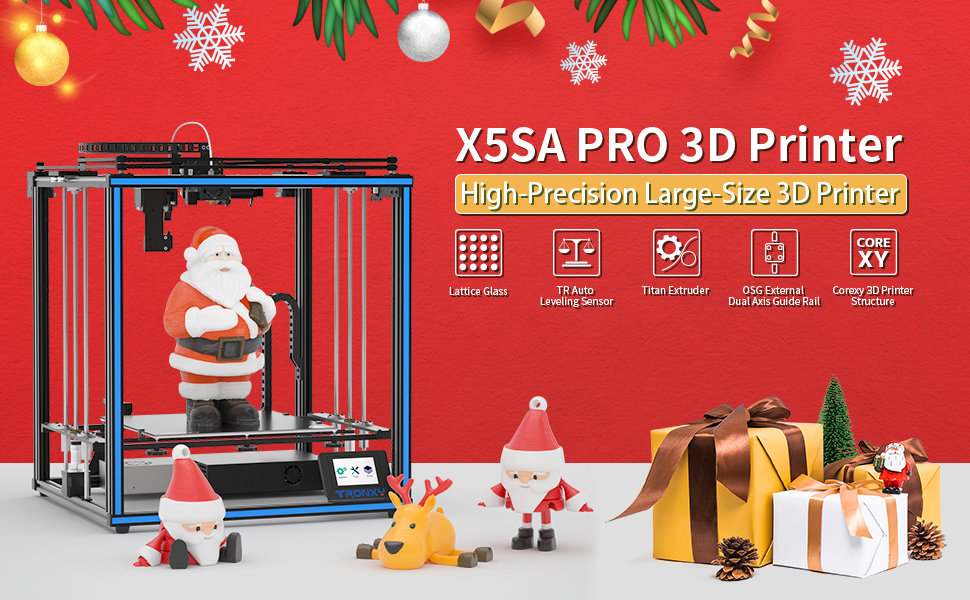
TRONXY New Upgraded version of X5SA PRO 3D Printer—— An excellent printer for experienced users
1. Brand new upgraded TR Auto Leveling Sensor
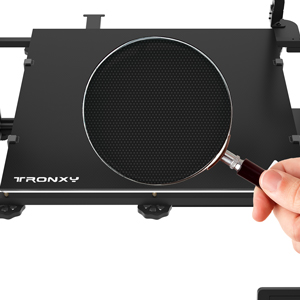
2. Lattice glass printing platform
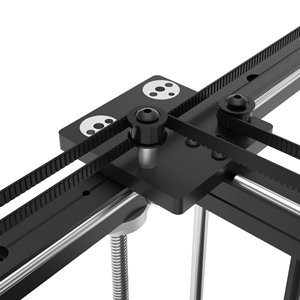
3.Left and right slider —— update idler pulley
Warm Tips:
About the shipping version of X5SA PRO:
The original version and the lattice glass black leveler version are currently shipped alternately.
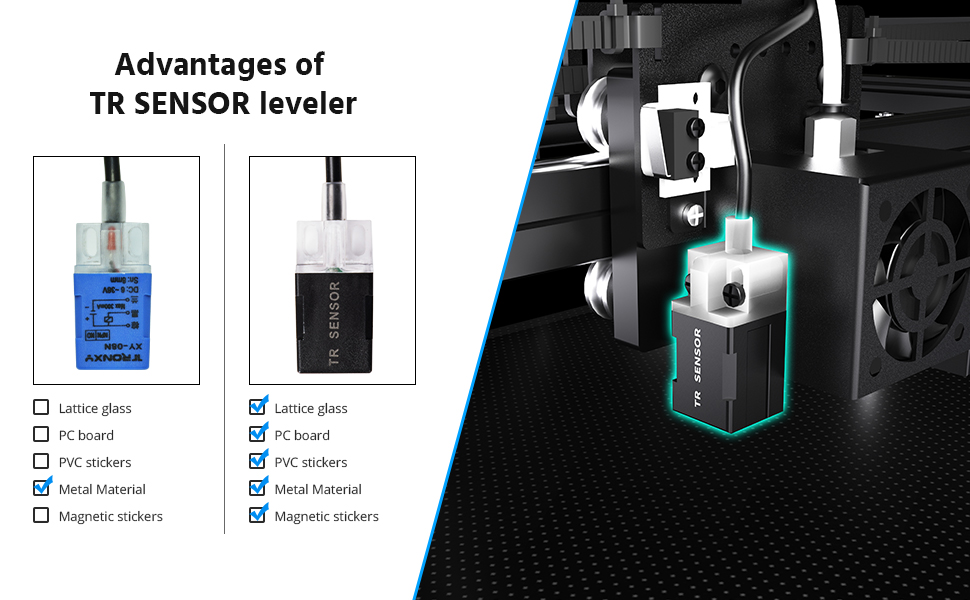
BLUE TR Auto Leveling Sensor VS BLACK TR Auto Leveling Sensor
The old blue Auto level sensor can only detect metal, but the newly upgraded black Auto level sensor detector solves this problem and can detect platforms with opaque materials such as lattice glass and magnets.
Technical Specifications About TRONXY X5SA PRO Lattice Glass Platform 3D Printer
| Print principle | FDM (Fused deposition molding) |
| Print size | 330× 330×400mm(12.99×12.99×15.74in) |
| Machine size | 580×645×660mm(22.83×25.39×25.98in) |
| Print thickness | 0.1-0.3 mm(Optional) |
| Nozzle quantity | 1 |
| Nozzle size | 0.4 mm |
| Positioning accuracy | X/Y:S0.00625mm,Z:S0.00125mm |
| Print speed | 20~100mm/s (suggest 60mm/s) |
| Filament | TPU, PLA, ABS, wood, pc,HIPS, wooden filament etc. |
| Environmental temp | 8℃ – 40℃ ;Nozzle temp:Max 275℃;Heat bed temp:Max 100℃ |
| Connection | SD card, USB cable(Suitable for skilled users) |
| Power input | 110V/220V; Power output: 24V 360W |
| Support Software | Repetier-Host.Cura |
| Slice software | TRONXY Slicing Software |
| Input format | .STL .OBJ |
| Output format | GCode |
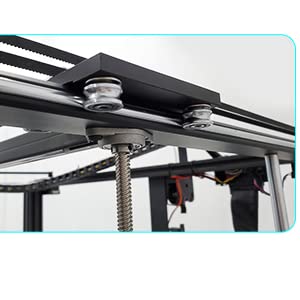
OSG external dual axis guide rail
- (1) “0” clearance, the eccentric wheel on the OSG slider can adjust the smoothness and tightness of the guide rail, sliding smoothly at high speed, low noise, and high precision
- (2) High speed and low noise
- (3) Anti-corrosion and anti-rust
- (4)smooth sliding (5)high precision
| | | |
|---|---|---|
Newly Upgraded TR Sensor Auto Bed Leveling Sensor1.It can precisely measure the tilt of hot bed surface and offers Z axis leveling compensation,Can detect glass, metal and other materials. 2.The new upgraded version of the automatic leveler.can sense opaque substances. 3.Induction Medium: Non-transparent object . | Newly Upgraded Lattice Glass Platform1. Has strong adhesion, 2. The characteristics of easy removal and cleaning of printed products. 3.Tronxy crystal lattice glass uses a special material coating, which maximizes its durability and long service life. | Left and right slider —— update idler pulley1.Metal idler pulley VS rubber idler pulley: Newly upgraded idler pulley, made of high-quality rubber material, Change from the original metal material to rubber material, (1) Metal idler pulley: It is easy to scratch the belt and make a noise when rotating (2) Rubber idler pulley: The mold opening is formed in one piece, the belt will not be scratched, and the belt will not make a noise, the printing process is quieter, and the printing fun is greatly improved. |
| Dimensions: | 67 x 47 x 19 cm; 16.5 Kilograms |
| Manufacture: | TRONXY |
| Origin: | China |
I had been looking to build a large core xy machine and had priced up all the parts. Seeing this printer with 100 off the price I couldn’t resist.
It took a good afternoon to build and I must say was very enjoyable with good instructions. The printer worked without any fiddling and the bed levelling was very good. Take some time here to get it just right. The first print was an utter disaster, my fault entirely, I forgot to tighten the x axis motor pulley. Check and double check all screws etc. This being done I printed a Chep cube, absolutely perfect. Benchey next and I need to adjust retraction settings but that’s all. I also need to check the E steps but that requires either pronterface or octoprint, something for later when I have time. As with all these new glass beds allow them to cool before removing the print and a bit of 3dlac on the bed will help with adhesion. Be careful with petg don’t use without glue stick or 3dlac because you can tear lumps out of the bed when removing the print, I ruined my previous lattice glass print bed this way. Next purchase is a removable print surface.
I will have to check on thermal runaway protection being enabled and as its running marlin that shouldn’t be a problem to enable if needed.
It’s not an ender 3 build wise, 4 screws and a couple of plugs and it’s a lot more money but it’s a lot more machine with better quality parts.
I can’t recommend this printer enough.
I had had this printer about a year now. Apart from changing the bed surface to a pei one and replacing the hotend it hasn’t missed a beat.
Package arrived the next day and was well protected. I am a resin 3d printer normally so this was a new experience for me. Building was easy using both the manual and an online video. I did have one issue with the build, the chain that connects to the Z plate snapped after 5 or 6 uses. After investigation I found that if I had ignored the manual and followed the video I would have been aware that the chain should have been fitted after the bracket placement was switched to the opposite side from the manual direction.
Size wise it is a beast. Outstanding for the price when compared to other models out there.
Had some teething issues with print quality, which I wasn’t really surprised by as I am new to this. However Tronxy has a great community that has enabled me to trim the plate for better cohesion, nail the nozzle temp to prevent the initial stringing I had.
All in all a well priced machine for the size and quality of print.
Good full colour instructions makes a simple job of assembly, do allow a day to put together and tube up to perform well though, prints fast and turns out decent prints with ease, well worth the money, industrial quality at home user price 🙂
This kit includes everything you will need to get printing. For a hobbyist the assembly is great fun. The end result is a strong printer with a very large build size.
This is a great printer and definitely value for money with this latest iteration.
I would advise that you get the z timing belt kit, a set of aluminium corners and boat nuts and bolts to go with it to help stiffen the frame.
I also used cable ties to hold the gantry to the back of the frame while getting it square and tightening the bolts. Try not to over tighten as I now have one of the hex bolts stuck and rounded off. Dremel will be needed to get that one out if I need to change it.
Make sure you do your manual bed level and z height offset and then auto bed level before every print.
And don’t start a print from your PC/Laptop while it’s doing this as the printer will think everything has heated up when it hasn’t.
Prints have been excellent so far but the carriage assembly is almost on the same level as the hotend nozzle so look out for catching.
I have had problems with it rubbing on tree support but not the print itself.
This works brilliantly with sliced gcode files from an SD card and the pause print was a life saver on a print I hadn’t put enough support on and had to rescue.
So far this has been very reliable and easy to use.
The assembly was smooth.
The only problem I did have was with the cog on the z motor not being at the right height for smooth belt operation.
This chewed the z belt up and I had to replace it with a spare I already had from a previous build.
Please bare in mind that this thing is big!
So reserve a large area for it.
In operation this printer is super quiet. Especially until the fans kick in.
Intact the fans are the only noisey bit about it and if you want to upgrade then you can get small silent fans for it.
And don’t bother with the version of Cura on the supplied SD card. Just download the latest version and select the profile from the setup menu. Works a treat.
It has its faults but this is a brilliant bit of kit.
Not for beginners.
Assembly 5 hours.
Many hours of adjustments.
Perfect for DIY enthusiasts.
Rigid base, ideal for many mods. (Synchronize Z motors with pulleys and belt immediately!)
Good deal!
A good value and decent quality 3D printer.
A point not in the instructions – when assembling the frame, use a trysquare to set all the joint angles perfectly square and flush at the outer edges, both up-down and sideways.
That will avoid a lot of possible alignment issues later on.
I’d not fitted the trim strips and cable wrap when I took that photo so it looks a bit messy, but it has done quite a few very nice prints, including a test with flexible TPU filament, which came out surprisingly well.
I videoed the entire assembly process for mine, if you want more information than given in the manual, it is on youtube if you search the printer name and my name.
First things first — if you’re expecting to open a box and be greeted with a finished printer, this may not be the printer you are looking for — I’d suggest the TronXY XY2 instead. If, however, you’re after something a bit more involved that has some stellar results, this is *very* much for you.
As someone who has been building printers since the earliest days of hobby 3D printers being a thing, having a coreXY printer kit that’s this well put together has been an absolute revelation. Having worked on assembling the original Darwin PlyRap way back when, I never imagined building a cubic chassis like this could be so easy.
Since the rise of using aluminium extrusion to build printers, things have definitely been simplified, but there has always been something or other that’s needed fettling or fiddling with to go together right, and I am extremely pleased to say that I had none of those issues while building this kit. Everything is cut straight, measured properly, counterbored to the correct depth and threaded properly, which is wonderful to work with. All of the components are manufactured and finished to a very high standard, with parts being either visibly machined or lasercut. Alignment is trivial, thanks to the work done in quality control – I cannot state enough how big of a deal this is: almost every other printer I’ve ever worked with has had *something* that’s needed a bit of work. I didn’t even have to pick up a file for this one.
In general, the manual is pretty clear, although it could do with a few more detailed callout images – the whole thing is printed in A5, and it’s easy for details to get lost, especially when using coloured 3D images like they have. The written translations are of a very high standard, which is something that TronXY as a company is very good at, and it puts them significantly ahead of their competitors in my eyes.
The only real frustration I had with any of this build was largely due to the drop-in T nuts (referred to in the manual as boat nuts for some reason) not behaving themselves, but that’s pretty much a standard feature with those particular fixings.
So it’s worth noting that it *is* a kit – while all the necessary tools come with it, it never hurts to have some kicking about anyway. Pliers, 5.5mm spanner if you have one (there are some M3 nuts that you need to snug up), flush cutters to tidy up the zip ties and a decent steel rule. Personally, I’d also suggest using a set of ball-end allen keys, because my fingertips are feeling pretty shredded from the sharp ends of the ones that come with the kit. Overall assembly time was around 3 hours for me, but I’ve had a lot of practice at this sort of thing, so your mileage may vary. I’d suggest spending a day on it, instead of trying to pack it all into that short a space of time.
The electronics assembly is trivially easy, thanks to everything being labelled and prewired – it really is just a case of plugging things in according to what the label says.
Initial bed levelling is pretty standard — just do the slip of paper as a feeler gauge method until it’s fairly close, then let the auto level sensor tell you where it’s diverging a bit too much. The little plastic thumbwheels are a nice addition — I’m not a fan of fiddling about with 3mm allen keys to level a print bed, so this addition is a welcome nod towards usabililty.
The build volume is *massive* – I’d strongly recommend putting it somewhere out of the way and just letting it chug away at whatever you’ve set it to print, because if you’re making full use of it, it’s gonna be a multi-day print, no questions. For reference, in the fifth photo, there’s a pair of Amstel beer cans (don’t judge me) — they’re 440ml cans, to give an idea of scale.
All in all, it’s an excellent bit of kit, especially at the price point. Having bed levelling and filament break sensors paired with touchscreen controls at this end of the price range really is a killer feature set to my mind. Because of that kind of feature inclusion, this is my second TronXY printer and I am absolutely satisfied with both of them.
It is a long assembly procedure for this printer, around 5 hours. Once assembled works straight away. Ensure everything is square when building to prevent printing errors. Included filament isn’t very good but useful for testing. The firmware preloaded (Chitu) is awful: rubbish heating control, doesn’t save bed level mesh, etc. Recommended to upgrade to a version of Marlin as soon as possible
Received printer in Flatpack format.
Assembled in around 6hrs. This gave me a good in site to how the printer works.
I initially had a few issues printing but once I realised that the bed level & nib height are critical (user error) I started printing.
This is a great starter printer and works great.
The Tronxy slicer is easy to use and works perfectly with the main printer.
Overall very happy with my choice.
Would recommend.
Note. This is not an out of the box plug & play set up.
The printer is easy to build, the manual is clear and the instructions are easy to follow, but if you are new to 3d printing and want a 3d printer that you can use straight out of the box, then this probably is not the printer for you. However, if you want to learn about how to get the best out of your printer, or if you are someone experienced with 3d printers, then this is a great large printer at a great price.
Out of the box, the firmware is easy to use and the touch screen is a good. Auto levelling is a bonus, but you will need to spend some time getting each of the calibration points to less than +/- 0.5mm. Also, the firmware does not have ‘baby stepping’ which would be useful to get the first layer precise. Thanks to the TMC drivers, the printer is very quiet. This being said, you will need to make some tweaks that the manual does not cover. Firstly, the extrusion rate will need to be calibrated (although this is recommended on all new printers anyway) and you will need to check the tension on the rollers for the x and y axis.
Out of the box, this printer is not compatible with Octoprint. If you want to control this printer via Octoprint, then the firmware will need to be replaced by Marlin. This is very easy to do, and there are a number of guides online to help with this.
Overall, with a bit of time and patience to calibrate and dial in all the settings, this printer is very very good.
I think this product is very good value for money if you consider the large bed print size.
Most reviews be-littled the Tronxy make and this printer, but as I followed the reviews and went for the best printers, that to me, were a load of rubbish, I was maybe a little concerned.
However, I had nothing to be concerned about. The instructions were clear, colourful and fully understandable; a first. It took most of the day to build, but it is a very big printer and did not want to break anything or do anything wrong. Going by the setup for my Ender 3 Pro, which took 2 and a half months, the setup on this printer, including levelling the bed, 30 minutes. Perfect prints like nothing I had seen before.
I would suggest to anyone that wants a very good spec 3D printer to look at this printer make. However, with this printer, before you buy, check the dimensions to make sure you have the space for it, it is very big.
The prints are good and have far fewer stray bits of filament to trim off than some older printers.
The user manual is basic, mainly showing menu layouts, more explanation of the what and the why is needed, as is a section on error messages. If you have used a 3D print before this is a minor problem, a beginner may struggle.
The Tronxy slicer software has a Windows 10 compatibility problem that prevents it connecting to the printer. I use the Tronxy slicer on a laptop, save to an SD card and print off that, there is other software available but I have not yet tried it.
Tronxy have a good support and after sales service, note these are two separate groups, technical problems go to support other issues to after sales, if you mix the two up they redirect the problem for you.
Why five stars? Despite the basic manual, and the Windows 10 issue it is a good printer with a good backup service, there is nothing wrong that takes more than half a star off it.
Set up was relatively clear. Did have a few teething problems and couldn’t get it to print straight away but the company has an online help service that’s friendly and knowledgeable and resolved our queries quickly.
This is my first 3D printer, I purchased the xy-2. It works straight out of the box with great results. I bought the magnetic base for it just to make it easier to remove the finished project.
It arrived a few days ago and I finally got chance to put it together today so this is ‘hot off the press’.
The printer is well packaged and in, more or less, 4 parts — assembly is reasonably straightforward however the single sheet of A4 containing the instructions could use a little more detail, also it would be useful to have labels on the sockets as well as the plugs to speed up assembly, but there are plenty of YouTube resources showing the build and a link is also included on the memory card included with the printer.
I agree with a previous review that 15 — 30 minutes is good indicator of build time, one thing that caught me out is the two grub screws holding the drive to move the print head up and down were loose, it would slip with regularly which is what I assume caused the lines on the test print (pictured). I have tightened them and now when the gantry moves up smoothly.
One thing I will be doing is ordering a ‘Magnetic Hot Bed Sticker’ as removing the test print from the plate was a right pain.
Overall very impressed!