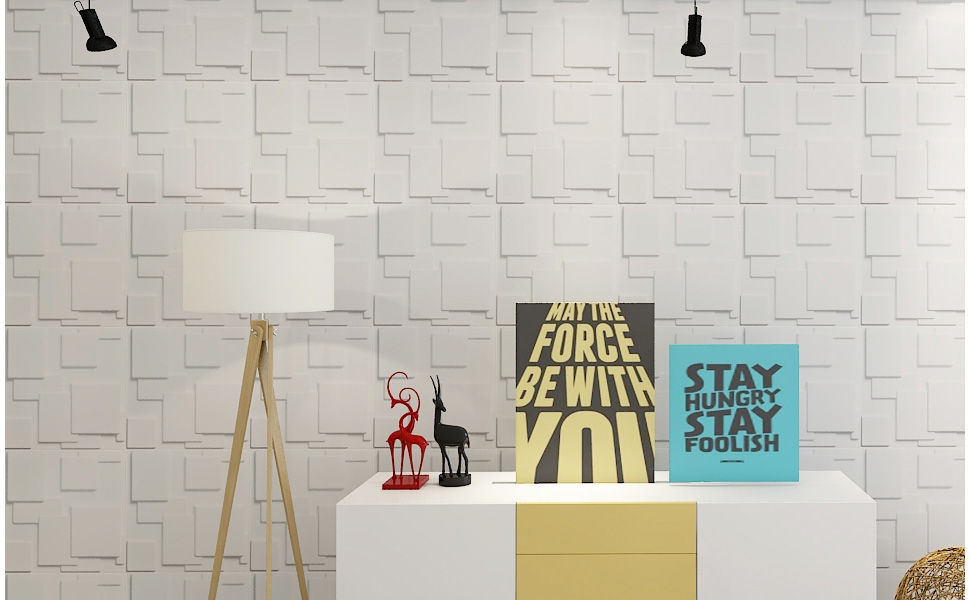
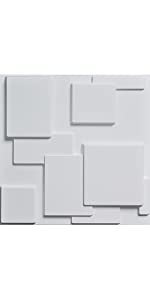
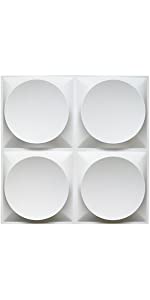
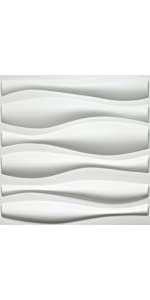
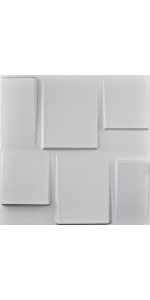
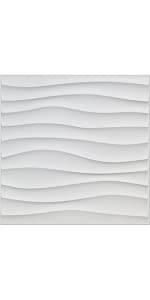
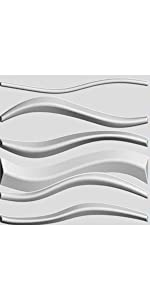
Art3d Decorative Tiles 3D Wall Panels for Modern Wall Decor, White, 12 Panels 3 Sq Meter
More designs on k4s.uk/art3d
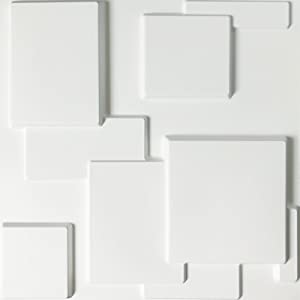
About PVC 3D Wall Panels
PVC 3d wall panel is an exciting wall material that offers a dramatic alternative to traditional flat wall panels. Combine 3d wall panels with creative lighting and the results are spectacular.
3D wall panels are ideal wall covering products that widely used in interior wall decoration.
They are great solutions to ugly, stubborn problematic wall, ceiling or any surface that needs covering. Such as living room, bedroom, kitchen room, TV background, feature walls and ceiling in house decoration; company logo wall, meeting room, lobby backdrop, reception desk front function room in office, restaurant, cafes, cinema and night clubs decoration. Other than creating a stunning visual effect for wall, 3d wall panels can also be crafted into furniture designs, such as cabinet doors, bed headboard, bedroom wardrobe and kitchen cabinet.
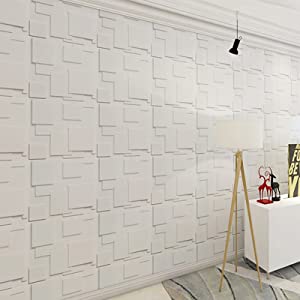
Color: Matt White
Material: PVC
- Measure the wall and plan the design
- Adhere with All-purpose adhesive glue (Tilebond made in USA recommended, or using Power Grab adhesive (very inexpensive and available at any hardware store))
- Priming
- Fill the gaps
- Painting
* For detailed installation guide please download the Installation Manual [pdf ] on Technical Specification Column.
Weight: | 340 g |
Size: | 50*50cm |
Dimensions: | 50 x 50 x 0.48 cm; 340.19 Grams |
Model: | A10033 |
Colour: | White |
Manufacture: | Art3d |
Colour: | White |
Size: | 50*50cm |
Great quality. Arrived fast and as described. Will be buying more
I used command strips for adhesion. I put it up in about 45 mins. It was super simple. Great value for money! It was super easy to install. I would buy this product again!!! Each tile is light ( 12 oz) . I have attached before and after pictures!!! Enjoy!!!
Easy to install, my husband and son installed the 3D tiles and they never do that kind of job before, was really easy. The adhesion is good and makes the studio look spectacular!
Good quality and easy to install. It’s one of my good buy. Happy custome
Excellent product. Easy to install and paintable. Better than expected
Took about 4hrs to do with mastic. I used heavy duty scissors to cut them. I get a lot of compliments and who did the work.
When I say, well I did it. They look shocked “was it wasy?” I say yes, its the 1st time I do anything like this.
Son fciles de colocar, se ven increbles, sin embargo necesitas algo verdaderamente filoso para poderlos cortar. Recomiendo pintarlos, se ven aun mejor.
Love it. My room looks more big. Very easy and good material. Recommended
These are NOT traditional “tiles” and therefore, you can pretty much toss out all you may know about tiling in that manner when working with these. That said, they are like cutting PVC pipe except they aren’t round. Difficult without the proper tools for sure. Also, you DO need an outlet extender if you will be tiling around any outlets. You can pick these up at any hardware store or on Amazon. Pretty easy to install and does not require electrical expertise of any kind as long as you TURN OFF THE POWER to that outlet FIRST. That stated, I made the stupid mistake of failing to consider my crown molding in my layout and execution until it was a bit too late. For this reason, I ended up having to sculpt a transition along the top of my wall where it meets the crown molding. I did this with a combination of stucco patch and drywall patch and a pile of trial and error. None of which I recommend. I recommend removing your crown molding, installing the tile properly and then reattaching your crown molding like it should be done (insert face palm here). Nevertheless, these tiles are everything they promise to be, including the secure packaging and shipping. I would not hesitate to purchase these again. LOVE THEM!! I’ve attached photos of my completed wall so you can see my efforts. I did choose to paint mine white and found the paintable caulking gun to be my gold friend when it came to cracks. Dries instantly and comes out very smooth with a damp rag running over it after application. The tiles are smooth so you will need a paint AND primer. In my case, I used Valspar with primer in the paint. I’m happy to answer any questions if anyone wants to get an honest answer about the product or application. I’m happy with this purchase. Thanks for reading!
Great look. Installation was quick for flat surface without sockets. Cutting took a bit of work. But looks great. I even painted mine a bi
Great! Easy to put on wants you figure out how to cut it, if you are having a hard time, you are doing it wrong, stop and try to figure out one more time! Reccomend!!!
Exactly as advertised. They were relatively easy to mount but not something you’d want to rush. Check out installation videos, follow instructions, make sure your measurements correct and mark it out before you start and you should end up with a really nice home improvement projec
These look great in my remodeled bathroom! So glad I installed these than doing tile. Easy to cut with sharp scissors. They also fit behind my toliet so I didnt have to remove it. Will do another wall behind my tv with these. Make sure to get Pvc than plant based especially if you are keeping them white. I ordered wrong ones first then had to reorder in pvc.
Great project but needed three panels to finish the job. Wish they had individual options didn’t want to spend another $75 on just three panels .
It’s very good quality. Looks very solid and as is in the picture. Can’t wait to install i
It’s a lot thinner that I thought it will be . But is a really good looking pvc panels . Easy to install.
I labored over getting these tiles; and I waited for the price to drop just so that if I jacked up the project there isnt a huge buyers regret.
I did talk to the company and felt better after my purchase. A lot of the complaints are not reletive, just make sure you have the RIGHT TOOLS to do the job. It Will ALWAYS be hard when you assume its gonna be easy, that assumption will have you up late and spending money looking for the easy route to installation.
Have the right tools and you will be fine; I will say if you get the pvc tiles either use a rotary blade or sharp shears it does get difficult when doing half cuts.
I looked at the install videos 5 times.. And even afterwards..i really didnt feel like I needed caulk for the sealing of the lines ( maybe later) I will add round corner bead at top.
Again just have the right tools , good music, food & drink & create your Sexy Space..Welcome to The luv Dlux Lounge… ( I’m a dj btw)
They are sturdy, hard to cut- specially around outlets (don’t recommend). I tried painting with regular paint- had streaks. Used spray paint- be careful with overspray, otherwise looks great. Applied with liquid nails.
Checkering them looks more natural, and they cut easily enough. Fill gouges with silicone sealant, holds well.
I really love the look it adds to this area of my home… of course I’m going to add more furniture and pictures, but everyone loves it! I’m going to finish the bottom I used 3 boxes and have some left over. I also used liquid nails and tacked it into place until it dryed. It is a bit difficult to cut but it was well worth i
I didn’t do great keeping my spray paint even but it still looks awesome… I get so many comments on it…..
These panels are very easy to install but we had to paint them white after one year because they turned yellowish.
Love these tiles. I previously purchased an eco friendly one that looked cheap so got these instead and was thrilled with the quality. Once I figured out cutting it was simple…. used a sharp pair of scissors and it was so much better than a utility knife.
Also used gorilla glue construction adhesive and it worked beautifully. Figure one bottle per box and get the gun.
Did my sons bathroom which had horribly uneven walls after removing wallpaper in our new home. Took about two hours and love the look.
We used these for a video shoot background. They were pretty easy to install, we just clued them to the flats… but we did have to use a little filler that then was sanded before we painted the panels. This eliminated the seams 100%. We were very happy with the final look. It was a great low cost option for us… gave us the look the client wanted. Very happy with this purchase and will use again.
Looks nice after installing. Expensive- especially because they’re flimsy and plastic looking
Looks great and fairly easy to install. I did find the panels difficult to cut and recommend a good pair of sharp construction shears. Also installing them on a wall with a window is a little tricky, but it can be done. Electrical outlets are a bit of a pain as well. I did the install by myself and it took me pretty much the whole day, but I am pleased with the results so it was worth the time/work.
I used double sides tapes for this project. The tapes costs me $80 for 3 panel boxes… but I really don’t want to use heavy duty adhesive. Using tape will help to easy adjust during installing or remove in future. I recommend overlap panels. It looks much better due hiding the gap between panels. Overall, it’s not really difficult to install, only very difficult to cut off a piece for electric plugs.
We are still working on our project but we love it. It takes a little work. Dont put to much glue on the edges. Smooth it down.
Made into a head board-beautiful!. Please note the product is thin(1/16″).
Great alternative to real rock. Gave a nice modern look. It’s takes some serious ability so I wouldn’t suggest average joe installing them. Great finished look and people have no idea they are made out of pvc.
We love it. Even it’s very hard to apply, but looks beautiful. We got so many compliments. These tiles are very hard to cut, but we did it. It’s consuming lot of time to apply. We even put special lights behind my TV. Looks fantastic!
This is a genius and economical way to add style to your home. And, you have an unsightly wall with imperfections, for whatever reason, a perfect solution to cover them up and transform an ugly duckling into a beautiful swan.
Very easy to install. I installed over existing wallpaper, using Power Grab adhesive (very inexpensive and available at any hardware store). Can also be cut to size using a good quality pair of large scissors. I could not be happier!
It makes a very impressive wall . A wonderful statement without being overpowering. A wonderful statement without being overpowering so very happy I bought it . I don’t think I could’ve put it up not that it’s difficult but I’m not great on file and patents but I had it installed and it was done in a day .
These are easy to cut, easy to install, and they look amazing! I only bought one box to try as a sample, but now I’ve returned to buy more and finish my project with them. I’ll update this review with more photos once the rest arrive and I finish putting them up and painting them.
The package came with no instructions or guidance, so here are a few things I learned:
* DO NOT PAINT THEM before installation. Paint them AFTER. They will curl up and be hard to install if you paint them first.
* You’ll need to glue them on. I used gorilla glue construction adhesive
* If you don’t already have one, get a cartridge gun so you’ll actually be able to use your glue (I have no DIY experience, so this was new for me).
* You’ll need to cut them to fit. An ordinary utility knife works for peeling, and industrial strength cutters work well for bigger cuts.
* As shown in the photos, the tiles are hollow, so when you cut them, if the open end is not against a wall, you’ll probably want to spackle it in, sand it down, and paint over it.
* You can do these very close to seamlessly without painting them, but for me, most of my tiles have a tiny seam between them that can be caulked over and painted to become seamless.
* Don’t expect your walls and baseboard to be perfectly perpendicular, and don’t expect your windows to be straight. Builders suck.
* Don’t expect to peel them off – they’re permanent.
UPDATE:
I wanted to tile another room in my house, so I tried another brand of wall textures that is made out of the “eco-friendly” material (see: cardboard). After getting about halfway through, I hated working with the material and decided to rip them off the walls and do it over with these tiles again. Words seriously cannot describe how much better these tiles are than others. Additionally, I bought some spray foam insulation that I’m going to attempt to fill the hollow parts of the tiles with, for more noise insulation from my rowdy neighbors. When the room is done, I’ll post updated pics of how that turns out, in case anyone else is considering doing the same.
I purchased those panels and out them as board of our bed in the master bedroom. What a makeover!
Now the room looks so modern, I love it!
The size is fit to my room
And it has a great design and made with a quality material