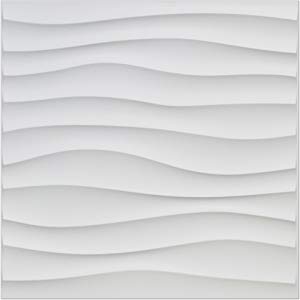
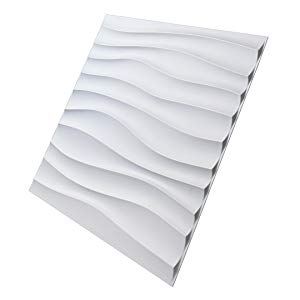
Art3d Matt White PVC 3D Wall Panels Geometric Mate Design, 50 * 50cm (12 Pack)


| Weight: | 4.64 kg |
| Size: | 19.7″ x 19.7″ (500mm*500mm),come in box of 12 panels, cover 32 square feet, Color: Matt White |
| Dimensions: | 50 x 50 x 2.54 cm; 4.64 Kilograms |
| Part: | A10043uk |
| Colour: | Matt White |
| Batteries Required: | No |
| Batteries Included: | No |
| Manufacture: | Art3d |
| Colour: | Matt White |
| Dimensions: | 50 x 50 x 2.54 cm; 4.64 Kilograms |
| Reference: | A10043uk |
| Size: | 19.7″ x 19.7″ (500mm*500mm),come in box of 12 panels, cover 32 square feet, Color: Matt White |
These cover a lot more space than the other Art3d wall panels. They look incredible for a space-ship interior-styled setup. Can’t wait to get more of them!
El platico es duro pero no pesa , es fcil de pintar y de queda bastante bien siempre y cuando lo hagas con una pistola , no trae adhesivo pero compre uno en Leroy y genial , este es el resultado , lo vi aqu a una clienta y le copie la idea aunque no esperaba que quedara tan bie
I used 3M clear heavy duty double sided tape to install. It’s hard to align perfectly but you cant tell there’s any errors from a distance. They are difficult to cut but I was able to cut using good quality scissors. Be aware of the pattern/orientation when installing.
I used a laser level to mark lines on the walls but a spirit level would do.
On the wall where the bed will go I created a section roughly in the centre with the panels, then made up some fake panelling with 8mm MDF cut into strips.
Gripfill was used to stick the panels and the MDF, using a couple of panel pins to support the bottom edges of each panel until the Gripfill had gone off a bit.
A narrow scraper was used to remove excess Gripfill which from the joints after pressing along the joints with the scraper handle.
On the opposite wall I’ll be fixing a TV so had to make cuts, which is the fiddliest job to do using the Stanley knife across the ridges.
Just lightly score the line first, then again and keep going until you penetrate the panel all the way through.
Filling the joints is again fiddly (more fiddly than the video suggests) due to how narrow the gap is between the ridges but just be patient and you’ll get there.
Finally I bought an airless sprayer to paint them, and used ‘Zinsser Allcoat Exterior Satin’ which covers in one coat and no prep needed.
Over 80 for 5 litres but well worth it; I still have almost half the tin left after painting both walls which are around 3.5m x 2.4m each, and there’s a very large range of colours you can have mixed.
Happy with the purchase looks amazing. Whoever has come around has been impressed with the 3D panels.
I used a strong grip glue to stick the panels to the wall and are easy to install.
Only thing is if you have to cut the panels it’s not so easy I ended up using a grinder.
Love it on wall this is easy to do if not having to cut any. It’s quite difficult to cut and had to use a cutting blade grinder for clean edges.
Otherwise looks amazing and had a lot of compliments
Ich hatte bedenken, dass ich das alleine hinbekomme, und wenn ich hier und da noch ein bisschen nachbessern knnte, ich bin mehr als zufrieden, absolute Kaufempfehlung, auch weil super schneller Versand als Prime Kunde.
The downside is i found them a little hard to cut in newt lines with a super sharp stanley knife as recommended but overall the effects are great!