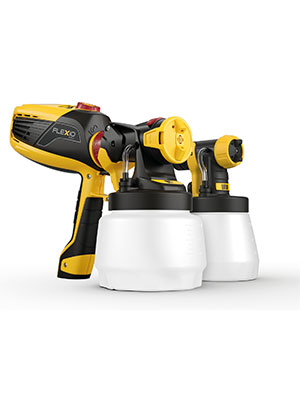
Wagner Universal Sprayer W 590 FLEXiO – Electric Paint Sprayer for Wall & Ceiling/Wood & Metal paint – interior and exterior usage, covers 15 m² in 6 min, 1300 ml/800 ml capacity, 630 W


WAGNER W 590 FLEXiO
Effortless paint application on walls and ceilings.

FLEXiO Technology:
Uniform coverage with all conventional materials in a single coat.
WAGNER W 590 FLEXiO
The Compact Hand-Held Spray Unit for Interior and Exterior Use
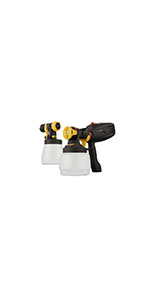
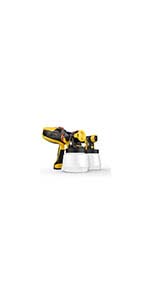
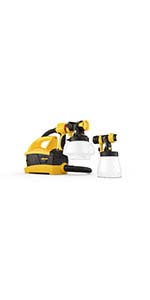
If you are planning a slightly larger project and want to spray both internal walls and other surfaces, you need the W 590 spray system: Thanks to its two spray attachments for low and high-viscosity materials, you are ideally equipped to apply wall, wood, metal paints and varnish. The powerful X-Boost turbine, used in combination with the innovative I-Spray nozzle, sprays almost all conventional materials undiluted.
- For emulsion and latex paints for indoor use
- For water-soluble and solvent-containing varnishes, glazes, wood preservatives, oils and so much more.
- Separable gun for fast spray attachment changes and simple cleaning
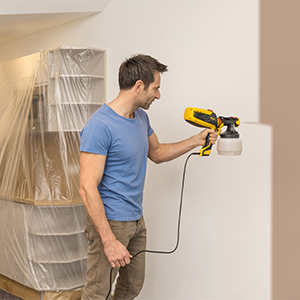
Walls
With the W 590 paint sprayer, walls and corners requiring renovation are a thing of the past. Fresh wall paint can be applied quickly and easily, leaving you time to relax. There is no need for any time-consuming cutting in of corners and edges with a brush you can just spray them.

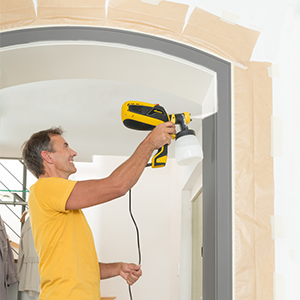
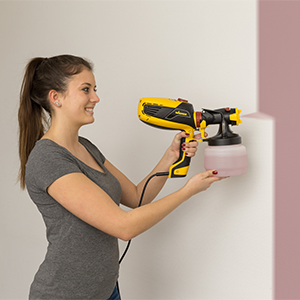
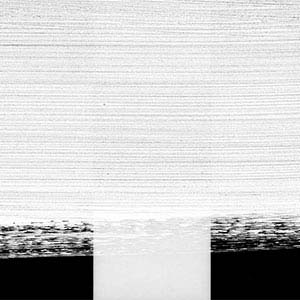
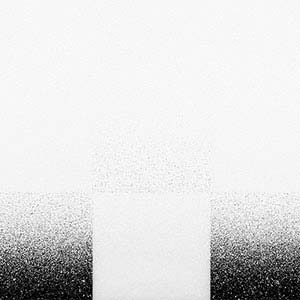
Comparison of Paint Applications with Brush, Roller and Spray Unit
| | | |
|---|---|---|
Applying Paint Using a Brush– Uneven paint application – Brush strokes visible on the surface – Surface characteristics are lost | Applying Paint with a Roller– Uneven paint application – Roller marks visible on the surface – Surface characteristics are lost | Applying Paint Using a Spray Unit– Even application of paint – Perfect coverage – Excellent surface quality |
| Weight: | 3.1 kg |
| Dimensions: | 28.5 x 15.5 x 39 cm; 3.1 Kilograms |
| Model: | W590 |
| Colour: | Yellow/ Black |
| Manufacture: | Wagner |
| Colour: | Yellow/ Black |

Honestly a game changer for full garden fence re sprays, took about 20-30 to nail down the right settings and to test a couple of patches. Next job is the spare room!
This so far does what it says I’ve just started our hall and stairs once you get your head round the setting it’s brilliant so far done ceiling and part of the stairs bought the extension rod makes it a bit heavy at arm length but ok in short runs until you get use to it overall brilliant does what it says just make sure you mask up well the bits not to paint as there is a little bit more over spray than I thought there would be worth the cost makes painting much easie
This so far does what it says I’ve just started our hall and stairs once you get your head round the setting it’s brilliant so far done ceiling and part of the stairs bought the extension rod makes it a bit heavy at arm length but ok in short runs until you get use to it overall brilliant does what it says just make sure you mask up well the bits not to paint as there is a little bit more over spray than I thought there would be worth the cost makes painting much easie
Gives a professional finish. I have done the whole house .
Used for painting fence panels. really good piece of kit and pretty quick to cover 14 panels. Easy to clean.
Only thing I would improve is the length of the lead. If it was slightly longer it would not pull when using with an extension lead.
Highly recommend the sprayer.
Zuerst einmal das positive. Die Ergebnisse des Gertes sind unzweifelhaft sehr gut.
Mein Problem war das Gewicht des Gertes.
Da ich leider nur Pommesdnne rmchen habe, fiel es nach einiger Zeit schwer, die Pistole so zu halten, wie es sein Muss.
Das Befllen klappt prima, die Verdnnung ist kein Problem mit dem Mastab der beiliegt. Wichtig ist es aber auch, die Dse sauber zu halten. Extrem wichtig sogar.
Dafr ist der o.g. Mastab zwar auch vorgesehen, allerdings wre es hier besser, ein separates Tool aus Metall zu haben, denn die Spitze zur Reinigung der Dse gibt zu schnell auf und ist dann unntz.
Der Sprhstrahl ist kontinuierlich und gleichmig. Es gibt tolle Ergebnisse.
Wer ein bisschen Gefhl fr die Arbeit entwickelt muss gar nicht gro abkleben.
Jedenfalls nicht mehr, als bei der Rolle.
Eben weil man sehr przise sprhen kann, wenn man ein wenig Geduld hat.
ben Sie an einer Wand wo spter ein Schrank steht und Sie werden den Rest locker erledigen.
Ja, die Reinigung… Uiuiui, da arbeitet man mit Farbe und da kommt es vor, da es farbig zugeht. Warmes Wasser, eine nagelbrste und in 20 Minuten ist das Ding sauber. Da Sie 4 Rume in 2 statt 5 Stunden fertig haben, ist das zu vertreten.
Nur Muckis sollte man haben. Mit 1,5 kg Farbe vorne und 2 kg Maschine hinten kann es nach einiger Zeit eben schwer werden. Ansonsten tut die Maschine was die Videos im Internet versprechen. ben Sie und sie werden die Ergebnisse bekommen, die Sie gerne wollen!
Kaufempfehlung, Anleitung lesen, ben und gerade am Anfang etwas Geduld
I brought this to spray a large shed, it was easy to use and a great labour saving device. Covers large areas in no time. It is a bit fiddly and time consuming to clean so I’ll only be using it for larger jobs. The power lead is too short, I had plugged the sprayer into an extension cable and then into an extension real. You’ll need to do this to enable you to spray large areas.
Hi I am a decorator and I hate the name paint sprayers because of the mess etc!!but this sprayer is super clean and easy to clean..what would of took me 4 days I actually done the whole job in one day..I actually saved money on paint and labour..I did make one mistake I didn’t water the paint down enough that’s my mistake but after that was fantastic very happy it’s a must have
Fantastic sprayer!! Be nice to have the correct plug,twice sent two pin plug….i want a three pi
Easy to use but took time to get the right flow and the cable is a little bit too short as it has to be attached to an extension cable money value okay and it was very easy to clean as it all comes apa
Bought to paint newly plastered rooms and repaint existing areas.
Took a short while to gauge correct air/product flow but once I had the result was excellent.
Very smooth and evenly spread coverage.
Managed to apply a mist coat on bare plaster which doesn’t require a 2nd coat.
There’s a fair bit of excess spray which needs more effort to properly prep and tape off.
Agree with several other comments here that power cable should be a fair bit longer.
Spray painted our garage door in 30 minutes with a result Picaso would be proud of. Easy to clean and with more practice I will embark on more projects.
I recommend that you filter your paint when pouring into container and use a toothbrush to help keep the machine clean after each use
Invested in this to spray a newly built extension with fresh plaster. It was well worth the time to prepare the area. it was so quick to apply and yes does take a bit of practice. But it was well worth it for what was quite a daunting job with a roller!!
Pro.
Instructions are easy to follow and the equipment is easy to use
You can different sprayers for different jobs – sprayers not expensive –
Cleaning is very easy – with water-based paint – this isi critical to ensure good paint finishes
Compressor is separate from Sprayer making it lighter and more flexible to use
CON’s:
Contrary what Wagner says you will have to dilute the latex paint to get good atomisation 10 – 15% at min
IF you new to using sprayers definitely practice using the sprayer – use a sheet of cardboard or brown paper
Use good quality paint that self levels – let it it do the work for you
I sprayed all my cupboard doors flat which allows for paint leveling
If you are not cautious you can end with huge runs in your paint
Nozzle junks up quickly especially in hot weather (20+C) as such if you do not wipe nozzle often it will screw up your finish with blushing and orange peel
Because this is not a professional sprayer your jobs can be hit and miss
I found huge amount of over spray dust as such make sure you protect other surfaces
Overall for the money -I got a good finish on my cabinets. paint fences and shed will be a doddle with this ki
Pleasently surprised! Made quick work of the garage with its breeze block walls. Heavy mind, especially when full of paint, good shoulder workout when painting higher up on the wall.
After some internal renovations I was left with a number of walls/rooms with new plaster which needed mist coats. As I was doing ceilings white and mist/second coats white the sprayer was perfect for getting this done in significantly less time and mess than a roller. You need to make sure you mask everything you don’t want painted and that takes time to do properly. But worth it. I wouldn’t use for a final coat as I am probably not skilled enough and prefer to cut in and use roller. But the finished coat and ease of painting all the ceilings was great. Downside for this version was that when container full of paint it was heavy when held at arms length so ceiling work made shoulder ache. I bought an extension but used once as again weight at end makes difficult to extend arm. I have seen other sprayers that are lighter and your reservoir of paint is on ground and better if doing a lot. Cleaning was ok too and if you make sure to run warm water out it cleans through well. My mist coat was 50/50 mix with water and at first my second coat was too watery and it ran down walls as plaster no longer as porous. But once a bit thicker it went on well and you can go up and saidways and like getting two coats on. I would recommend depending on the paint job you are doing.
Usedon my decking today
Normally a 6 hour job done in 90 minutes .Next year I’ll be down to 1 hour after practice
What don’t I like?
The container for the handheld sprayer is too small for painting fences.
The motor broke on the first machine, but very quickly replaced by amazon.
Good.
Easy to use, good coating. Easy to clean.
Great customer support. Versatile.
Would definitely recommend.
I used the W690 FLEXiO today and am blown away by the results, 12 fence panels both sides and a shed in less an hour. Seemed to take longer filling the paint pot than painting, its so fast.
The results and finish are flawless, covered an old fence and shed that had not been painted for some years in one coat and both look like new. ( used Ronseal one coat )
Two small annoyance’s for me at least was the mains cable is way to short, easy enough to use an extension but its just something else to get tied up in! And if you aren’t particularly fussy the next point wont bother you, but if you are like me and like to keep stuff as new then it is disappointing difficult to clean after use and keep as new.
Easy enough to clean after a job just not easy enough to clean so it looks like its not been used.
Probably just a me thing!
Useful tip, get an old plastic jug to decant the paint into the spray pot or you’ll start to get in a mess pretty quickly.
Anyhoo I highly recommend this, I’ve used cheaper lesser spray painters and as the saying goes “you get what you pay for”.
Hi everyone Wagner spray gun Im use for long time easy quick more recommend roller and burse Ok spray gun need for cover and Masking tape but corner need to cutting burse so it easy Quicke
It’s again and again manually filling the paint it’s better to buy the bigger electrical with self filling pai
Long ugly masonry wall quickly sprayed. Economical with water based paint and components easily cleaned using a lot of warm water well
A good product. On the widest setting I was expecting a bigger surface area but overall very happy with the product. Gives a decent finish with 2/3 coats. Very easy to use but some dry paint powder is pushed out through the fan so just watch out for that. Two coats on a double room took around 1.25 hours.
Invaluable piece of kit! Very impressed as managed to paint a whole 3 bedroom house in 6 hours!
Exactly job and I would highly recommend it to anyone, easy to use and to clean.
Excellent bit of kit, it saved so much time when painting my fence, I used the spray ale paint so no need to water down.
I wasn’t too sure about buying it at first as it’s not an airless model however I was very pleased with the outcome.
Cleaning the gun is pretty simple due to the nozzle and pot detaching from the rest of the gun. Just soak the nozzle and pot In warm soapy water and that’s pretty much it. No standing over a sink trying to get every last bit of paint off a brush, roller or paint tray
The downsides that I experienced were:
The cardboard funnels they supply didn’t fit into the smaller pot so had to fold it further to use but even then due to the size of the paint pot the paint spilt everywhere. My solution was to get a cheap measuring jug and just transfer from one to the other result no mess at all.
The amount of times you need to refill as one pot covers two maybe three fence panels but considering the time i saved in using this I was happy to put up with that.
Next job is to try it out indoors and if the results are as good then I don’t think I’ll ever look back.
Haven’t yet used, but I know I’m going to love it. Makes light work of fence panel painting
Excellent bit of kit, it saved so much time when painting my fence, I used the spray ale paint so no need to water down.
I wasn’t too sure about buying it at first as it’s not an airless model however I was very pleased with the outcome.
Cleaning the gun is pretty simple due to the nozzle and pot detaching from the rest of the gun. Just soak the nozzle and pot In warm soapy water and that’s pretty much it. No standing over a sink trying to get every last bit of paint off a brush, roller or paint tray
The downsides that I experienced were:
The cardboard funnels they supply didn’t fit into the smaller pot so had to fold it further to use but even then due to the size of the paint pot the paint spilt everywhere. My solution was to get a cheap measuring jug and just transfer from one to the other result no mess at all.
The amount of times you need to refill as one pot covers two maybe three fence panels but considering the time i saved in using this I was happy to put up with that.
Next job is to try it out indoors and if the results are as good then I don’t think I’ll ever look back.
Just got it. Feels sturdy. Came in a Storage box which is fantastic. Haven’t used it yet. Wire on that thing is bit short in my opinion specially if you’re painting higher walls, will be carrying the extension lead along. I will be updating my review after using the sprayer later.
Dry useful and easy to use. You need to prep windows and areas first as you can easily over spray. Few gripes relating to length of power lead is too short and easily lose bits down the sink when cleaning.
So easy to use and with a small bottle brush easy to completely clean. Used to spray very rough rough casting
It takes some getting used too. I first used it for a mist coat, but because the paint was so thin it was a bit messy. With normal paint it’s fairly clean. I used it up and down then left and right over the same spot and moved on. Large ceiling done in 15 mins. I got the extension but it was pointless. Just used a ladder.
I’ll be using the sprayer to do the whole house.
I have used this to paint the inside of a new build using high quality emulsion paint and some areas masonry paint.
The instruction infer that emulsion should be diluted 10%, however I found that to get an even spray without ‘spits’ it really needs to be diluted 50/50. Thicker paint can cause clogging of the nozzle.
Masonry paint can be applied quite thick, and using the narrow spray pattern it is less susceptible to spitting.
The emulsion gun instructions say it should be cleaned by running water through it instead of paint. To be honest, it really needs to be taken apart and cleaned properly. The nozzle is not intended to be removed, but it comes off easily once you understand that the yellow clips need to be eased passed the front flange.
I clean the whole spray attachment in the kitchen sink in bits and it makes life much easier without semi-dried paint collecting inside the nozzle.
Once you get the hand of it you can make a lovely uniform finish on the walls and ceiling. Maybe it takes an extra coat since it requires thinning.
Simply the best tool I ever bought, for some one that never painted before, no time to waste and demand quality; this is the one.
I have used this to paint the inside of a new build using high quality emulsion paint and some areas masonry paint.
The instruction infer that emulsion should be diluted 10%, however I found that to get an even spray without ‘spits’ it really needs to be diluted 50/50. Thicker paint can cause clogging of the nozzle.
Masonry paint can be applied quite thick, and using the narrow spray pattern it is less susceptible to spitting.
The emulsion gun instructions say it should be cleaned by running water through it instead of paint. To be honest, it really needs to be taken apart and cleaned properly. The nozzle is not intended to be removed, but it comes off easily once you understand that the yellow clips need to be eased passed the front flange.
I clean the whole spray attachment in the kitchen sink in bits and it makes life much easier without semi-dried paint collecting inside the nozzle.
Once you get the hand of it you can make a lovely uniform finish on the walls and ceiling. Maybe it takes an extra coat since it requires thinning.
I didn’t want to mess around with diluting my satin paint and having to double the coats to compensate, and this spray did exactly what it said on the tin.
The instruction manual is rubbish, the video I found was OK, but only half the story. But its pretty simple.
-Fill the pot with paint, straight out of the tin (thick satin)
-Twist/Click the nozzle & tank on to the gun
-crank it up to max
-Point and shoot.
You can see the wind generated in the video is significant enough to require a sweep up of any dust before hand. The application is almost as smooth as a fine roller and consistent. I didn’t expect this to be as good and as easy to use as it was.
Cleaning was a faff the 1st time. Filling the tank with water and spraying it wasn’t amazingly effective. But the nozzle disconnects and disassembles nicely for detailed cleaning as shown in the photo.
Other peoples reviews – Never have I been so conflicted in whether to buy a product or not; a read through the reviews and you’ll see conflicting positive and negative reviews from both DIYers and Pro’s alike – I would however point out now that this product is not designed or intended for use in the professional trade, it just wouldn’t stand up to such sustained use or the typical wear and tear tools are subjected to within a site environment. For DIYers who are likley to use it for shorter periods, and for occassional small projects, I think it is absolutely fantastic (I’m thinking decorating a house, extension, loft conversion, furniture, shed, fences and so forth). My justification for buying this machine was that for 200, if it only lives as long as it takes me to complete the projects I want it for, and it provides a superior finish to traditional methods, and it saves me a load of time in decorating (I actually hate decorating!), than it’s money well spent. I also don’t usually write reviews, but I felt strongly that the this unit, for the price, had been misrepresented and that based on the many conflicting reviews I had seen, others will have struggled to make the most informed decison, and hence I felt motivated to write this (lenthy) review.
My projects – Initially I bought this product for 3 specific uses; first off, I am refurbishing a baby changing and drawer unit and wanted more of a professional spray finish than the hand-painted look, but also I wanted to use a more specialist water-based non-VOC paint (from Little Knights) and invariably such water-based paints are otherwise tricky to acheve flat finishes with via traditional methods, and also spray cans and oil based paints werent an option for me. I also wanted to spray our converted garage room, and next year I intend to spray an extension and loft conversion we are planning build.
Set-up – There’s not a lot of options to setting up and its all quite intuituve; however, I will stress the importance of following the instructions step-by-step and I suspect those who have said the machine failed early, paint pouring out everywhere, may not have followed the instructions and set it up incorrectly. I can’t stress enough how important this is.
Preparation – The machine is an air compessor, it effectively blows air out at quite a rate continuously and then trigger controls the flow of paint. For the reason that it continously blows out paint, you are going to want to make every best effort to remove any dust from the envionment and this can be tricky, but otherwise, there will be the tendancy for the air to kick up any dust built up in corners or rooms, or from below skirtings etc. With either attachements, there is an incredible amount of paint mist created and so you are going to want to be exceptionally careful if you are spraying in furnished rooms or around windows and doors etc – lots of plastic covers and masking tape required – Good and thorough preparation is absolutely key here.
Bottle fed gun – So first up is the baby changing unit with the hand held bottle gun; having thoroughly prepped the unit and set up for spraying I went straight for it with no practice run – I have to say that it was not at all that bad for a first attempt. With the set-up of the bottle, you have to mindful as to which way you angle the straw feeder, because if you are spraying mostly upwards for example, and you start to run low on paint, the paint will naturally build-up towards the rear and this is where you’ll get a bit of splatter occurring. After a light key and second coat, finished with a light rub down with wet & dry to flatten off the finish, I was really pleased with the results I’d achieved. I did however put a third coat over it just because I was being fussy, and there were a few areas wihtin the drawers where it had blown dust out of the crevices that slight tarnished my finish (but this is my own fault having not preppred thoroughly enough!). All in all, each coat took about about 5mins to apply (rapid!) and I used approx 1.5litres for 3 coats of Little Knights water based paint liberally applied. I would also just say, that for a water based paint, it provided a really nice flat finish but slightly rough finish which was simply improved and flattened off with a wet and dry sandpaper finish – To manage expectations; with the gun and a water-based paint, you will get a better finish than with rollers & brushes, but you would be hard pressed to achieve that absolutely perfect factory-type finish.
Next up is the spraying of the conveted garage with the lance – directly fed into a well mixed tin of dulux emulsion, only very slightly diluted, and I absolutely flew around the room within 30mins and the finish is great. What I will say is that in this room, there is no final floor finish, one small window, and only one door and so prep for me was minimial and I didnt need to be too worried about the mess from the overspray. If however you are spraying within a furnished room, with lots of light fittings, windows and other tricky features, you’ll need to spend the majority of your time prepping over painting.
Cleaning up – This is equally as important as prep, many have commented that the unit worked fine on first use but on further use they have had issues with splatter spoiling their finish and again, I fear they may not have been following the instructions on clean-up and that dried paint in the machine will likley have caused this issue – Follow the instructions, clean up every component after use, use the clean setting of the lance, flush through a lot of clean water several times only and not only is it still quicker than cleaning up trays, brushes and rollers, but you’ll be good to go when you set it up the next time around.
Build-Quality – I cannot believe some have commented that it feel’s cheap and plastic, take a look at comparable professional equipment, take a look at the cost of air compressors and spray guns, and I think you’ll find that for 200 you are actually getting a lot of equipment for you money here. So what it’s made of plastic, just be careful with it. Again, I doubt very much it would stand up to being used on a daily basis for pro-use, carted from site to site, and being packed in and out of a van, its just not designed for that sort of use – it’s 200, you get more than what you pay for.
Summary – Excellent value and all round excellent piece of kit. I think it would be onerous to buy it to redecorate a fully furnished house due to the amount of paint mist it creates, but for clean and clear rooms which are not liable to being trafficked, new extensions, fences, and small items of furniture, I think it is an absolutely superb piece of kit and well worth the money – I almost enjoyed decorating again…almost.
Best of luck, read the instructions, prep well, clean it well and you’ll be golden!
It took some time to get familiar with this paint sprayer and how to get the best out of it. Plenty of supporting videos on YouTube which helped.
Once you get used to the sprayer it does a professional job.
One thing they don’t really make clear is that you must cover everything in the room that isn’t getting sprayed and that can take a considerable amount of time.
Wagner need to increase the length of the paint sprayer electrical supply cable as it isn’t long enough to allow you to reach the top of a standard height wall and you have to position the cable extension on a platform/plank to counter this.
make painting easy… I recommend for anyone… I’m not professional painter but with this machine I did paint like pro 🙂
There is nothing to not like…
You know it’s quality as you open the package and the documentation is really clear and easy to follow (and I am not great at following instructions, usually)
The trigger mechanism takes a little bit of getting used to, but other than that it’s a great product.
Purchased this item in April, having already bought a larger wagner airless sprayer for spraying the rear of my house.
I bought this based on several reviews left here and elsewhere.
The item comes in a well-designed carry case plus good simple instructions.
My first project was to apply smooth masonry paint on a shell rendered wall at the front of the house. This involved traversing several scaffolds, had windows to contend with plus ornate brickwork to cut in.
I diluted the paint to around 10 – 15% and stirred well. I made a stirring implement that would fit into the the paint pot that I could use on my drill to ensure a good mix.
The 590 lets you vary both the paint volume and spray air pressure, so for doing the cutting in around windows or brickwork, I could achieve a lot of control. On the larger area’s, being able to rotate the nozzle through 90 degrees was an excellent feature, especially when limited by scaffold position.
I found that cleaning the spray nozzle between pots kept the application even – takes 2 mins to rinse the nozzle so no hassle to do.
Applied 2 good coats to the house and achieved an excellent finish.
Have just used for an emulsion coat in the hall/stairs. Adjusted the air and paint volume to suit and very pleased with the results.
Cleaning takes around 10 minutes and I found best to do under a running water tap. I purchased some narrow pipe cleaners for the paint delivery tube, but the sprayer can be cleaned using a soft brush. To clean the sprayer will take no longer than cleaning brushes or a roller and is less wasteful of paint residue.
The only thing to be mindful of is that the sprayer is heavy when fully loaded with paint and on a job which requires reach, this can be tiring.
I would also recommend the excellent Wagner video’s on the website for guidance.
Very pleased with this sprayer. Build quality is very good. Would recommend this with out hesitation.
I am a reluctant DIY kinda guy most at home indoors at a keyboard rather than doing out-doors macho stuff. It is however a heck of a lot cheaper me painting fence panels than paying some other dogs body to do it. It should also save me money in the long term by extending the life of 70 expensive panels that will one day crumble away and need replacing.
Painting panels looks a doddle but is time consuming and it is wearing on the body when painting above waist height. I bought the ‘Wagner Universal Sprayer W 690 FLEXiO’ with no prior experience of paint spraying to save time and reduce the physical fatigue of doing it. I was a little reluctant to get a sprayer as it filled my mind with embarrassing images of me covered from head toe in paint.
Think Laurel and Hardy in ‘Dirty Work’ ( type it in to google and you’ll get the idea ).
I carefully experimented beforehand with water and then fence paint discretely away from my neighbors twitching net curtains.
The ‘Wagner Universal Sprayer W 690 FLEXiO’ has attachments for indoors and outdoors.
On reflection it’s unlikely I will use it indoors but I like to get the most bang for my buck so the flexibility of both indoor and outdoor spraying appealed to me.
After reading the instructions and assembling I was ready to go — sort of.
If you are painting with a brush or a sprayer you need to prepare the area first.
It seems as if you can never have enough cardboard to protect the ground. I have collected a heap of big boxes in preparation and flattened them to protect the pavement and white fence supports at the foot of the fence panels. I also used masking tape to protect the white fence posts and I filled in the gaps with a combination of old rags and bin liners ripped open to cover everything else. In fact it takes quite a while to set all this up but this is necessary regardless of whether you are spraying or brushing. I now tend to set up the masking tape in advance before ‘spray day’. The tape you can prepare any day it’s not raining but on ‘spray day’ you need it not only to be dry but also without any wind.
The smiling slim early 30′ brunettes in jeans and a shirt that appear in the marketing pictures for this produce I am pretty confident never actually did any painting. You need to be kitted up. With proper brand spanking new out of the cellophane painting overalls on, an old pair of glasses, the provided face mask and a cap to protect my saloon shy hair it was time to blast away.
When switched it on it sounds a bit like a modest hoover. Spraying about 20cm away and moving very slowly gets the best results. My first instinct was to wave my arm back and forth like a paint brush but that just increases fatigue. Better to remain static on target until an area is done and move slowly to the next bit. I didn’t get much spray blowback. It goes where you point it. The nozzle can be adjusted for side to side or up and down painting. I did find it quicker and less taxing than using a brush.
However I would recommend a few things to get the most out of it.
1) It takes a while to clean the thing afterwards so it’s better to do lots of panels in one session.
If you are just doing one a day you probably are not saving much time when the cleaning of the equipment is added to the job. Doing 4 or more panels at a time and you are going to be in time credit.
2) Make sure you have a BIG funnel. Pouring a bucket sized tub of Ronseal ‘Dark Oak’ Fence Paint into a small container does get very messy. I bought an ‘Extra Large 200mm Orange Funnel’ from Amazon and it does the job well.
3) Buy an additional 1400ml container add-on attachment. It’s annoying to be in the flow of painting and then have to stop to carefully fill the paint container again — even with a big funnel. On my spray days I fill up the 800Ml standard container that comes with the unit and two 1400ml containers I bought separately before I start spraying. When I get going I can then do a fast reload by replacing the empty container with the ready to go and already full containers. Search for ‘Wagner 417921 Container with Cover, 1400 ml Paint sprayers’ on Amazon and you will find the one I bought.
4) Wear a hat.
5) Watch the weather forecast and plan the preparation day and the spray day.
6) Consider the neighbors. Where there are windows, washing lines, patio furniture or sunbathers on the other side of the fence; play safe and use a brush. At least do not spray the top part of the fence so there is no chance of spraying something that could get you a mouthful of abuse and a knuckle sandwich.
7) Wear ear protectors. I did 12 panels in one go and my ears were ringing afterwards.
With all that in mind it seems to the job quite well.
It’s not cheap but it seems sturdy and it is effective.
I’m happy with it and now I can get through a load of panels in less time without feeling the aches and pains of a wrestling match after just one panel.
Gives as good a result as a traditional compressed air spraye
So I decided that I would rather spend a lot less and invest in this Spray Gun system, and really glad I did.
I followed the instructions on youtube, made sure the paint was mixed to the right consistency and made sure I did a test run on another wall to get a feeling of the spray pattern and speed of movement.
The bathroom took 45 minutes to prep to make sure to protect against overspray, then it took about another 45 minutes to spray three walls and the ceiling. Less than 2 hours from start to first coat for the whole room.
No Spills, no drips and the builders loved the finish so much they are buying one as well.
Super easy to clean, no brushes or trays.
Hope to never to use brushes on walls ever again.
have used for sprayi g the fence only at the moment. I was impressed, lovely finish. Just ensure nlt to mos place the tiny valves…..
Used it to paint a 16m2 rough stone wall in my garden using external wall paint. It worked great. Once i found my ideal setting (spray power and width) i finished the whole wall in around 15 minutes. The sprayer was perfect for the uneven surface. So much more effective and efficient than with a brush and roller. I definitely recommend this product.
I love it, omg so fast, and I hate painting, (waste of my time) I can think of better things to do, but this is so quick, I painted my mother in laws bungalow in a day, it had taken two men over a week to do a neighbour’s same size property, saving me time and my mother in laws cash.
This gun is great for small DIY projects. You can still paint a small house but bear in mind the fan and paint are both located on the gun so it makes the whole device a bit heavy. There are other options with a compressor on the floor from same and other companies if you plan on doing big projects. It works beautifully, havent had any problems with the “self destruction” videos seen online and the cleaning, takes some time (5 mins?) but again, nowhere as difficult as they put it online. The product is good and would recommended to anyone.
The only reason I give it 4 stars overall is because of the weight of it.. It is heavy especially if you are spraying over shoulder height! No need to go to the gym to work on shoulders! Very pleased with it! Spreads well and you can adjust really well
Its easy to use, not as messy as i originally thought, used it on my fence panels and so much quicker and easier than a paintbrush, going to use it indoors in the next few weeks
This is a great product after cleaning a fence panel down it takes only 2-3 mins to paint. It’s so quick that my wife has decided she doesn’t like the colour and wants it changed. And I don’t mind. Only drawback is the motor and spray are all one unit and can get a bit heavy after a while.
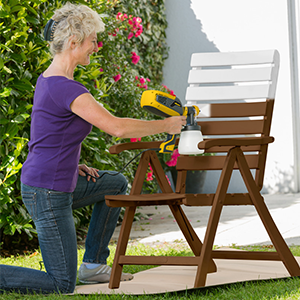
I am a hobbyist painter. I get asked to paint alot of chairs so spray is ideal for this.
I’ve been taking extra time to really clean up the sprayer after each use, a few small bits so make sure you have a pot. Jobs are done in a fraction of the time (including the cleaning of the sprayer) so want to make sure it lasts.
I personally brought a bigger pot for the fence sprayer (1400ml) as I was refilling a lot, but that’s personal choice not essential.
Absolutely fabtastic painted 20 fence panels today and was a breeze. needed rwo good coats as new fence. at the beginning one needs ro get used to the sprayer. i found that the veryical spray woeks better and was easier on panels. this gun was light easy to handle and once i got my groove and the right distancei was gone. i wish the wood paint tank was bigger and a bit of a faff to regularly refill. i actually compared it with uaing a brush on new panels. to be honnest it does not use much more paint but saves tons of time. a great purchase!
This sprayer is really good a little but heavy when loaded with a full pot of paint but once you get the hang of it is very good I’ve sprayed wardrobe doors chests of drawers and a french bed came out excelle
Product is of German quality, I was very impressed by its engineering.
However, if you are new to spraying, i have the following suggestions:
– be patient: it will take a few attempts before mastering how to use the sprayer properly (right distance, width of spray, etc.). I recommend trying several times on a cardboard before moving to the wall.
– keep a small roll at hand, in the beginning if you over-spray, you will see areas with drops of paint, just roll them over
– spray particles will go everywhere, therefore: 1) wear protective masks at all time (ironically, in these Covid times when a proper mask is difficult to purchase, one FFP2 mask is included with the sprayer); 2) protect windows and doors with plastic sheets (make sure they are taped properly, the sprayer releases strong air which may move the plastic sheets). Same for the floor, protect it from spray particles and dust.
– Paint needs to be water-based, and you will need to refill quite a few times, depending on the area you need to spray. We used Dulux “white matt” from Homebase: every time I refilled I was adding a 10% water and gave a good stir.
– Cleaning takes some time, do it in the garden drain or in your utility room sink if possible, just use water; components can be removed and repositioned easily.
– Finally make sure you carefully read the clear instructions and leaflet; also I suggest to watch videos on Wagner Youtube channel.
Good luck and regards
its good to increase the speed of painting projects but I did have to use a roller for finishing touches
Now this product is fun to use. Managed to paint the outside of my house in one day. Would hate to think how long it would take using a a conventional brush.
Can’t recommend this product enough.
Definitely an essential item for all painting requirements.
1.Happy with product
2.Product as described
3.Good price
4.Quick post
5.So, for me 5 stars…
Coverage is great, super fast, definitely some overspray but probably reduces with use and improved technique… although, avoid using on a very windy day because it does blow atomized particles around all, the gun was covered afterwards for me but cleaned up reasonably well with a cloth and some soap.
Coverage is great, super fast, definitely some overspray but probably reduces with use and improved technique… although, avoid using on a very windy day because it does blow atomized particles around all, the gun was covered afterwards for me but cleaned up reasonably well with a cloth and some soap.
This spray gun worked very well for me, arrived the next day. Unboxed the spray gun followed the instructions and adjusted the gun to adapt to what I was using it for. Worked perfectly would highly recommend this for Item!
Excellent product, great coverage if you have a lot of say walls to cover, of fences
I have used Wagner Universal Sprayer W 590 FLEXiO – Electric Paint Sprayer for painting out garden fences. Did a great job.
the spray power and spray direction options are great. the cable is short but i assume you have to use an extention cable.
The only glitch i had was the pulling gun mechanism, it did de positioned itself few times. Manifacturers can look in to improvements. otherthan that great product and great value for money. i would recomend this product.
Really really good. My only gripe is a short ish power cable, only reason for a missing star. Other than that it’s a great tool.
I have quite a lot of high wooden fencing around my back garden and I like to paint it every year, but it takes a long time and a lot of effort. I thought I would try a sprayer, saw the Wagner being endorsed on TikTok by Craig. It arrived in a really well made case with all items well packed. The sprayer worked really well when using Ronseal fence treatment which is quite thick and “gloopy”, I diluted it by 10% to start with but then tried it undiluted and it worked just as well. Only needed to use level 3 or 4 air pressure out of 10. I also found it best to use a light trigger setting rather than full blast, this stops overspray and gives much better control. The instructions suggest setting the nozzle to either vertical or horizontal but me being me decided to try 45degree half way between the two and it seemed to work better then the other options. Basically, back off the pressure, spray less product which will go onto the fence more accurately rather than have it blasting back off the surface and into the air.
Every 2mtrs I stopped to quickly run a 4″ paint brush over the painted area to even out any runs.
Two issues:
1 – The cable could be longer as it has to be plugged into an extension lead which keeps on getting caught up around your feet, if the lead was approx. 1 mtr longer the plug connection would be out of the way a little more.
2: The paint pot empties quite quickly once you get the hang of it and you have to stop frequently to take it off, refill it and then re-fit it to the gun. I have just bought 2 extra paint pots so that I can fill them up in advance and just change them over rather refilling so often which is easier and you can cover more fence quickly. If you have someone to help you, they can refill them for you while you keep on spraying.
Historically, it has been really difficult to find a DiY paint sprayer which could cope with thick “gloopy” fence treatments, the nozzles always blocked and other feed & paint delivery issues were a big problem. Many manufacturers talked the talk but could not actually spray the whole fence! Wagner has a product that can, does and keeps on going. BRILLIANT! Thanks Craig 🙂
For painting my 38 panel fence and 130 handrails the product was perfec
Using on the ceiling is hard work as it is very heavy and I’m fairly fit, If I were to buy again I would get a model where the paint is delivered to the spray attachment via a pipe.
So far I have used on garden fence panels, ceilings and walls. Be aware you will need to do a lot of masking but you will not get messy splashes unlike using a roller & the finish is good ( no roller mark’s ).
I have quite a lot of high wooden fencing around my back garden and I like to paint it every year, but it takes a long time and a lot of effort. I thought I would try a sprayer, saw the Wagner being endorsed on TikTok by Craig. It arrived in a really well made case with all items well packed. The sprayer worked really well when using Ronseal fence treatment which is quite thick and “gloopy”, I diluted it by 10% to start with but then tried it undiluted and it worked just as well. Only needed to use level 3 or 4 air pressure out of 10. I also found it best to use a light trigger setting rather than full blast, this stops overspray and gives much better control. The instructions suggest setting the nozzle to either vertical or horizontal but me being me decided to try 45degree half way between the two and it seemed to work better then the other options. Basically, back off the pressure, spray less product which will go onto the fence more accurately rather than have it blasting back off the surface and into the air.
Every 2mtrs I stopped to quickly run a 4″ paint brush over the painted area to even out any runs.
Two issues:
1 – The cable could be longer as it has to be plugged into an extension lead which keeps on getting caught up around your feet, if the lead was approx. 1 mtr longer the plug connection would be out of the way a little more.
2: The paint pot empties quite quickly once you get the hang of it and you have to stop frequently to take it off, refill it and then re-fit it to the gun. I have just bought 2 extra paint pots so that I can fill them up in advance and just change them over rather refilling so often which is easier and you can cover more fence quickly. If you have someone to help you, they can refill them for you while you keep on spraying.
Historically, it has been really difficult to find a DiY paint sprayer which could cope with thick “gloopy” fence treatments, the nozzles always blocked and other feed & paint delivery issues were a big problem. Many manufacturers talked the talk but could not actually spray the whole fence! Wagner has a product that can, does and keeps on going. BRILLIANT! Thanks Craig 🙂
This is a good product for outside. Not sure I would trust myself and it on an inside job. It is complicated and you need to read the instructions. I didn’t I am to impatient. Get your partner to read them for you and it will probably be fine.
This is slightly heavier than expected so your arms and wrists get a good workout painting walls, fences etc. Still it makes painting easier once you get used to it. You need to practice a bit first though.
Excellent. Easy to assemble. Easy to clean using soapy warm water. Not so tiring on the wrist. Took it out of the box – neat – and just sprayed. Works quickly. Ran out of paint before I tired. Easy to refill while working. Only drawback is short cable. Have to use an annoying extension lead. The linking plug adds weight to tall projects where you need to stretch or climb a ladder.
30 6′ x6′ shiplap fence panels sprayed in under 2 hours. I used Ronseal Fence life dark oak stain.
It needed 10% water added, to make it flow properly, so I poured the 5 litre tub into a mop bucket with a spout, and added 500ml water. Saved measuring each time I had to refill.
First time I’d ever used a spray gun. I bought a Cuprinol sprayer 3 years ago but so much overspray meant it was a waste of time. This Wagner is a proper bit of kit.
it makes my job easier rathan roll on and paint brush. it gives you the quality you want.
Absolutely perfect. easy to use. easy to clean which is just amazing.
Its just so simple to use. used this on masonry paint for out side of house.
Sprayed bedroom wardrobes and brilliant result achieved. Very easy to use and maintain. Highly recommended.
Really good set at a very good price. Works very well once you get the hang of it.
Product was refurbished but looked brand new. Easy to use and set up. Only used outside so far, will be using indoors soo
Package arrived super quickly and I had an entire house to paint so started off with Leyland Trade Contract Matt Emulsion Paint to cover bare plaster (whilst it does state that you do not need to dilute, I did dilute as this was the first coat on bare plaster). I started off by masking up all areas like windows and anything that was still in the room and then started to assemble the sprayer. This is not complicated but there are quite a few bits to assemble. The instructions are OK but I did get stuck at one point and sought help from youtube but could not find anything relating to a setup guide for this model. The issue was where to connect one of the pipes as there is a plastic cover hiding the connector on the spray end of the handle, this has to be removed to connect the paint feed.
Everything connected I turned on and filled with paint with following the instructions, easy job. Then when you turn the device on beware that the air pressure will come out of the nozzle even when the trigger is not pressed, hence if you still have the nozzle pointing at the paint pot when you turn on, you will get a nice spray of paint from the air coming out of the nozzle.
Now pointing the nozzle at the walls (as I should have been) and a pull of the trigger and a nice steady flow of paint comes onto the wall. I did notice that it takes a while to work out the speed and distance to get a good covering but generally the finish was looking good all over.
I noticed that after some time I lost paint feed completely and thought it was due to the paint getting a bit low, so topped up but still nothing came. I checked the manual again and it only refers to no paint == blocked hence you need to clean it. As I had only been working for a short while I thought this unlikely and eventually realised the reason, there is a small pipe which connects under the handle which had popped off, the connection on this is not great, but reconnected it and back in business. When spraying walls, I found it fairly easy to avoid the over-spray but when doing ceiling, this was more difficult and found i got covered pretty much with a fine mist of paint. But the paint on the walls and ceilings look great. Occasionally I put on too much and you can either wipe it off and start again or simply turn off the trigger to stop the paint feed and use the air pressure to push the paint where needed, once its dispersed it dries nice and even.
Once finished I then went through a clean process by simply getting some hot soapy water to clean the exterior of the device and a bucket of warm water for the pipe, following the clean process, it was very easy to clean and overall very pleased.
Only dropped 1 star due to the slight difficulty with the pipe disconnection which I can be avoided by carefully fitting one of the pipe clips in place carefully at the top where the pipe connects so that there is no movement on the pipe.
Highly recommended. Every DIYer needs one of these.
No he llegado a probarlo ya que al coger la turbina me result muy pesada y ms an si se llena el depsito de pintura con ms de 1 litro. Adems tambin haba pedido el prolongador para llegar bien al techo sin tener que subirme en escaleras. Para mi resultara del todo impensable poder sostener todo ese peso sin que terminara con el brazo y la espalda muy dolorida y sin poder terminar el trabajo por ello.
Si no ests acostumbrado a coger peso y sostenerla durante un tiempo ms o menos largo, no te lo aconsejo. Pienso que es muy buena opcin para personas con brazos bien fuertes.
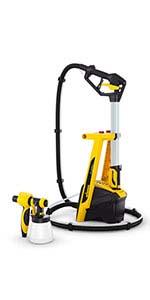
Lo devolv sin ningn problema (muchas gracias a Amazon) y cog el modelo Wagner w890 flexio que tiene la turbina en un maletn que a la vez hace de almacenaje de los dos depsitos que lleva. Slo tienes que sostener una pistola ligera con el depsito de pintura y si quieres el prolongador. Tambin tiene el tubo del aire muy largo que hace que no tengas que mover para nada la maleta, al menos en un espacio de 6 m a la redonda. Si tuvieras que moverlo, no pesa y es muy manejable. Tiene un saliente en el asa de la maleta para poder posar la pistola con el depsito sin que te tengas que preocupar donde dejarlo y que no vuelque.
La verdad que ha sido un acierto total y pinte el techo de unos 10m* en unos pocos minutos.
Con el otro cabezal que viene con su depsito pint un cajn en menos de 1 min. La limpieza es rpida si eres cuidados@ en verter la pintura en el depsito y que no te manches las manos para no manchar la pistola y dems.
Un truco… yo forr la manguera con film transparente flexible y tambin la parte superior de la maleta. As si cae el polvillo de la pintura, no se te ensucia y siempre lo tienes impecable. Hice lo mismo con la pistola.
La segunda compra ha sido un acierto total y estoy muy contenta ya que me quita mucho trabajo con un ahorro de tiempo cosiderable y queda de una sola pasada perfecto.
Recomendable 100%
This is my first sprayer ever . I was bit worried before I purchased it but it is very good piece of tool . In my honest opinion it’s not for large projects but to do some spraying around the house it is and for me it will get great help .
highly recommended product this
I expected the clean up to be arduous but actually it is quite easy, if a little time consuming – however cleaning a sheepskin 12″ roller takes about the same amount of time, so no complaints.
One issue to be aware of – if even the tiniest flake of solidified paint makes it’s way into the mix and through to the nozzle, it either blocks it completely or reduces flow so take extra care when mixing that there is no dried paint or lumps anywhere. Overall happy with it and relatively easy to use first time. Best feature is the wide range of adjustments to spray pattern, volume, air pressure and materials. Also sounds really cool.
To clean the the pot I just washed it out with water, then filled it again and reattached it to the gun and sprayed the water into an empty bucket until it sprayed clean water. Finally, I took the nozzle apart and cleaned each part with water. All this took less than 10 minutes.
Not tried this with emulsion yet, but will review again when I do. At the moment it’s a definite 5 star product for me. One recommendation I would make is to buy an extra paint pot especially if someone can fill it as you will empty the other quite quickly when spraying a fence.
Used with emulsion today. First used it on our bedroom ceiling then on the four walls after cutting in. Tried it initially without watering the emulsion down but then did a 10% dilution with water. Superb finish on both the walls and ceiling. Very very pleased with this product. Took a lot longer to clean than with the fence paint but wanted to be sure the spray mechanism works well next time, still on took 15 minutes.
Not only was i optomistic at first before i used it that it would be too heavy, or it would be too difficult to use and that it would be aimed towards professionals.
WOW I TELL YOU SOMETHING I WAS WRONG!!!! Its a product that ANYONE can use. For a lounge which would take me 6-8 hours to paint with a brush or a roller, with the w590 it would take less than a quarter of that time!!!! Doing a door is tricky with a brush and a roller and to do one side, your looking at 10 mins up to 30 mins to do. With the W590 you can do it in as little as 1 min!!! Crazy stuff!!!
So if your interested in getting a paint sprayer i would say drop everything else and choose this product as its amazing. It can be used outdoors and indoors. Its easy to clean.
Being a non professional amateur decorator, this product is life saver!!!
Buy buy buy it now!!!!!