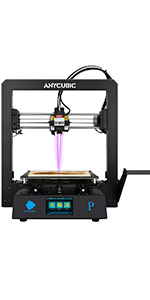
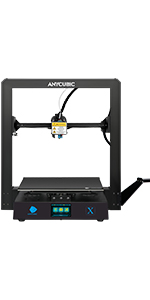
ANYCUBIC Mega S 3D Printer, Assembled with Sensitive Touch Screen FDM 3D Printer, Resume Printing and Extruder with Metal Printing Frame, Print Size 210mm x 210mm x 205mm
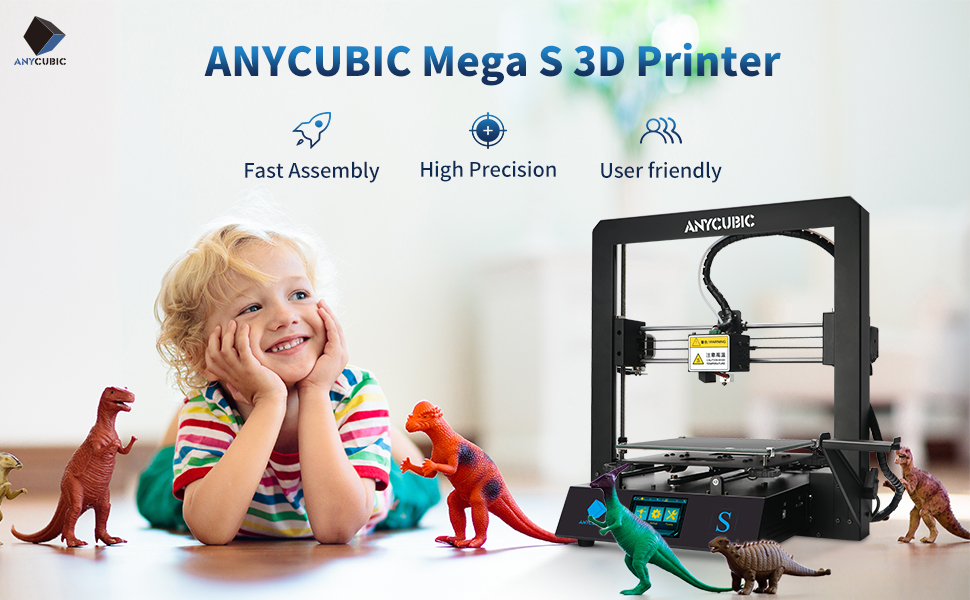

Technical Specifications about ANYCUBIC Mega S 3D Printer
| Nozzle Diameter | 0.4 mm/1.75mm |
| Positioning Accuracy | X/Y 0.0125mm, Z 0.002mm |
| Print Speed | 20~100mm/s (suggested 60mm/s) |
| Materials | PLA, TPU, ABS, HIPS, PETG, Wood PLA |
| Operating Temp | 8°C – 40°C |
| Operational Extruder Temp | Max 260°C |
| Operational Print Bed Temp | Max 110°C |
| Connectivity | Memory card; Data cable |
| Software Input Formats | .STL, .OBJ, .DAE, .AMF |
| Slicer Software | Cura, Smplify3D, Repetier-HOST |
| Layer Resolution | 0.05-0.3mm |
| Input Rating | 110V/220V AC, 50/60Hz |
| Printer Dimensions | 15.94” x 16.14” x 17.83” |
| Extruder Quantity | Single |
| Software Output Formats | GCode |
| Working Voltage | 12V DC |
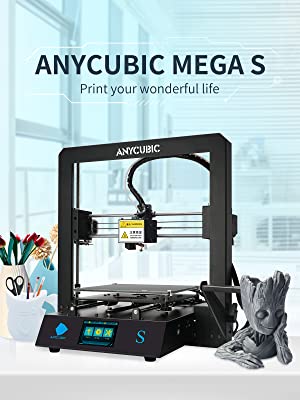
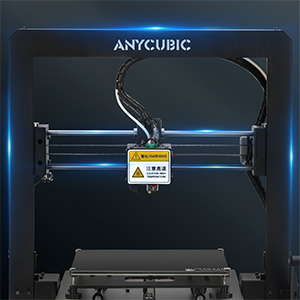
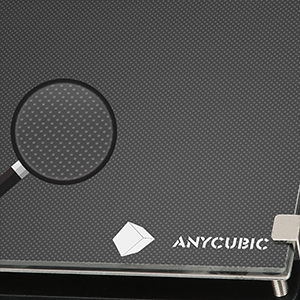
High Grade Titan Extruder
ANYCUBIC Mega S 3D Printer Equipped with updated Titan extruder, the optimized combination of the classic extrusion system and straight-through V5 extrusion head, provides smooth feeding, not easy to jam, and compatible with flexible filament.
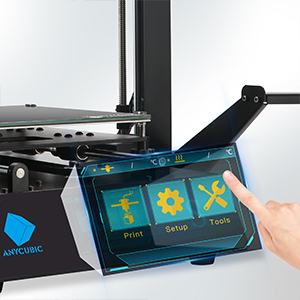
TFT Touch Screen
Mega S 3D Printer FDM has 3.5″ TFT Touch Screen, user-friendly interface, simple operation, rich functions, smooth operation, one-key switch between Chinese and English, which can provide you a different touch screen experience.
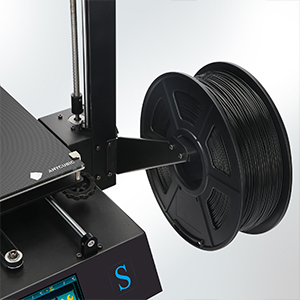
Suspended Filament Rack
Black oxidized sheet metal parts with good texture. Mega S 3D Printer adopts integrated suspension design, which is simple and beautiful. The filament feeding is smoother, and the storage and organization are more convenient than others.
| Dimensions: | 41 x 40.5 x 45.3 cm; 14.4 Kilograms |
| Model: | MEGA500-05 |
| Manufacture: | ANYCUBIC |
| Dimensions: | 41 x 40.5 x 45.3 cm; 14.4 Kilograms |
| Origin: | China |
I have an engraving business and was looking to expand the types of products I offer, the only issue is that for each new product I would need a new custom made jig for the engraving machine.
Thought to myself what about buying a 3D printer and printing my own jigs, had a look at reviews on YouTube and other sites and this 3D printer came up time and time again. Decided to go ahead and was pleasantly surprised. Was not expecting the best prints at this price point but it did exceeded my expectations.
Tried the usual test prints and all was fine, some tweaks here and there, still need to tweak a few bits however I have now printed some custom jigs, also went onto ThingiVerse and downloaded some tools for my office and some items for the 3D printer (yes you can download and print little upgrades!)
Would defo recommend printing the bed adjuster wheels (makes so much easier adjusting the bed) and the tool holder which clips onto the frame.
So happy with this purchase and will save me so much money in the long run!
This will be my second printer and first from S series. Like everyone else I love the way it is build – none on the market so solid. The previous one M series I used it for 2 years and still works like a charm but now was given to my brother. The one that I got: strong build and with a few screws in place everything us ready. Heat the bed and do the leveling on it. Afterwards feed the filament and this is done through the menu and not manually. Ready for the first print as you see in the picture. Always have a temperature test on the filament (PLA PLA+etc) and use the best settings in slicer. I use Cura since ‘pre settings’ are done and just adjust them to fit your needs or time. I find it very easy to use and play with settings or replace parts. Also do a home all since everything will start from the beginning and use it at some sort of reset on positions. I find easy to use it and would recommend it to beginners and advanced users as well.
Printer was easy to setup. I did follow a youtube video just to make sure it was right. Had some errors in initial prints, E0 error which I think was caused by a loose plug. Reconnecting everything fixed this so I expect was my own fault. Since then not seen this error at all. Prints come out great.
After about a 100 hours of use the only issue has been prints getting stuck to the bed and pulling off bits of the surface. There are many fixes for this. I used blue tape as a replacement and works fine.
Overall as a 3D printing newbie this has been a great printer to start with.
Some may argue that is it really not healthy to love a bit of tech so much… but I really love this printer, it is my first step in 3d printing and I am over the moon with this, it did not come with much pla so buy some extra, I did view several YouTube videos about it first making setup very easy, you will need a few bits of software, think they are on so card that comes but I downloaded them beforehand, comes with tools and extra parts, I print mostly tanks for miniatures and gaming and I am thrilled with this, if it is your first printer I hope you will be as happy as I am
After buying 1 I found it significantly better than other 3D printers I have used. So when I needed another there was only one choice!
I use PLA+ for my everyday printing – it sucks to the plate and comes free when the heated bed temperature drops. No fiddling around getting prints to stick.
Setting up and using is a doddle. Within minutes of arrival I was printing my first model. It has a robust performance which gives excellent results. I wish for 2 things – a larger print area (now available in the Mega X), and dual extruders.
Support from AnyCubic is exceptionally good. With some companies the supplier can be hard to get onc they’ve made the sale, but with AnyCubic they go way past what’s needed – even after warranty has ended. Top marks for this company.
Got this for Christmas 2020, and it’s brill.
Actually managed to bag this during a lightning deal and got it for 230 quid.
It is well packaged, and It actually arrived earlier than expected.
Had a minor niggle setting up, and customer service were very quick in responding. Assembly is a doddle.
The manual is on the supplied SD card, and there are also some spare parts supplied, too, which was a nice touch.
The prints are decent enough, although I’m still in the getting-to-know-it phase.
First thing I printed was a joystick mode-selector for the home-arcade machine I’m making. This took several iterations, and the beauty of home printing is that this option is available.
I tried using TinkerCAD, which is ok, but ended up going back to AutoCad, for the finer control over the designs.
Use Cura to slice your models, but take your time with the settings; don’t just use the defaults. This printer prints PLA at 230, but Cura defaults to 200, which is too low.
I have my printer in the garage, so it’s convenient to leave it to print away without disturbing anyone.
I also put a ziploc bag over the filament spool, with the end feeding out to stop the filament bulking up with moisture. This seems to have worked well for the past few months.
Yes, it’a a bit noisy, but there are 4 stepper-motors, and a couple of fans running, so it’s to be expected.
For some comparison, it’s quieter than a hairdryer.
I do a lot of projects using Arduinos, so this has made protoyping far easier.
I can’t recommend this printer enough.
Excellent printer for beginners,comes in 2 parts,assembly requires 8 screws.
The extruder (a e3d titan clone) isn’t the best but will do until I upgrade.the hotend (a e3d v6 clone) is good.you get 2hotends both with a 0.4mm nozzle installed.
The ultrabase bed is fantastic for adhesion but does require a full cooldown for prints to release.i do not recommend hacking at ur prints with the included scraper once finished to release them from the bed as this will most likely result in damage to the surface,instead have a little patients and just wait for it to cool down & you will hear ur prints self release after around 5-10 minutes when the printer has completed its task.i clean the bed with a 50/50mix of 99% isopropyl alcohol & water after every print.
Overall I highly recommend this printer and I’m very happy with it.
I am very pleased with this printer.
This was my first 3D printer so I wanted something that was not overly complicated yet gave good results.
The printer arrived well packaged with everything you need to get up and running.
Assembly was relatively straight forward – you just need to attach the base to the upright that houses the extruded and plug in a few wires followed by assembling the support for the spool.
Once all done it’s just a case of loading the filament – 1kg of white was included.
This is a straight forward process and is covered nicely in the instructions.
Before starting to print you will then need to level your bed. This can be quite frustrating at times but it is essential for getting good adhesion and improving your prints.
I have found that the nuts were a bit small and this is easily solved by a quick search on Thingiverse for Anycubic Mega S accessories.
From here I was able to print attachments to make accessing the adjustment nuts much easier.
(I also found it handy printing a storage rack for the tools/accessories).
My first print was the test file provided with the SD card. The two owls came out great. Print quality was very nice.
I have then gone on printing a wide variety of STLs.
(Print quality has varied depending on the files used but I feel this is down to the files and not the printer).
In relation to adhesion I initially found the hot bed to be very good with all prints adhering well.
A lot of this is down to levelling. As time has gone on some prints have lost adhesion and as a result I have had failed prints.
10 months into printing the coating on my hotbed has started to peel away with the prints exposing the glass underneath.
I contacted the Tech support and got a reply within 24hrs (I was expecting the usual delays due to COVID).
Overall I am very pleased with this product and would highly recommend to anyone looking to get into FDM printing
The Printer arrived very well packaged with the printer split into 2 separate parts and a bag full of accessories. Building the printer is incredibly easy and only involved inserting 8 screws and plugging in 3 colour coded wires, the instructions were very simple and clear. The printer itself feels very sturdy and well made. After plugging the printer in the touch screen is very responsive and easy to use and it was very simple to level the bed using a piece of paper and then inserting the filament. The kit includes and SD card preloaded with an Owl print file that can be used as a test print. Once the bed and nozzle had heated up the print began, the print bed has incredible adhesion and the first layer was perfect. Overall the print quality was very good for a 10 min setup time. The kit also came with a bed scraper, filament cutters, PLA (enough to print a couple of owls), a spare nozzle and hotend and a few other bits and pieces.
I would absolutely recommend this printer for the price as it has plenty of features and is incredibly simple to setup for printing newbie’s.
I had a few issues initially with delivery however the customer service of Any cubic is some of the best I’ve come across, I’ve no doubt they will solve any problems you may come across.
I’ve had my Mega S for about three weeks and I’m completely addicted! I’m a complete beginner to 3D printing, but the printer was super easy to set up and start printing from, and it comes with spare parts – the hotend in particular, was a nice touch!
I had teething issues with getting my print released after set up, and damaged the bed slightly – got in touch with Anycubic and they replaced the bed for me! Really great customer service direct from the manufacturer. I’ve ordered a bigger printer too – the Chiron!
It is slightly noisy, but nothing that causes any problems for me – I have it printing in the room next to my bedroom and it’s not loud enough to interfere with sleep.
If you’re new to this, this is a great printer to start out with, quality is great, easy to build (and easy to upgrade if you wanted to)! I think even if you’re experienced, this is a great printer too… enjoy!
I really like this printer. Out of the box it creates some really high quality stuff.
TBH I would say that the print quality is 80-90% perfect. You sometimes get a little stringing or tiny pieces you need to remove. At this price point it is by far the best machine I have seen. If you want super high print quality then you need to spend significantly more money. For tools, ornaments and stuff around the house this printer is perfect.
The photos are having just printed the items without any clean-up. You may notice one of to slight imperfections but you can’t expect any better. I’m very happy with the quality.
One thing to note is spend a lot of time levelling the bed. Ensure the unit surface is flat and be very careful with the hot plate. I didn’t level it correctly upon first try and the quality suffered. Once I followed the Anycubic guide I got the prints in the photos.
This is my third 3D printer, after a Velleman K8400, and an Ender 3, both of which I built from kit parts, and both of which were a steep learning curve to get printing at all with good results. This printer is streets ahead of those in comparison.
It comes in two large sections, with the PSU, build platform etcc in the base unit. Then the z-axis frame. You put the former through the z-axis frame, line up the holes and bolt it together. A tip here would be to get a right-angle carpenters tool to make sure the z-axis frame is perfectly at 90deg to the build platform before you tighten up the bolts. Then connect the helpfully colour coded cable loom plugs to the sockets on the base unit. Load the sample filament, and literally away you go. This printer works straight away with the included sample print file of two owls (see the first picture).
I’ve printed over 20 items now and only had two failures. These fails were down to me not setting up the Cura software slicing correctly. Barring my own errors, I’ve had superb results from everything else, as a few pics show.
I have no hesitation in reccomending this printer to anybody who can get hold of one!!
Edit (5/June);- (1) there is a spare complete ‘hot end’ supplied as part of the kit, nice to have that just in case! (2) once heated up and ready to print, the hot end zooms to location and starts, but there is a small delay of 5 to 10 sseconds for filament to come through – easily solved by always printing with a brim, allowing PLA to flow fully before getting to the actual print, (3) Also, a small spring is supplied to retension any belts that might loosen over time, (4) AnyCubic support was a mite slow, but good results from them in explaing a couple of things to me. Still happy to give 5stars to this printer.
still going strong, printing out face mask parts to help out where I can. F
Updated: 2020-05-06
I have given back one star, Anycubic support are very responsive to support tickets.
The bed levelling issue that I had has now been identified and a new part has been issued. It took a bit of effort to identify that the glass bed was slightly warped in the middle.
I’ll report back once the replacement part has been fitted.
Initial Review:
Writing this after a few weeks now:
I’ve contacted their support team to try and sort out the warped bed. I can imagine that this unit will be returned as I’m losing confidence with it.
Summary:
Very easy to get setup. BUT…. do some research, watch youtube videos on the maintenance with the AnyCubic.
As a beginner you will have to learn all the different types of filament and their best melting temps etc, all good fun !
but before you can get printing you have to assemble the unit – which was easier enough and then ‘level the bed plate’… I spent HOURS on this – .The guide book says start at the corners and then lastly check the centre. But on mine the corners gave some paper resistance – but the middle the nozzle is touching/scraping the glass plate – NOT a good start… but when you’ve just this amount of money the last thing you want to be doing is taking a unit apart. So I levelled the middle ….but it means I can’t print to the edges — at first you don’t know if this is normal or not so you carry on and get printing…
After a few weeks NOW I want to get on and do some larger prints but this is where my device is starting to struggle to get started on the first layers on parts near the edges because of the inconsistent levelling. I’ve tried blue painters tape for adhesion – that’s a bit better but it still does not resolve bad levelling completely at the sides.
AnyCubics support team have been very helpful – and I can’t fault them – they respond quickly – I had an issue with the extruder deployment and they are sending me a new one… but now I’m getting more adventurous with big prints the levelling of the bed appears now to be an issue- I’m starting to think that this unit is a bad one.
I’ve raised a ticket about the bed levelling and will update this review the moment that I hear back and what can be done about the unit.
I must like these as I’ve just purchased a second one after owning the first for about five months. They are a good sturdy machine which can be assembled and printing within the hour due to the fact that they arrive part assembled. I’ve bought a second as I’m heavily involved in the production of printed faceshields for care workers and one machine just wasn’t producing them fast enough to meet the demand. The first printer has now turned out very nearly 400 masks and has been working round the clock.
The second and most recent purchase was assembled just as quickly as the first but it strikes me that these are being very rapidly produced to meet the current high demand as the quality control standards were no where near as rigorous as the first. The initial machine had some teething problems which were sorted out very ably by Anycubic and beyond that was virtually problem free – although see a later note.
The new one came with several build problems which I have been able to sort out with spares but it wouldn’t work out of the box. The nozzle was completely blocked – possibly in testing and had to be immediately replaced. Also the bowden tube was badly kinked and wouldn’t allow filament to pass through it – again replaced with a spare tube. I feel this would have been very disappointing for a completely new user as several hours and the purchase on new parts or a return would have been necessary. I also noticed that the new one came with far fewer accessories than the first which rather generously came with a number of spares, a good tool set and 1kg of filament. The new one has come with a spare hot end and a couple of tools only.
Although the machines are very well built some of the ancillary parts are of poor quality and will undoubtedly need replacing quite quickly. The SD card reader is of poor quality as is the extruder. I’ve had to replace the first one within a few months and the new one which has been printing for less than an hour is already making some disturbing noises. The extruder appears to be of an unusual design so the only way to replace it is with the same extruder again from Anycubic. If a better quality third-party metal extruder appeared on the market I would immediately replace both as it’s a weak point.
In conclusion it’s a good printer but you will need to make some repairs and improvements to get lasting service from it. At this price point one shouldn’t expect a 1000 machine but the production quality seems to have slipped from the first one.
This is an update and it concerns Anycubic customer service. On my new (second) machine the bed started to peel badly and it was clear that there was a manufacturing fault. I had previously received very good service with my first machine so contacted them again. Susie Zhang, their customer services agent was brilliant and via Amazon arranged an immediate refund for the cost of a new bed, and I was up and running within a few days. I really cannot fault the aftercare for these machines and I would carefully factor this into any buying decision if you are choosing between several manufacturers.
Well this is my first 3D printer after having a look into what’s available out there and what I could get. I was always under the impression that most of these printers are thousands of pounds, however it wasn’t until I did a bit of digging around, I found how relatively priced they are. I saw this one, looked over some other reviews on this one and added to my wishlist and it then went onto the lightning deals and so with my 40th birthday coming up, I snapped it up (with my wife’s approval I hasten to add – hehe).
The delivery was really good and was to be delivered within about 4 days, although I managed to get it to be re-delivered as we were away on holiday. So I had it a week before Christmas, unwrapped it and had a go. I had an email from Anycubic via Amazon offering me a 5% discount for filament, so that was a lovely surprise.
Initially I struggled with the bed levelling part, however with watching a couple of YouTube videos re-reading through the set up instructions, I finally got underway with my first print and this was exciting. So I printed the demo of the two little owls and they looked…… awful!! Unfortunately, it was partly down to the levelling and also the dinning room – where I’d set up the printer – temperature was quite cool. So after a little bit more trial and error, pulling out hair, wondering if I indeed made a big mistake in jumping into a 3D printing world and perhaps 2D really is the way forward, I finally got to grips with it and printed the 2 owls and they came out perfectly. In fact, I now have about 6 or 8 owls, just to build up confidence in using it and they’ve come out well.
I would recommend this little printer. It was easy to set up as you have the heatbed and all you need to do is to screw in the frame that holds the nozzle. The Ultrabase bed is really good – although if you’re levelling it, don’t do what I did and run the nozzle across without a sheet underneath it as I managed to scratch it (it hasn’t affected any of the prints fortunately!). Oh, also in my box I had a 1kg white filament, but I also had 10 small packs of coloured filament. I’ve not used these yet, but that was really good. Lots of spare pieces in the box as well includes screws, small scrapper for taking 3D prints off the bed, a few nozzles (of various sizes) and set of pliers. There were a few other bits, but these I use most of the time.
Getting a bit more confident with it and so I tackled my 3D designs using Blender and made Christmas tree decorations and they’ve come remarkably well. My current project is a large tube to use as storage for a board game. It’s the largest project I’ve done on the 3D printer so far, and it’s turning out very well. I do have an inkling I may get a request from my dad to print him one too. 🙂
Folks, I don’t normally post reviews of products but as a beginner I was expecting it to take time before I got good prints. I have read many web pages about people have issue with print quality and adhesion.
You won’t have these issue with is printer, it has the UltraBase which is pure magic, holds the print tight until the end, once it cools the print simple falls off the bed.
Two things are key, 1. Clean the bed as soon as you get the printer and keep it clean, 2. Level the bed correctly. If you do both these things you will have top quality prints from day 1.
IMPORTANT!! Make sure to clean the bed, if you don’t you will get bad adhesion and it sometime makes you think the bed is not level when really it’s not clean. So, Clean, Clean, Level.
There are also a number of facebook group which help so have a look there, different filament need different setting but with the CURA default settings you will be printing excellent quality prints, you can then tweek them if needed.
Have recommended this printer to 4 of my friends who have also bought them and like me are have super results.
You won’t go wrong buying this printer.
Since this I have moved on to a large model of Baby Groot, a horse, an MTV music award (which I then painted black and gold), a model rocket and then parts for building a water rocket including nozzle, launch mount and rails and release mechanism. I also printed out a stand for my soldering station tips and reflow nozzles.
I have only been using Tinkercad online and also downloaded Ultimaker Cura 4.3 for the slicing and been using different layer thickness and infills % depending on how much strength I want in the components. For example, the rocket nozzle and launch mount have so far seen 30psi pressure using 0.1mm layering and 100% infill, and printing at 200’C and 60’C bed using Anycubic’s PLA filament.
I regularly clean the bed plate with isoprop alcohol to make sure I get good adhesion, and you get a yellowing of the tissue coming off the surface, so there is a deposit of somesort being left on the plate.
Overall I have been well impressed by the printer, it surpassed by expectations of 3D printing in general, and well impressed with the Anycubic product, a good solid well priced first time printer. Would love to try their bigger ones one day….
After a lot of research and reading reviews online, I decided to buy this printer as it had good reviews and a good reputation. Its arrived promptlyand was well packaged. It arrived with a lot of accessories including spanners, Allen keys, some extra coils of PLA and, somewhat disturbingly, a spare extruder head.
It took me about an hour to put it together. It’s very sturdy, well built and well designed. I printed my first model off three hours after receiving it, and it worked very well.
I’ve spent the last few days working out what the best settings are for the things I want to print. It’s going to take a little while to work out which settings are suited to best which materials and model types.
Now the reason for the four stars rather than five. One week after receiving the printer the heated extruder head packed in. After a little research online I was able to fit the spare one which arrived with the printer. It was now obvious why they send out a spare one with every machine. The heated extruder head is a regular replacement item, and if you buy any 3-D printer of this type you can expect to replace the head on a regular basis.
I’m rather unhappy about this. I can expect the nozzle itself to be a replacement item due to wearing tear, but not the entire head including the heater.
So to sum up it’s a very sturdy, well built and well designed machine that does a very good job. It’s Achilles heel is the fact that I now need to order a couple of spare heads for those times when the head does pack in.
This is our first 3D printer and after two weeks of playing with all its settings, I can safely say it is an excellent first purchase. Build quality is very good and it’s easy to assemble the Z axis frame with 8 bolts (4 each side) and then add the spool holder using a couple of bolts to attach the arm and the existing bolts on the Z frame (loosen them) to hang the spool holder off. Then route your PLA through the filament sensor (twist it to ease it through) and up through the extruder motor inlet hole (squeeze the little lever at the back to let it in) and then push it through until it reaches the head (I suggest you pre-warm the extruder head to 190oC) the filament will then ooze out a bit. Also, in the Tools menu there is a Filament option to retract the filament or bring it in. It’s pretty cool to use the retract option and then ease the filament back onto the spool until you feel it drop off the gear feed — then carefully trim off the end with the snips provided before pulling it through the sensor. Be careful not to lose the extruder inlet guide as when the bulbous (melted) end of the filament extracts, it tends to tug off the press fit inlet feed.
Before doing the above, you need to level the bed, which is a bit arduous, but fun as it teaches you all about making sure the bed is as level as you can get it. It’s a piece of glass with a soft ‘grippy’ coating. The glass is not exactly level as it sits on top of the heated plate. You need to use the manual screws at each corner and either use a feeler-gauge or a piece of paper until it just nips the paper at all four corners, and all four mid-points between the corners. Then move the head into the middle and test across the X and the Y axis to make sure you have a paper gap. This is a bit of a black art and you need to go back and forth between front to back to mid-points until you have averaged out the levelling. Each time you tweak the front, it affects the opposite point, so take you time. Don’t rush this as levelling is critical to good prints. I think AnyCubic need to add automatic bed levelling to their firmware as there are others who have flashed the firmware with a non-standard version to do this sort of thing in software. Frankly, once you have tweaked it over a week, it pretty much stays where you left it.
Now print off the two owls from the supplied SD card. They come out pretty good if you have done the above legwork first.
I’ve attached a few photos and a video of thin-wall printing. This is quite hard to achieve as not only does it rely on your bed-levelling skills, but you now have to spend a lot of time tweaking the flow rate; travel speed; extruder heat and retract and de-retract settings — all worth learning BTW. Of course, you can use the default print profile for the AnyCubic i3 Mega, or just use the Prusa i3 MK3 profile. That will likely give you fairly good results, but to get a really clean print with no artefacts and stringy bits between objects on the bed, you will need to go out and YouTube your way into becoming an amateur and later a pro. My son and I spent the best part of a week messing around with a gazillion settings in Cura and settled on Cura 4.2 as this has the most tweaks I know of for a free slicer. They do supply a 1.x version of Cura, but this is really old — it does the job, but doesn’t have some of the more advanced features that slicers are now coming up with.
Remember this is a sophisticated glue-gun on the run. They call them FDM printers — Fused Deposition Fabrication printers. Just watch the head closely to see how it works and how the slicer moves between the various parts, making sure everything is built up one layer at a time whilst maintaining heat across the objects — pretty tricky programming. Cura is a blast, you can import GCODES (raw printer data), STL (Standard Tessellation Language), acts like a template and let’s you scale, move, rotate; OBJects; projects etc. I won’t bore you with all the details as you will pick all this up for yourself. One thing’s for sure, this is a brilliant little printer that can print out some fairly big objects in multiple sections. We tended to print out single objects so we could observe the whole process and get print quality up — zero whiskers between retraction and travel between objects — look into Z-hop. We have gradually upped our game on printing more objects in one go, but you don’t save a ton of time doing this as the printer just has to work harder as it skips between all the elements and that of course leads to some of them being hotter and some cooler.
So, in short, if you have kids, or are just a big kid at heart and want to learn all about 3D printing, then the AnyCubic i3
Mega S is a great printer for the money. It also comes with a set of tools and a spare extruder head. Just add some good 3D lacquer (don’t bother with hair lacquer unless you want to spend a shed load on one’s that don’t stick) and watch how you use the scraper as you can easily damage the soft bed top layer — also let the bed cool down so you can pop off the objects easily. Sometimes a little tap with a hammer on the end of the scraper at a low angle will help knock off the object — just don’t go at it like a mad-man and gouge the bed.
All-in-all a smashing little printer that packs a punch in terms of overall capacity and functionality.
Well this printer sold me on how easy it was to setup – it was up and running within 15 minutes once i had opened the box.
Everything is reassembled all you need to do is put 8 hex bolt screws in to attach the gantry to the base, plug in some cables (which are colour coded) and power it on.
The manual and first print were a breeze – so long as you follow the instructions you shouldn’t have any problems.
The print quality is amazing – it does require cleanup after printing and you will need to experiment with your slicer settings but thats just part of the hobby 🙂
I had a few teething problems once i got it running (its been in near constant use for over a month) but the support team have been amazing in helping me diagnose and fix the 2 small problems I’ve had.
The cost as well is at a point where its justifiable – yes it is still a lot of money all at once but its way better than it was even a few years ago.
If you want a good printer to start the hobby at a reasonable price point with good customer support i’d definitely recommend the i3 Mega.
Anycubic have impressed me so much in fact that i decided to get their SLA printer – The Anycubic Photo
This is my first 3D printer and let me say right off the bat that I’m really impressed.
I chose this particular printer based on the positive reviews both here and on reviews sites around the internet. Although there are many opinions on how the printer could be improved there’s strong agreement that this is a great entry in to 3D printing.
So far I’ve used the printer for a few dozen prints, including the ones in the attached photo. The quality of all of them has been ‘good’ – as in it’s obvious that the item has been printed and you might need to deal with some stray stands of 3D filament that have been trailed by the extruder during printing but overall you get what you were hoping for.
After about 2 months of use, here are my main experiences to share:
1. If you like making ‘stuff’ a 3D printer will be a valuable addition to your life. I’ve used mine for everything from components for DIY, to making brackets for a frame for a tomato plant, to chupa chup style balloon weights for a Willy Wonka themed birthday party. If you often find yourself thinking ‘if only I had a … to fix this thing’ then a 3D printer is the answer.
2. 3D printing is slow. Larger prints can easily take a day. The octopus and lizard in my photo took half a day each. This is not a quiet printer so ideally put it in a spare room. There’s plenty of advice online on how to swap out the motors and fans for quieter equivalents if that’s a route you’re happy to take.
3. You need to be happy to tinker. I didn’t understand the instructions about how to load the filament when first setting up and so clogged a nozzle within my first hour of ownership. I’ve also had to take apart some of the frame to investigate a levelling issue and I broke an extruder so had to remove and replace that piece. The 3D printing market is still immature and you have to accept that you will need to take the time to understand the machine so you can get the best out of it. The good news is all the parts are cheap and available the same / next day with Amazon Prime.
4. The online communities are great, especially for the i3 Mega. The Facebook group is full of people who will diagnose printing issues and explain step by step how to fix problems time and time again without a hint of frustration. Online model sharing communities like Thingiverse provide millions of sample projects for you to try out.
Finally if I could change just one thing about this printer it would be adding automatic bed levelling. Getting the print bed level seems to be the number one problem for users and has caused me a fair amount of frustration too.
All that said, if you think you’ll enjoy 3D printing then you should go ahead and give it a go.
This printer is verry fast.
It comes with everything you need to set it up like 1kg of fillimant
Would deffo recommend this 3D printe
From there went on to print lots of d&d bits using Cura as the slicer. Basic, easy to use and does the job. Tried all sorts of variations on the print settings and all worked well.
So about a week in it all went wrong, bed adhesion went completely. Printing was a disaster, nothing would work. Much searching later i bought some 70% rubbing alcohol. Cleaned the bed let it dry and did a complete re level.
Result is perfect prints again! I now clean it after every print with a small amount of alcohol while the bed is cool. I re level once a week and have no issues.
For the price can’t recommend this enough, i am printing cosplay kit, n-gauge railway bits for my dad, boardgame extras and lots of D&D scenery.
From reviews my main reason was the ease of construction, i.e. putting the machine together and overall simple UI.
It took all of 15 minutes to get the printer from unpacked, built and ready for a test print. My first ‘Owl’ print failed as I was a little over cautious on how close the print head needed to be to the heated bed. Despite watching the levelling video on Anycubics website which very clears states how close it needed to be, I was little ‘Thats too close’ and set the print head too high that resulted in the print failing.
So I went back and followed the guides to make sure the paper levelling sheet supplied had a slight tension when pulled between the bed and head. For a newbie you may be kinda fearful that the head will drag across the print bed, but it doesn’t. Follow the instructions!
So after re-levelling, the Owl test prints were perfect. They both come out far more detailed than I could have imagined.
Moving on to other prints, I selected a few ‘Christmas’ things from Thingyverse and these too all printed without any problems.
I have now started to design my own models with Sketchup, the first being a fish feeder powered by a small 6v motor, stepper driver and Raspberry Pi. From my own designs, all I can say is I am amazed at the precision of the printed pieces. The photo attached (Round thing with four sections), is just a small prototype with lots missing, just so I could run a quick print to gauge the motor driver distance, but it was spot on and fitted perfectly.
So, would I recommend this printer, absolutely. From the customer support emailing checking if all is going well etc, to what you get supplied in the box, I don’t think you can get a better quality product at the moment.
The Mega S however was unboxed and printing within about 45 minutes.. just 20% into the owl test pieces but already I’m Mega impressed (looking like it’s the printer I should’ve bought as a first dabble with printing).. fingers crossed I’ll have my first predator mask (printing now), gauntlet and servo controlled shoulder gun to follow.. nice instructions, solid unit, excellent tool kit.. no complaints at all from me.. phew 🙂
I originally ordered the Chiron for its large print area as my first 3D printer but due to a stuff up with the order I picked the smaller Mega S. I’m not disappointed with the S it which with my limited knowledge seems to carry all the same components and technology as its bigger brother (except the auto levelling system) with a bit of tweaking in Cura I’m getting outstanding results. In the short time I’ve had it, its had some punishment in the sheer number of prints i’ve done and the only problem to date seems to be with the Ultrabase – adhesion despite regular cleaning and levelling in accordance with the manual (Pg 34 – FAQ 5) everything has to have a raft and I’ve resorted to using a small amount of glue stick just to help it stay-put while printing, which doesn’t affect removal once the bed is cold.
Hope to continue the Mega S for many more prints
The Cura software allows you to print 0.1mm levels of details and the contents actually come with 3 5 different hot ends included to you can change it and get even better print quality.
It’s not that noisy and does absolutely everything a 500-700 printer would achieve but at half the cost.
It took about 30 minutes to put together as its 90% built and I was watching youtube videos to make sure I was building it correctly……Would probably only take10 minutes if you know what you’re doing.
All in all this printer is literally plug and play after you’ve spent 5-10 minutes levelling the bed.
Incredible….It does what it says and it does it excellently.
UPDATE….. After having an issue with the heated bed I just wanted to let you all know about the customer service I received from the Anycubic representatives.
Within a few days of contacting them a new bed landed on my doorstep after mailing customer services, they seriously couldn’t do enough to help me get my printer back up and running again.
Not only is this a great printer, the after service received is second to none, which, if you are new in the 3D printing scene, is a huge comfort when you’re looking to spend money on a printer.
In the late 1970s I was involved in the early development of personal computing. Machines came in kit form, were pretty crude and required their owners to tweak and trouble shoot them on a regular basis – it was impossible to buy a ‘user friendly’ computer that would work perfectly ‘out of the box’. The situation was pretty much the same in the 3D printer world a couple of years ago but WOW, things have really changed.
Although the Anycubic Mega-S is not quite ‘foolproof’ it can be set up and working within an hour by anyone willing to follow the detailed instructions and its performance is pretty amazing.
My machine arrived within 48 hours from the Anycubic UK Store, was very well packed and came with 1Kg of White PLA filament and 10m sample packs of red, yellow, green, blue and ‘skin’ PLA. The instruction book is comprehensive and, unlike many manuals translated from Chinese, very well written. The machine comes in two main parts; the base which contains the electronics and build platform and the frame with print head and stepper motors. It comes with an impressive tool kit – everything you need to build and operate the machine. Setup is fairly easy; bolt the two parts together, plug in the various cable bundles, level the base, insert the filament and you are ready for your first print!
It sounds a bit complicated but the instructions are very clear (do NOT be tempted to ignore them and do it by trial and error)………. it took me about an hour from opening the box to making my first print.
The SD card included contains a file (in gcode format) for printing a pair of Owls about 5cm high. As you can see from the picture, they came out very well first time – confirmation that you have put it all together correctly and that all is well. The card also contains a very old version of Cura which you will need to create the files needed to print other models. I would strongly suggest that you download a more recent version from the Cura website – I am using version 3.6 and exploring the 4.0 beta version. With this software you will be able to download models in STL format from sites such as All3DP or Thingiverse, convert them to gcode and print them.
I downloaded, converted and printed ‘Benchy’ a small boat which is a demanding print and reveals any problems/limitations in your printer. As you can see….. it turned out very well.
I then printed an articulated elephant……. printed in one part but the legs and head move!
Feeling confident I then attempted a bust of Einstein using the sample of ‘skin’ filament. You can see the printer in action in my video clip. Models like this with overhangs (chin, nose, hair etc) need to generate ‘supports’ which make them look very messy BUT they can be removed quite easily to reveal a very detailed print. My last image shows the bust after roughly removing the supports; no sanding, filling or painting – just imagine what it would look like after these steps!
Now for the bad news…… the Ultrabase heated platform is impressive BUT is very easily damaged as you can see in my final photograph. Unlike most print bases it does not require the use of tape or glue to fix your model, or require the use of a scraper to remove them…….. just let the bed cool and they pop off easily. If you do use a scraper enthusiastically (as described on many websites for ‘ordinary bases’) you will cause serious damage!!!! The instruction book does explain this BUT ‘how to print the owls’ is on page 17 and the ‘how to remove after printing’ is on page 30 after 10 pages on the use of the software!!!!!
The instructions suggest using ‘alcohol’ to clean the base after use……. BAD IDEA.
If, like me, you consult 3D printing web sites and follow their advice to use Isopropyl Alcohol……… buy some on Amazon and use it on a hot base…….. you may get the kind of damage shown in my image. In the USA most ‘rubbing alcohol’ or ‘alcohol wipes’ seem to be about 70% isopropyl alcohol but in the UK they might be 95% or even 99.9% like the one I bought.
After talking to a very helpful person on the Anycubic Support site……… the golden rule is:
Isopropyl alcohol – no more than 70% (mix with water if needed), applied gently with a microfibre cloth on A COLD BASE.
After extensive research it seems that lots of people have had similar problems and have damaged their Ultrabase by scraping, pulling off prints while still hot or using high strength alcohol. After this experience, many suggest that the Ultrabase is ‘rubbish’ but I think that this is very unfair. The undamaged part of my bed works flawlessly – now I know how to treat it – and I look forward to the replacement which is on order.
In conclusion…… the Anycubic Mega-S is an amazing bit of technology. I had expected mediocre results and lots of troubleshooting but I was wrong. If you follow the detailed instructions you can expect excellent results quite quickly.
If you do run into problems or have any questions then I have found the Anycubic support website very helpful.
which 3d printer i was going to go for as my first foray into the world of 3d printing.
This printer was my choice due to the following
* Easy to build, it came in two pieces that you just bolt together
* It has a heated build plate
* Decent size build area, not too small and not massive
* Free 1Kg of filament
* touch screen display
* USB and SD card inputs
* Filament run out sensor
you also get a spare extruder, different coloured samples, tweezers, scraper.
Setting it up was easy, bolt the two bits together, connect up 3 plugs and away you go.
I do however have a couple of notes when you set this up.
1. Loosen the filament sensor ( I found the angle ment the filament feeder was
too tight so I loosened it off and everything has been fine. )
2. Bed levelling. When you do this, make sure you have heated up the build plate
to 60c, it is not 100% level. I followed the sliding paper under the extruder
guide and scratched my plate with it cold, then later used the heated plate.
As for printing, well i have been a maniac over christmas and printed loads.
Yes printing takes a while but this printer makes things really easy.
I can 100% recommend this as your first 3D printer, solid metal construction.
To print you can load models onto an SD card or conenct directly to a computer.
For windows you can laod models into CURA and print directly to it. Which is
great if you have a PC connected directly to it.
For me , i’ve bought a Raspberry pi 3 with camera and loaded octoprint onto it.
That has been the best thing i could do, I now have a wireless 3d Printer i
load modesl onto via a web page, i can watch it and chect the status remotely.
Also it is plugged into a TP link smart plug, so using octoprint plugins I
can power the printer off and on when not in use from the GUI.
Note : I did have a problem with my LCD touch screen, Anycubic have sent me
a new one so once it arrives I will be 100% active again.