GeeekPi DeskPi Pro V2 Set-Top Box For Raspberry Pi 4 – SSD Support, Full Size HDMI, Safe Power/Reset, Ice Tower Cooler, Power Supply
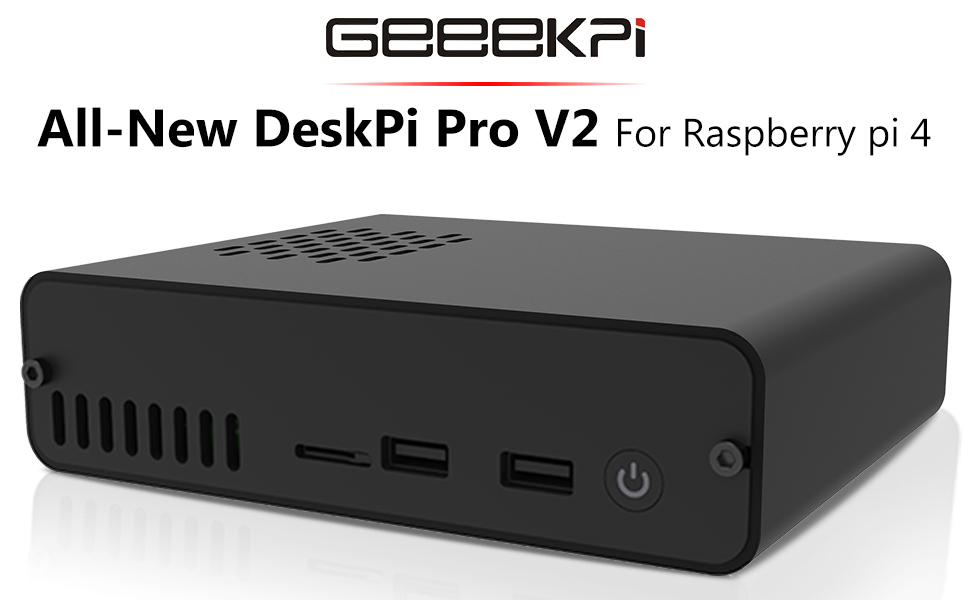

Overview
- This is an upgraded DeskPi Pro V2, which builds your Raspberry Pi 4B Board into an excellent NUC-style desktop computer.
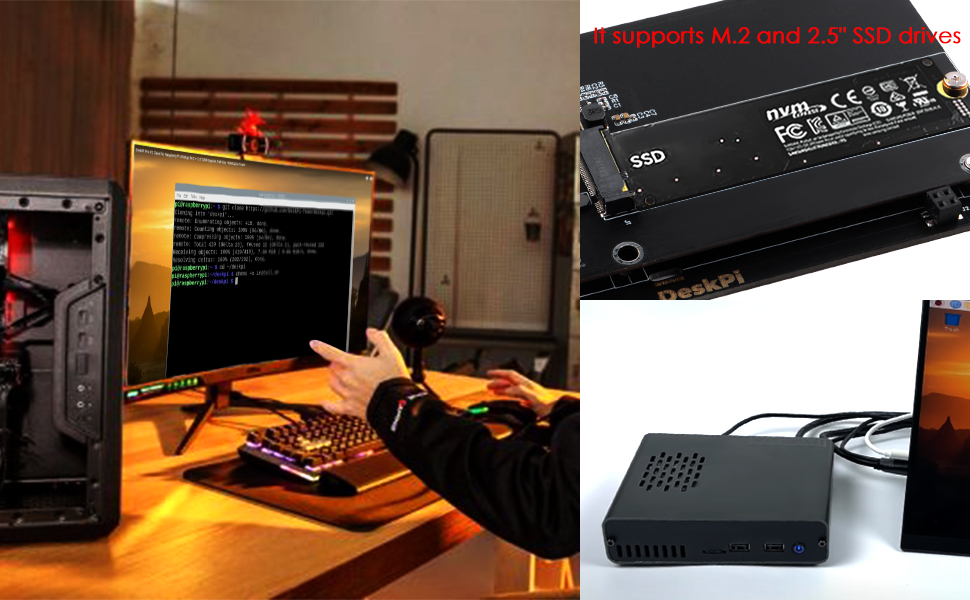
- It supports M.2 and 2.5″ SSD drives, and it’s also equipped with a safe shutdown/rest button.
- It’s with a super radiator and can automatically adjust the fan speed when the CPU temperature rises ensures that your overclocked pi4 will not overheat.
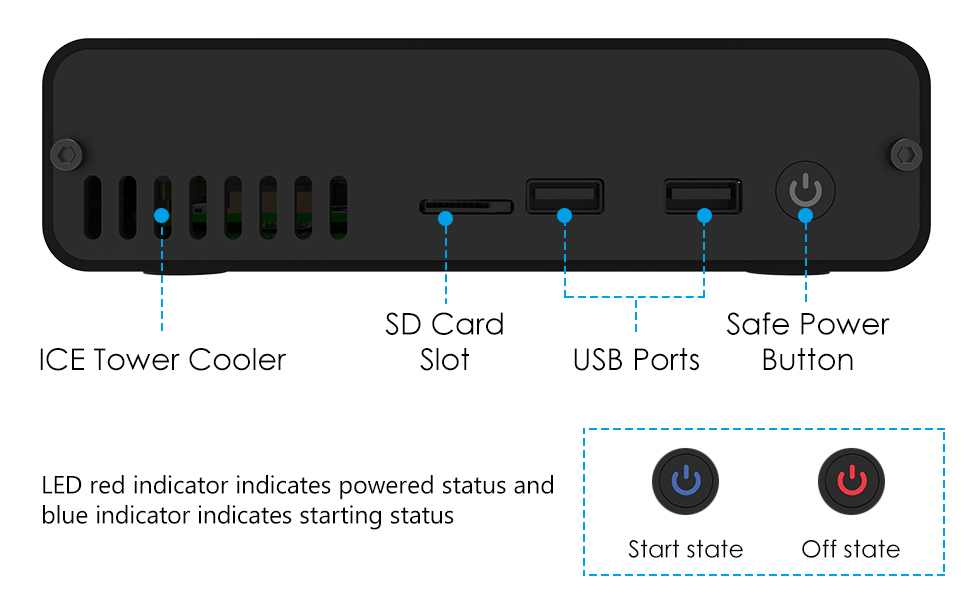
Front Side:
- Press button switch to turn on; Press button switch and hold for more than 8 seconds to force shutdown; LED red indicator indicates powered status and blue indicator indicates starting status.
- The shell script provides the fan driver and sends a power-off signal to the deskpi daughter board after the Raspberry Pi is shut down normally to cut off the power of the Raspberry Pi.
- Transfer the interface of the TF card slot to the front panel by the TF adapter board for easily access to the TF Card.
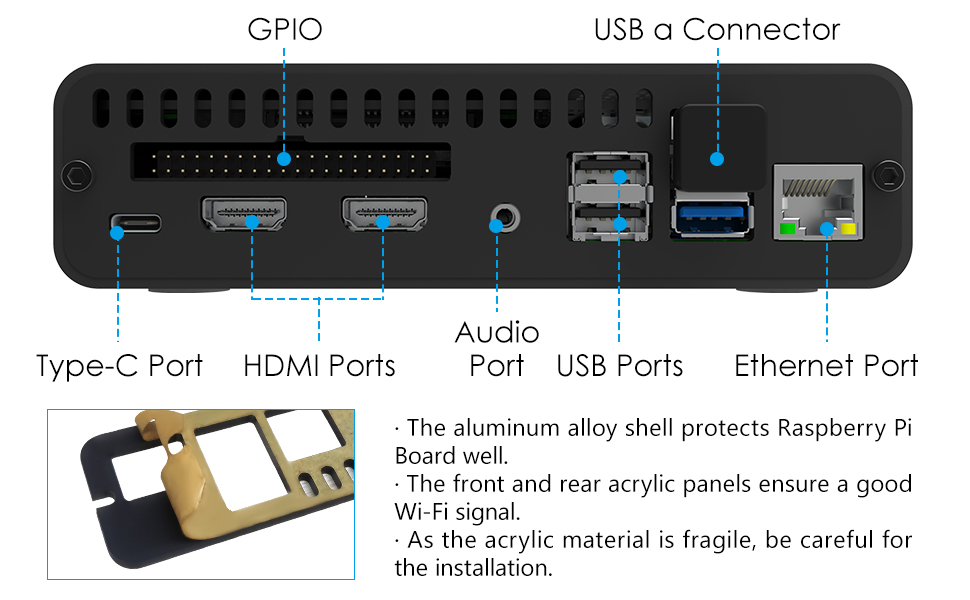
Back Side:
- Convert Micro HDMI to the two Full-sized HDMI at the back side of DeskPi Pro.
- Convert the 3.5mm audio interface to the back 3.5mm audio female interface.
- Turn the GPIO to the back side of DeskPi Pro Case and access it at the back side of DeskPi Pro Case. (Connected by FPC wide cable)
- The back USB-C provides overall power supply. The USB-C port of the Raspberry Pi is connected to the DeskPi Daughter board for the application of the OTG Host. The two front USB ports are initialized via configuration.
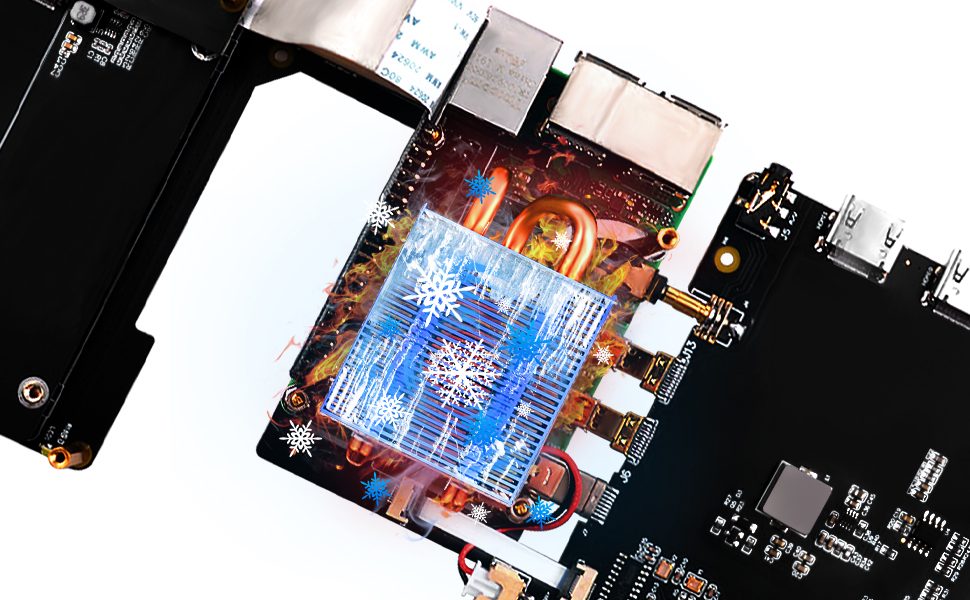
This amazing case keeps the Pi 4 cool using the Ice Tower Cooler+fan and can automatically adjust the fan speed as the CPU temperature rises.
NOTE
- Please install and configure your DeskPi Pro exactly according to the user manual.
- Our business spreads all over the world, making Raspberry Pi full of fun and convenience.
- Our technical service team is always ready to answer your questions.
- We summarized some possible faults and solutions. If you have questions unlisted in the following.
FAQ
Q1: Where can I find the driver of DeskPi Pro?
A: You can find the hint both at deskpi.com website and github.com/DeskPi-Team/deskpi.git
Q2: What kind of SSD can be supported by DeskPi Pro?
A: Just M.2 SATA SSD, it not support M.2 NVME SSD.
Q3: HDMI0 is out of work?
A: Insert the T type Conduct Cottom into the gap of USB2.0 and USB3.0 port on Raspberry Pi.
Q4: WiFi can be seen but isn’t be connected.
A:First, open terminal and typing “sudo raspi-config” and then change the “wifi country” to where you belong to. Second, check router’s DHCP function.
Q5: Front USB ports are not working.
A: First, you need to enable the dwc2 function on your OS, if you are using Raspberry Pi OS, just modify the /boot/config.txt file and adding `dtoverlay=dwc2,dr_mode=host` , save it and reboot Raspberry Pi.
Q6: Front USB Ports dos not support USB3.0?
A: Front USB Ports are USB2.0
Q7: Why my deskpi pro shows `low voltage` warnning on screen, there is a yellow flash icon on right corner of screen?
A: Please replug the power supply and test it again, make sure you are using the power supply comes with the product and supports QC protocol.
Q8: After DeskPi Pro is powered on, only the power light on, but the system and display screen does not start.
A: Please Plug out type C power cable, turn plug over, plug it again.
Q9: Abnormal signal and voltage of RPi 40 PIN IO port caused by DeskPi Pro panel.
A: Disassemble the DeskPi Pro cover and check whether the two ends of the 40PIN FPC cable are correctly plugged in.
Q10: After powering on and entering the boot screen, the RPi system cannot start.
A: First check whether the SD card has been burned to the system and installed correctly.
Then if the system still fails to start, disassemble the DeskPi Pro cover to check whether both ends of the 8 PIN FPC cable connected to the SD card adapter board are correctly inserted.
Q11: Abnormal infrared receiver.
A: Disassemble the Deskpi Pro cover to check whether the shorting cap of the IO expansion board is correctly installed in the designated position.
Q12: No sound output from 3.5mm Audio Port.
A: By default, the system audio is outputted through the HDMI interface. So you can use the raspi-config tool to adjust the output to Audio Jack (analogue).
Q13: Abnormal USB interface on the front panel.
A: In /boot/config.txt file,the code of “dtoverlay = dwc2,dr_mode = host†should be input, then restart the RPi.
Q14: Unable to fix aluminum alloy shell and the internal PCB copper pillar.
A:
- Install every component at designated position.
- Connect connectors tightly.
- Keep correct installation direction.
- First fix the diagonal screws lightly, then screw all screws into the copper column, tighten all screws.
Q15: The fan doesn’t run.
A:
- Ensure your operating system is compatible with the tested systems listed on the DeskPi website.
- Connect RPi to the Internet and install the driver correctly.
- Keep the fan cable properly connected to the PCB.
| Dimensions: | 20.4 x 16.4 x 5.1 cm; 650 Grams |
| Manufacture: | GeeekPi |
| Origin: | China |
In my previous review I complained about the weird look of the front panels. Unfortunately that was my mistake – the front and back panels have a protective coating that needs peeling off. It is quite difficult to get off, and I didn’t see it written anywhere that there was a covering. So I apologise for my initial negative review.
This kit is a little on the expensive side – but that is because it contains so much. It’s one of the most attractive cases and primarily aluminium, whilst also providing a power lead, converting micro-HDMI to HDMI, built-in SATA cables, built in SSD mounting, a power button, a fan, a radiator, thermal pads, easy SD access etc. If you bought all of these components separately and got a cheaper case, you wouldn’t be saving that much money, and you would have to get a less attractive plastic case. And it definitely wouldn’t have room for an SSD etc.
I haven’t fully finished assembling it yet, but I am happy with everything so far and will update my review when everything is up and running.
Very nice case. I really love it. Mine is running Dietpi and everything works just fine.
Despite some of the online reviews I had read the hardware more than loves up to expectations. Well designed and great instructions. All the screws you need and some spares in the box.
My only criticism is that the software could do with some love and attention. By default on an Ubuntu RPi the shutdown did not work as it should, this was easily fixed after a bit of searching turned up a 2 year old post!!
Not to bad however the fan doesn’t work unless you switch it to enable which disables the power butto
I’ve followed all the steps provided installed the script and the fan isn’t working. It did work for a couple of days until I rebooted the RPi, now /dev/ttyUSB0 is gone and enabling USB host mode just doesn’t seem to make a difference.
Update:
Support contacted me and they were great. Helped troubleshoot the issue and came up with a resolution.
This is a great case if you plan to use the Raspberry PI as a Desktop device and one of the most complete I have come across so far.
But it is not perfect ( hence only 4 stars ) as not all fits perfectly as it should, but aside from that you get a very sturdy case made out of metal and acrylic and it has everything included you need to build your Desktop PI including cooling and place for a SATA or M.2 SSD.
It also has a power button in the front, which they call misleading a safe shutdown button, the PI still has to be shut down by console or Desktop and then a long press cuts the power to the PI.
All you need is a Raspberry PI4 and an SSD, although it might be challenging to find a Raspberry with current shortages.
Pros:
– Very well and sturdy build case
– Nice smoked acrylic front and back plates fitting to the dark grey case
– all included ( Motherboard, SD card extension, SSD and M2. board, Mainboard with LED and SD card connectors )
– Very easy to assemble ( plenty of youtube videos and a good booklet )
– Good cooling design and good cooler included
– Power Supply and Power Button, not many have that
Cons:
– Shutdown button is not really a safe shutdown as mentioned
– Fitting is not 100%, you need to press a bit against some M2.5 standoffs to get all screws in
– Not all bottom screws included ( you only need 4 but there is space for 8, sadly only 4 are included ).
All in all a great and very neat looking case, which is also very well cooled, if they can make the fittings a bit better ( its only about half a millimeter ) this is the best case you can currently get for a Raspberry PI
Comes with alot of parts for your raspberry pi 4. Very good value for money.
I’m using this to host a single node k3s “cluster” on a RPI 4 4GB that’s always on and hosting some of my business apps, including my public facing website. I wanted to run this off an m2 ssd, for longevity and reliability.
Once assembled, it looks as good as the pictures. Solid and well made. Absolutely no complaints there.
The breakout board is very well thought of, but the assembly could be better – it is hard to get everything lined up properly so that it also lines up with the cutouts on the case itself, but it is certainly possible. Tolerances are very small, so it’s pretty fiddly to get right.
I haven’t tried the SATA functionality, but the m2.sata drive works great. Do make sure it’s an m2.sata and not nvme, as it won’t work – this works off the USB on the pi, whereas nvme requires a direct pci connection. I’m pairing this with a Kingston A400 SSD Internal Solid State Drive M.2 2280 SATA Rev 3.0, 240GB. Zero issues on Raspbian 11 bullseye (32 bit)
Speeds:
~ sudo hdparm -Tt /dev/sda
/dev/sda:
Timing cached reads: 1504 MB in 2.00 seconds = 752.62 MB/sec
Timing buffered disk reads: 336 MB in 3.07 seconds = 109.28 MB/sec
Pretty good and certainly more than good enough for my use case.
Visually, I only wish the U shaped USB bridge connector had a flatter profile. It’s not really an issue.
Temperature wise, seems to keep things cool enough – right now the system reports 49.7C on the CPU and 48C on the GPU. The fan control software works fine.
5* from me even if assembly was fiddly.
There were no assembly instructions but I managed to work it out. The CPU runs at about 50 to 55 degrees which is a huge improvement! With the driver installed, it works well and looks good. It’s nice having the SSD inside the case.
I found this case of good quality and it has a Industrial build quality to it. A very solid case. A nice expension of two USB 2.0 ports in front which are able to power an external Wifi dongle, just make sure in the config.txt file the following two lines are added:
dtoverlay=dwc2
dtoverlay=dwc2,dr_mode=host
One for the CH340 Serial to USB Host device and the other OTG USB ports to work.
With a bit of googling I also managed to get the PWM fan to work with Ubuntu x64.
Great case with the Ice Tower included and the QC3.0 Power (you might need a longer lead).