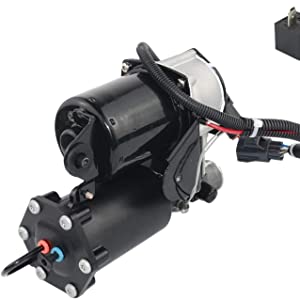
LR023964 Air Suspension Compressor Pump Hitachi System #LR044360 LR015303 for 2005-2009 LR3 / 2010-2013 LR4 6 Pins Connecto


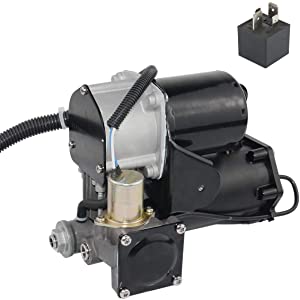
What is Air Suspension Compressor?
Air Compressors provide air to the integral components of your vehicle’s air ride suspension, keeping air springs and air shocks inflated to a necessary height based on your carrying load, towing and passengers. A properly working air suspension will keep your vehicle’s ride a smoother, more enjoyable one, and help with vehicle stability, braking and fuel economy.
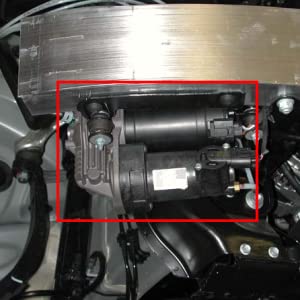
When Need to Replace Air Suspension Compressor Pump?
The main reason a compressor fails is due to being overworked and burning out.Usually, when it is having a problem, a few symptoms will be produced that can alert driver of a potential issue that should be serviced: vehicle riding lower than normal; abnormal noises during operation such as excessively loud clicking, whining, or grinding; the compressor won’t come on. If you have these problems on your vehicle’s suspension, please inspect if the vehicle needs an air suspension compressor replacement.

Compatible with the Following Vehicles:
2005-2009 LR3 / Discovery 3 V8 4.4L
2005-2009 LR3 / Discovery 3 V6 4.0L
2010-2013 LR4 / Discovery 4 V8 5.0L
2006-2013 Range Rover Sport
2006-2013 Range Rover Sport Supercharged
NOTE: Does NOT fit the L322 / VOGUE Models. Only suitable for non AMK modified vehicles.
Hitachi air suspension compressor fitted from VIN:
Discovery 3/LR3 – 5A000360 to 9A513325
Discovery 4/LR4 – AA513326 to CA638964
Range Rover Sport – 5A900302 to 9A215622
OEM Part Numbers:
- LR023964
- LR015303
- LR044360
- LR045251
- LR061663
- LR072537
- YWB500220
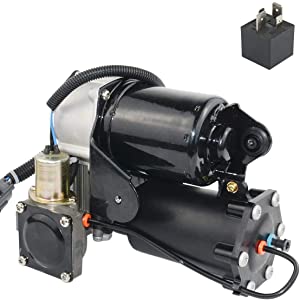
How to Replace an Air Suspension Air Compressor:
Part 1 of 2: Removing the air suspension air compressor from the vehicle.
Step 1: Turn the ignition switch to the ON position.
Step 2: Release the air pressure. Using the scan tool, open the vent valve and relieve all of the air pressure from the air lines.
After the air lines have been depressurized, close the vent valve. You do not have to deflate the air springs.
Step 3: Turn the ignition switch to the OFF position.
Step 4: Disconnect the air line from the compressor dryer. The air line is attached to the air compressor using a push-to-connect fitting.
Press and hold the quick disconnect lock ring down (noted by the red circle above), then pull the plastic air line out from the air dryer.
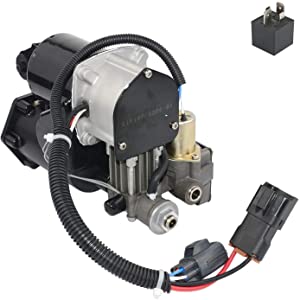
Step 5: Disconnect the electrical connector. Automotive electrical connectors similar to the one shown have a positive lock on them that keeps the connector halves solidly attached to each other. Some lock release tabs require a slight pulling movement to separate the connector halves while other lock release tabs require you to press them to release the lock.
Locate the lock release tab on your connector. Depress the tab and pull the two halves of the connector apart.
Some connectors fit together very snug, so some extra force may be required to separate them.
Step 6: Remove the compressor. Air compressors are held to the vehicle by three or four bolts. Using the necessary size socket and ratchet, remove the bracket bolts that secure the air compressor to the vehicle, then remove the air compressor and bracket assembly from the vehicle.
Part 2 of 2: Installation of replacement air compressor into the vehicle
Step 1: Install the air compressor and bracket assembly into the vehicle. Place the air compressor into its designated location and insert the retaining bolts through the bracket assembly and into the hold-down fasteners in the vehicle.
Step 2: Reconnect the electrical connector to the compressor. The connector has an alignment key or a specific shape that prevents the connector from being improperly connected.
Step 3: Install the air line into the air dryer. Insert the white plastic air line into the push-to-connect fitting on the air dryer until it bottoms out. Gently pull on the air line to ensure that it is firmly engaged into the compressor.
| Weight: | 3.87 kg |
| Dimensions: | 31 x 21 x 16 cm; 3.87 Kilograms |
| Brand: | Watlike |
| Manufacture: | Watlike |
| Reference: | LR023964; LR015303; LR044360 |
The pump arrived well packed, it came complete with mounting bracket (steel – not aluminium like the previous pump), a spare relay, full conversion pipes and pushfit connectors which are required when replacing a Hitachi pump which is normally an extra 20 if you buy it separately. New mounting bolts included as well as new air pipe connectors for the 6 and 8mm pipes (inlet and exhaust on compressor). When I removed the plugs from the compressor I heard the hiss of air escaping so it held pressure well! Also, this compressor came complete with motor temperature sensor and compressor temperature sensor, the previous aftermarket compressor I had only had motor temp. I can’t comment on longevity, but initial impressions are positive.
Like for like, don’t forget to replace the relay. It s noisier than original and still alive after 1 month. Some people complain that it fails but if the original failed, it might have been a good reason. Do you have a leak somewhere? If you do, the new compressor will overrun and fail. you can’t really complain because that s the user fault.
This is listed as “a replacement Hitachi pump…”
If you are dumb enough to receive and say the plugs are wrong, you haven’t done your homework and your pump is the AMK version which has switched MF connectors….
As a like for like replacement of an Hitachi, for this pump – YOU DO NOT NEED A ECU UPDATE via a nanocrom.
If you are switching from an AMK to this, you do.
If you switch from a Hitachi to AMK – you do.
A straight swap, you don’t.
A word on the noise levels as in other comments….
Yes it sounds different…some say its noisier… I probably would agree – but it is a different tone. The OEM pump is more throaty. This is higher pitch – so it maybe the same volume-just more noticeable. It is to me.
I connected my OEM pump to a battery on a workbench and it wouldn’t blow up a latex glove over the outlet.
This thing on the car is a different beast.
Although noisierdifferent, once it cut out, the disco was at correct height. A few hours later…I went down and started car and unusually, the compressor didn’t come on.. I deemed it was because the initial inflation was so much more powerful, that it hadn’t dropped to a level it needed a boost or top up.
After installing a dessicant refurb earlier in the year on my OEM part, and fitting new SS clips and bolts (you will need these on an older car if installing this), it was a half hour job to get my OEM part off and onto the work bench.
I swapped the bracket and checked everything was correct then reinstalled as quick.
Points i would suggest…
Lather the chassis behind with a grease oil mix.
I did this on my MOT testers advice for the chassis and 8mths later it looks superb – all rustcorrosion stopped. Don’t underseal, waxoil etc , its a waste of time and money. Grease and engine oil is the way to go. Its messy but its the best method.
I brought this pump on a hunch, ..mine had failed a few days prior – and i had scoured ebay etc…this one was advertised as “used – v good” … light scratches, not in original packaging…. – below the new version…
It arrived – brand new in an unmarked box!. I was interested how it could have been second hand so took the gamble…it was obviously because it was unboxed only…
I am pretty chuffed at the buy.
Its sorted the yellow warning issue, got the car rising again quick, and not much dearer than a used secondhand OEM version which, while OEM quality, you don’t know the history- and this part , its a big deal..
On that note, i will refurb my OEM pump so if anything happens here, I have a backup, but I feel pretty happy this is a solid purchase.
Obviously this review isn’t time served, so I may re-edit at a later date – but initial thoughts are, decent purchase.
Still working after 2 months. Have purchased from other sellers and had hem fail quick. This one is still going
Great compressor only installed it few months ago brought one on eBay lastest 6 months so tried on Amazon based on seller rating and comments.
Only thing I go say is check your connections as I had to cut off my old compressor connection and solder on to fit it came as female and needed male connection easy to do
It will replace an hitachi type compressor as has everything required to install it. The only thing is the ecu requires the compressor type to be changed.. it will work without but it changes the temp sensor type and thresholds as well as duty cycle to avoid damage to the compressor so does need doing.
I will say this though. Complete kit and new compressor, ecu flashed at landrover will still cost less than an original amk. So yeah just do it. It fixed all my problems car lifts like a champ now..