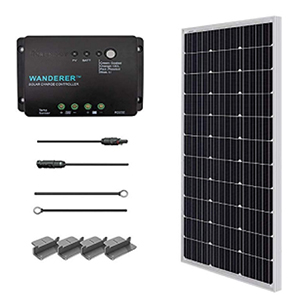
Renogy 100W Solar Panel Kit with 30A Solar Charge

Renogy 100W Solar Panel Kit with 30A Solar Charge Controller, 12V Solar Kit for Campervan, Motorhomes, Sheds, Boats, Trailer, Marine, Off Grid Homes
| Dimensions: | 119.41 x 3.81 x 53.01 cm; 9 Kilograms |
| Model: | KIT-STARTER-100D |
| Manufacture: | renogy |
| Dimensions: | 119.41 x 3.81 x 53.01 cm; 9 Kilograms |
| Origin: | China |
The controller works well, the panels generate voltage and amperage comparable to other 100 watt panels with a great price on the kit. My kit was missing the jumper connector but the agent I spoke with at Amazon allowed me a credit to order a new jumper kit. I have purchased a total of eight 100 watt panels from Amazon and so far these panels have been the most reliable. Some of the other makes have had unresolved performance issues.
The controller works well, the panels generate voltage and amperage comparable to other 100 watt panels with a great price on the kit. My kit was missing the jumper connector but the agent I spoke with at Amazon allowed me a credit to order a new jumper kit. I have purchased a total of eight 100 watt panels from Amazon and so far these panels have been the most reliable. Some of the other makes have had unresolved performance issues.
Easy to install and instructions are clear. If I had to criticize anything it would be that the wiring to the battery are too short making it so that I ended up buying proper lengths. The other criticism is no fuses come in the kit although they are sized and mentioned. Put them in and raise the price. This is my second time to buy Renogy.
The Renogy 100 Watt 12 Volt Solar Panel kit has a nice panel (well made) and it outputs 22-24v in direct sunlight. But if you are intending to use this for anything OTHER THAN charging a 12v battery, the included controller is extra baggage. The controller must be connected to a 12v battery. If you want to get 12v out of the panel, you'd need to purchase a separate voltage regulator.
The Renogy 100 Watt 12 Volt Solar Panel kit has a nice panel (well made) and it outputs 22-24v in direct sunlight. But if you are intending to use this for anything OTHER THAN charging a 12v battery, the included controller is extra baggage. The controller must be connected to a 12v battery. If you want to get 12v out of the panel, you’d need to purchase a separate voltage regulator.
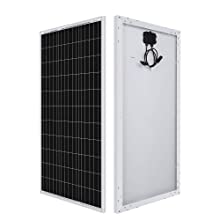
Solar panel
This item is easy to use, has worked well and does not require lots of maintenance.
Keeping a 100ah lifepo4 topped up without any struggle.
The only downside is you will need a 10a fuse.