Linksys Velop WHW0303 Tri-Band Whole Home Mesh WiFi 5 System
Linksys Velop WHW0303 Tri-Band Whole Home Mesh WiFi 5 System (AC2200) – WiFi Router Extender & Booster up to 6000 sq ft for 60+ Devices – Supports MU-MIMO & Parental Control – 3 Pack, White
| Dimensions: | 11.5 x 39.5 x 25.5 cm; 2 Kilograms |
| Model: | WHW0303-UK |
| Manufacture: | Linksys |
| Dimensions: | 11.5 x 39.5 x 25.5 cm; 2 Kilograms |
| Origin: | Vietnam |
We use three towers (“nodes”) in a tall thin house over three floors. We have good wifi everywhere – a nice, stable system. And good speeds all round. It took a bit of trial and error working out the best place to position them (and this makes all the difference) – expect to spend an hour or so, experimenting – but the end result is excellent.
This technology isn’t cheap though, is it?
Works well though little tricky to set up. Just don’t rush it and take your time. . I bought three to add to the pair I got from Community Fibre my ISP
A great bit of kit, out preformed anything broadband providers give you hands down.
This mesh router is easy to install and performance is excellent. There’s no dead spots in my house. Highly recommended for 2 rooms house.
Powerful Linksys router.
Prefe the Web interface for setting up but got used to the mobile app.
Had 1 or of 6 play up twice already but the others have not given me any problems 2 months down the line.
Just signed up to community fibre and they use these exact kits. To get a multi room kit with CF it costs an extra 10 to ensure Wi-Fi in every room. I plan to stay with them for 2 years so I bought these to extend the reach all around my house. 1 unit they give covered practically all of my house but it was slower upstairs now with 3 I have good coverage even in the garden.
Set up is really easy on the app. You just choose add to current network and after 3 mins it’s connected. No technical knowledge needed.
Easy to set up (plug in and set up one at a time) and have made our wifi consistent across the house. Nothing very standout but comparatively well priced. No complaints.
Needed to reach the loft. And had it installed at the same time as broadband.works well and recommended it to others.
Has made a significant difference to connectivity performance throughout my house.
Easy to set up so did not need any technical support. I work remotely from home and it has helped me work faster and more efficiently. Recommend.
i have had a ac1200 velop system since 2018, upgraded to 500mb full fibre this year, with this acting as the parent node my signal is so much stronger everywhere, over wireless in the same room i am getting 500mb+ DL, in the next room i am getting ave 350mb + over wifi, my sonos in the kitchen is more stable, wifi in the bedroom/office upstairs is more stable than before, would like to replace all my old ac1200 nodes with the new ax type, 1 has made a such difference
Whilst this is an expensive mesh solution, it has worked perfectly so far and done exactly what it is intended for – creating a single network that covers our house. We have an old property with a newer extension and previous BT Home Hub had areas it would not reach, and we had to use two networks to get coverage downstairs, and upstairs was always extremely patchy.
The Linksys app worked really well and guided the set up using our Home Hub 4 as the modem. When plugging in the parent node, the app says use any port on your modem, but it actually has to be an ethernet port – the WAN port will not work. It just took a minute or two to connect, choose a new network name and it was a simple as that. The second node connected without a problem and the app helped check that the position upstairs was suitable. The third node for our extension has a wired connection, as we put in a Cat 5 cable during the extension build. Again, this was simple to set up – just switch on the node (close to the parent) and add it to the network as a wireless node. Move it to your desired location and use your Cat 5 cable to attach one of the the node’s ethernet ports to a parent node ethernet port. It’s a simple as that, as the system automatically will switch the new child node to wired set up. All 3 nodes now cover our 4 bed house and single story extension in a unified network, which is great for mobile wifi calling (very poor mobile network), shifting where you work, wireless printing etc. The speed of the wifi has noticeably improved with the tri-band too, which is a bonus, though it wasn’t that bad previously.
One final adjustment was to change the Home Hub configuration via the online Home Hub Manager to disable its wifi, just so there was no contention with two networks. It’s now just working purely as a modem and seems fine to do so.
Overall, very happy with the investment in this. It may be pricier than some, but so far no complaints at all.
I live in a two floors standard UK house and I always struggled with the connection. My VM router is placed on the ground floor, in the first room – living room.
Before, I used one of the TP Link mesh wifi system with 3 nodes – AC1200 if I remember right. At the beginning it was alright but in time I installed multiple smart light bulbs, cameras, wi-fi connected appliances, etc. Unfortunately, I couldn’t get more than 200Mbps in other rooms with TP Link. Initially, I went for the Aeero system from Amazon with 3 nodes, wifi 6, but I couldn’t get better results – actually the connection was even worse – approximately 100Mbps speed both upstairs and downstairs.
I also forgot to mentioned.. all the nodes (apart from the main one obviously) were connected wirelessly.
After a long, looong research, I decided to spend more than I ever thought and purchase the Linksys mesh WiFi – 3 nodes – Atlas Pro 6.
As per the previous reviews, their app is not the best one out there, that’s for sure, and it was quite painful to set up the mesh, but it was really worth it in the end.
For a better understanding.. I installed the main mesh into the first room, downstairs. The second node installed it was on the upstairs room, exactly on top of the main node. The 3rd node has been installed in the kitchen, second room on the ground floor.
I’m not longer facing any connection issues.. on both floors, no matter the room, I’m getting no less than 400Mbps. Most of the times, it reaches the top speed, 550Mbps. Even in the very back room, the bathroom, I’m getting at least 350Mbps.
Also, in the garden I’m getting around 250Mbps, where I didn’t had any connection at all previously, with both TP Link and Aeero.
I know.. this is an expensive system, and as I mentioned before, I never thought I will spend that much money on a WiFi system.. do i regret it? Absolutely not.
Also, just to mention again.. the main node is connected to VM router by an Ethernet cable. The other 2 nodes are connected wirelessly.
Long story short.. if you’re looking to get the best out of your money and to have a superb internet connection, go for Linksys, you won’t regret it.
Arrived same day from Amazon. No unnecessary packaging. Waterproof film wrap on the box so was fine left out in the rain.
Nice unboxing experience. Directs you to download an app to your phone. The app takes you through the connection steps – very easy. I connected to a talk talk router. Turned off the Wi-Fi network on the talk talk router first by using the talk talk control panel.
Set up the new network with the same name and password as the old network. This meant I didn’t need to enter details into any of my existing devices.
The tower is quite small and good looking. No problem leaving it in view. Plug itself is square, bulky but also white and labelled with Linksys so you know what it is in future. Little surprised it didn’t use a standard usb c socket but it doesn’t really matter.
After half an hour I’d connected all three nodes.
I’m in a mid terrace house and the reception in the kitchen was rubbish before – kept on dropping the network. I’d used Speedtest on my phone (in airplane mode and Wi-Fi on) before I bought the mesh network to map the speeds around the house. Router is at the front of the house where the phone cables come through the exterior walls. Had ok reception on the old network upstairs in a middle bedroom so installed a node there. Then installed the third node at the back of the kitchen which covers the room and garden.
Now have 75mbps throughout pretty much everywhere. This is better than I was getting next to the talk talk router so is an upgrade. I only pay for 65mbps av speed internet so it’s great.
You almost certainly don’t need faster Wi-Fi 6 unless you pay for a faster internet connection.
Would suggest thinking about plug sockets and locations of the nodes before you buy.
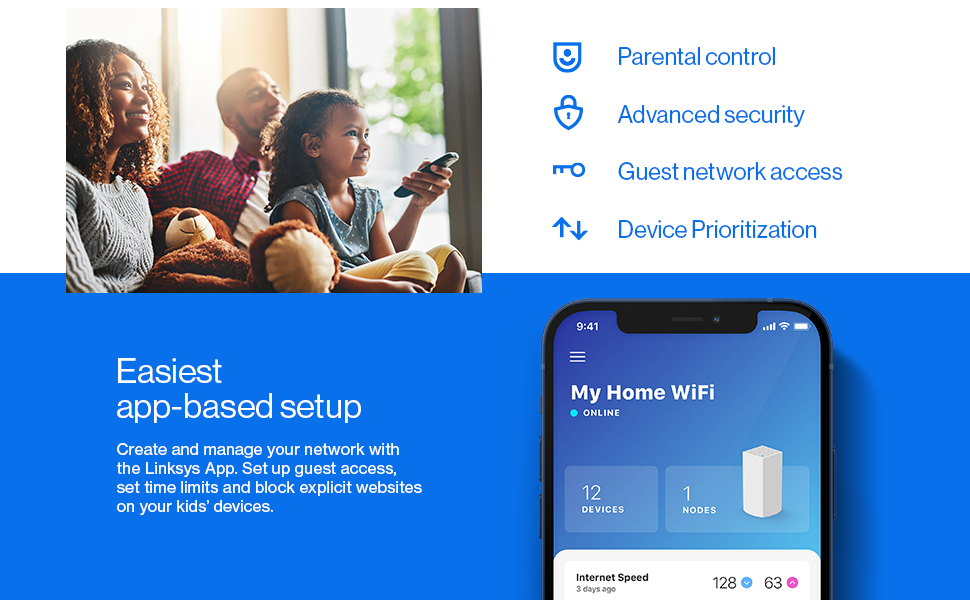
The app has basic parental Controls included so you can schedule / pause internet access for individual devices and block specific websites.
Basic but combined with ISP and family screen time controls is fine. No real need to pay for the shield subscription.
Also works with Apple HomeKit so your smart devices are less likely to get hacked. Easy to add to the home app.
Highly recommended and you can tell I love it otherwise wouldn’t have left such a long review. Only caveat is that I’ve only just installed it so no long term experience!
Been rocking this system for around month so far. I got these because of moving into a new home and hopping on the “Smart Home” train! With that being the case, I figured my EE router probably wouldn’t be up to the task with all the devices I wanted to connect to it. In comes the Linksys system. Works great with Apple HomeKit (although it’ll moan about a couple of nodes as Homekit can only deal with 1 – no an issue overall as it’s had no effect on any devices connected to the network – just looks a bit weird in Homekit).
So – done a comparative test between JUST my EE router and then this system…
with this, I have ZERO dark spots in or around the house and can get wifi from close to 3 doors away. By comparison the EE router would start losing signal the moment I went downstairs.
My only issue with this is…I had to change the primary node due to upgrading my router as the upgrade meant putting it in a different room on a different floor of the house. I called up Linksys Support and there’s no way to change the primary node WITHOUT resetting the whole system. I was GUTTED on account of having already setup my Homekit accessories. (FYI – Link sys stayed on the phone with me for an hour talking me through the whole thing which was refreshing) Did it and then realised that I had to essentially reset my Apple Home and add everything again from scratch (Well, the hubs more than anything). From what I can tell, they’ve sorted everything apart from certain changes to configuration – if they had that, this would have got 5 stars but they don’t, so it didn’t.
Would I recommend – ABSOLUTELY!! It’s a great system…the speeds are reliable and consistent and I have ZERO connection issues. Even playing a 4k Movie from my NAS Drive to my phone and then through Apple TV, take a few seconds to kick in but handles it like a champ!
Firstly, I am an IT engineer, I build on prem networks, configure firewall and also build cloud networks in Azure, so had it all worked out how I was going to set this up………… Jesus it took all my IT skills to master this little baby. Once working it is excellent, 5 bars everywhere.
I have a Virgin router and a network with LAN ports in each room, but wi-fi is crap, kids always complaining how the wireless sucks and i’m an IT expert (their words, not mine, but I am good). When I tell them the way wi-fi works they kind of zone out and look like I have asked them to take out the bins.
Best set up procedure, Connect one node to modem (do not connect to LAN as well, if you have one), follow the instructions on app, this takes a little while, once connected configure wireless SSID and passkey. Done, that’s the easy bit. Next step is connecting the other nodes, one at a time. Stay in the same room and keep your phone near, again follow instructions on app, it says this will take 6 minutes (harumh). After 15 mins it should connect (mine didn’t, so connect again). Once done do the same with the remaining node. That’s it (2 hours later), now unplug the two nodes and set them up where you want them, they take a few minutes to connect (at least 5 mins) and away you go. You now have a beautiful bouncing baby wi-fi network that will be the envy of your friends. It is a good idea to set up the guest wireless, just the flick of a slider bar and input the SSID and passkey, it keeps them off your network and has a shorter DHCP lease time
Testing – when my iPhone 11 is in the same room as the Velop router it gets 705Mbps, a Lenovo laptop with an AC wifi adapter I get 866Mbps. Further away on the ground floor my iPhone gets 300-400Mbps on average, the laptop gets 400-700Mbps. The WiFi signal barely manages to go beyond our outer house walls. I am certain this is because our house is made of traditional stone on the outside and pretty solid masonry on the ground floor between rooms. Explains the above speed drop off for the iPhone. So I’ll likely need a second device in/or near our conservatory to get garden WiFi. As a baseline reference; with an older Asus RT68U AC router this is significantly better coverage for a single router. Overall I am very impressed.
Device Management – is a different kettle of fish. You can use a web browser and login to it. However, it’s very keen you use the Linksys App instead. The app does it’s job well. It’s geared towards novice users who just want to set it up. Speaking of which the app device setup flow was a piece of cake. Very simple UI with minor user input, it’s impressive how things have changed.
The apps main purpose seems to be more about current status and info, than making any significant change to its operation. It does lack information on device connectivity speed (I had to use a separate app for testing mobile to router connection speeds). It is also missing control which of the tri-bands have specific WiFi traffic on. For instance I’d like my iPhone on one 5Ghz band at WiFi 6 speeds, the other 5Ghz band in mixed mode for WiFi 4 + 5 speeds. 2.4Ghz for any device that needs to defer to it for better range. This is technically managed by the routers own algorithms as is the channel selection for each to be broadcast. I appreciate that is a selling point of this device – self management be it a mesh setup or a single node. I just like to make my own technical decisions. Ultimately for the price of the device it does give you a very technically sophisticated device that operates very effectively. For said price, I’d have expected an expert mode, allowing me to change what I want though.
Summary – I think the product itself is excellent and does exactly what I needed it to do; make sure all our devices get WiFi and the router has plenty of resources in reserve to manage all the traffic we throw at it. I did originally have the Velop WHW0303 3 pack (WiFi 5 AC Tri-band version) but wanted more wired ports for our Hive, office desktop computer etc. WiFi 6 also future proofed us and because it’s physically bigger allows for more antennas for each one of the three WiFi bands. I’d like to see Apple Homekit support as the cheaper WHW0303 has it advertised as ‘Coming Soon’. So I’d hope that extends to their top product too. Also expose more control in the app for the routers features.
I should start by explaining our situation. We live in a 3 bed room house that is quite large for the number of bedrooms. Additionally, we have recently built a free standing studio in our garden for my wife to condut her business from. Because of this, a single Wi-Fi has never been an option for us. Until now we operated with three access points: two covering the house and one the studio. Each had its own SSID after a previous attempt to set them to the same SSID caused lots of issues. All access points were linked to the central router via CAT5E cabling that I installed a few years ago. As I moved from my study to our kitchen to the garden studio, I would need to connect manually to the three different access points.
The LinkSys WHW0104 Velop handles this much better. I am able to wander around our property and devices switch seamlessly. I also find the LinkSys app to manage the network very useful.
Setup was a bit fiddly. The system has a master node, and a number of slave modes. Although the documentation says you can use Ethernet to link slaves to the master, it does not say explicitly that the slaves have to be connected to the master and not route via the cable modem. Instead, they need to be wired directly. In our case routing also involves a switch as the masternode has two ports, once of which is taken with the connection to the cable modem. Not the fault of the WHW0103, but I failed to get the system working with the cable modem being configured in cable modem only mode.
I started configuring the network, discovered a number of issues and wanted to start again. This turned out to be harder than I thought with a number of false starts. As a result I wanted to reset everything back to its initial state. This turned to be more fiddly than I expected. This is partly due to the app remembering previous access points. Getting the app to forget the already badly configured network, or getting individual nodes to forget their configuration. Much use of the LinkSyst forums was madel.
Our house is an L-shaped bungalow, and for various reasons the router needs to be near one end of the L, not in the middle. I tried Powerline (Ethernet over mains) to feed a wifi repeater, but was let down by mains wiring that sometimes caused problems.
So I bit the bullet and went for Velop. We needed quite a lot of devices (6) to allow the signal to hop from one node to the next. Our layout is such that each node can only see the ones either side of it, so it’s not a true mesh where each node has more than one route back to the parent device. The range of each node, for getting the node-to-node backhaul signal from the router, is fairly limited because it only uses 5 GHz rather than 2.4 GHz, even though it can use both 2.4 and 5 for devices to connect to a node. With fairly thick brick internal walls (1850s house!) we need one node every two rooms to cover the whole chain from the end of one branch of the L to the end of the other.
But it works – brilliantly! The instructions are a bit vague in places – for example they don’t say that it’s probably a good idea to turn off the wifi on the router so it doesn’t conflict with the wifi from the “parent” node that’s connected by Ethernet to the router. And setting up port-forwarding (so we can access our security cameras when we’re away from home) is interesting: if you need to do it, you need to have port-forwarding on the existing router and then the same forwarding on the Velop network: the instructions don’t mention that and imply that you only need to configre it for the Velop.
One little caveat – the reason why I’ve only given it 3 stars for stability. Having had the Velop network working perfectly for about 2 months, some nodes have recently started losing contact with the parent node (displaying the dreaded flashing orange “no signal” light); they sort themselves out again without needing manual intervention after a few minutes, as normal service propagates gradually from one node to the next one downstream (ie further from the router). But it’s odd that it’s just started when nothing has changed that I am aware of. There needs to be a means of each node displaying second by second the strength of the signal that it’s getting from its upsteam node, to see if the signal is a bit borderline at times. I may need to rejig the network and insert another node between two existing ones.
The app works OK but is clearly aimed at things outside bridge mode.
Conclusion: Velop in bridge mode has settled down after setup after restarting the network. Online help for bridge mode not very useful. I could not find things about ethernet connectivity for bridge mode. Some blog info on the community linksys site is helpful. Mailing support to find out about amber lights in ethernet bridge mode: still waiting for response.
UPDATE June 2020: excellent wifi coverage and has been very stable and reliable (bridge mode) I had a spare Linksys dual band node and it fitted in perfectly to my triband setup giving me four nodes. The App has had an update and is easy to use. Rarely, a node goes “red” for half an hour or so: but I now leave it and it hooks back in on its own (I used to di restarts and stuff – probably was overkill)
UPDATE: Nov 2022. The App from Linksys now has much better support for bridge mode as well ss when a node is connected by ethernet to the parent. Reliability and stability have been very good. Very, very rarely a child node ‘goes red’ and offline. Cured by a power off/on cycle.
So, very happy with it (bridge mode) after further extended use…
This system is a bit unusual and as a result some people, even those with network configuration experience, may find themselves confused when they set it up. I read several reviews complaining about what you cannot do with this system, however I found that it works very well for my needs and in my opinion it can satisfy the needs of most average users.
So here is how it works:
First of all, this system is not a modem and has to be connected to a device that can function as a modem, connect to the internet, acquire a public (WAN) IP address and then allocate a local (LAN) IP address to the mesh network. Most, if not all, the modems/routers supplied by the usual internet providers can do this.
If you are looking at buying this product, you most likely already have a modem and WiFi router at home. To connect the Velop, just follow the incredibly basic and simple instructions. Essentially the process consists of creating an account with the manufacturer, download an app to your mobile phone or tablet (I use both the Android and Apple versions and they both work seamlessly), connect one of the three bases to the modem/router with the provided network cable and follow the process as instructed. One key element is to be patient and once the first base is configured, adding the other bases to create the mesh network is straight forward.
Note that the Velop will create its own WiFi network, separate to the WiFi network provided by the existing modem/router. Most likely the modem/router will create the usual LAN with a 192.168.x.x IP range, whereas the Velop will create its own LAN with a 10.120.x.x IP range. Anyone with even just a basic networking experience knows that the two networks WILL NOT communicate with each other so there is no point in keeping, for example, a printer linked to the modem/router and a computer linked to the Velop network as you won’t be able to print. For either network to work as intended all devices have to be connected to the same network. The best thing to do once everything is configured, is to switch the old modem/router’s WiFi network off and just use the Velop network — you will never look back!
It goes without saying that if the Velop has to work completely wirelessly, the bases MUST be able to communicate with one another and therefore be within their WiFi range. They do not necessarily have to communicate with the unit directly plugged into the modem/router, so long as there is a path to it, such as: base 1 connected to the modem/router, base 2 connected to base 1, base 3 connected to base 2. In this case base 2 will bridge the connection between bases 3 and 1; meanwhile all three bases will provide WiFi connection locally to them and roaming from one base to the others will be seamless. The system can work even if the bases are not in each other’s wireless range so long as you can connect them via a cable or via power line adapters.
Once you have configured everything, you will have a great network able to provide high speed connection (subject to your internet provider’s maximum bandwidth). This system allows a lot of settings such as various WiFi configurations and options, parental control, device bandwidth prioritisation, remote monitoring of the home network via the app and online account, DHCP or manual settings, port forwarding (single and range), uPnP, MAC filters, separate WiFi guest network, etc..
I know there are people who are not happy about creating an account or having to use an app (though in fact you can also use a browser on any computer), however all taken into account this is by far the best network I have ever had at home and I had no problems to configure it to meet my needs. So much so that I bought another two units. I am now running a mesh network with 5 units in total, which covers the whole house with no gaps, plus a sizeable area around it. A real five-star network that you’ll be happy with.
The items were initially really hard to install and this was more down to the current set up i had for my home network. I was originally using a Virgin Hub 3.0 in ‘Modem Mode’ and a ASUS router to push the WI-FI around the house. I was having trouble getting coverage in the loft and brought this 3-pack to see if i can solve the problem. I eventually got this working by following the instructions on the Linksys app which i downloaded on my phone to get the first node installed. Key here in my case was to turn off the modem mode and return the Virgin Media Hub 3.0 back to normal and disconnect my router (ASUS) and power this off. You will not need the router (in my case the ASUS router) as the Linksys product will be the new WI-FI system for the house.
I connected my my Linksys node to the Virgin Media Hub 3.0 and this eventually connected and was set up. The speed on the node which is located in the living room is really good and i was getting near enough the 100mb i am subscribing for. The second node was plugged in the middle floor and this successfully set up on the Linksys app by connecting to the node in the living room. Again the speed was very good and was getting between 65-80mb in the middle floor with some drop out in the box room but this has been the case all the time but still better than my old set up. Now the third node become troublesome to connect as it was a little far away and i was told i would need to move it closer to get a stronger signal. I moved this to various locations in the loft room and with no luck in terms of full connectivity. This was really disappointing for me as i needed her more than ever as i have constant drop out and terrible speeds in the loft if any on most days. The node would only get 8-11mb of speed in the loft which was better than before but no where near my 100mb i am paying for and would struggle with streaming etc.
The one thing i did which changed the whole scene was to connect this node next to my socket which had a hard wired ethernet port next to it (i.e. one Cat 6 cable into the node and the other going into my wall socket for the ethernet port). Once connected i had speeds going near 90-105mb which was incredible! I am so glad that i now have WI-FI in the loft running at top speed and allow us to use our wireless devices to the maximum speed possible.
I appreciate not everyone will have hard wired ethernet ports in their homes but if you do, please remember to do this as the system hits top speeds and allows you to benefit from having really strong WI-FI in the house.
The Linksys app is really good too in terms of setting up and also the website allows you to personalise in terms of changing your SSID and passwords along with setting up guest access etc.
All in all i am really happy with my purchase and glad i am now getting better speeds all around the house at a reasonable cost.
Now the setup – pay attention to save yourself hours of frustration:
1. Set up the first node exactly as instructed – it’s simple and easy to follow.
2. At the end of this process it asks if you want to set up your second node now or later – whatever you do do NOT select to do it later. If you do it will then download and install an update on the node you just installed. This update means it can no longer talk to the two you haven’t installed yet, and you will not be able to install them without a lot of messing around.
So what if you did click to do it later and you can’t install the other two? Well, this worked for me (after 5 hours of retesting and retrying)
1. unplug the first node you installed from the router and turn it off.
2. pick up your second node and reset it (hold red button) . Plug it into your modem.
3. Uninstall the app from your phone (important)
4. reinstall the app
5. open it and choose to install new device. Set this node up exactly as you did the first one. You can use all the same settings
6. once done. Choose not to install another node, the app will then update the firmware on the node.
7. once all complete, reset the node with the red button (the firmware stays installed)
8. Now repeat with node 3 (including app uninstall and reset)
9. The app will now show you as having multiple routers (it thinks all 3 are the first node), delete the two which are showing as “disconnected”
10. Reconnect the first node you set up to the router, in the app go through the process of adding new nodes. Now that they have the same firmware, they’ll all install easily.
All good things come to those that…. persevere!
It’s all working now, but it wasn’t smooth and here’s how I did it, with some background first.
I’m lucky enough to have ethernet running throughout my Edwardian 3 storey house and have tried to get wifi throughout using access points. With the same SSID used on router and access points, I found myself on the top floor connecting to an access point on the ground floor and unable to switch (as they are all have the same SSID). With a setup where each access point has different SSIDs, I find myself having to switch my wifi as I move throughout the house. Neither ideal. MESH is meant to be the holy grail.
Went for the dual band as tri was unnecessary as I’m able to take advantage of the ethernet backhaul.
1st and 2nd nodes setup easily, but the 3rd tested my patience and endurance. No matter what I did, I could not get beyond the blinking red light of death. Reset the whole system multiple times. Tried the offending node as the master and it worked fine so not a hardware problem. After reading around, I saw a mention of firmware versions/updates. In the end I got my system to work by:
1. Resetting all nodes by holding down reset button for several seconds, letting them boot to purple and then turning off. You wouldn’t have to do this if you were setting up for the first time.
2. Turned on 1st node and setup as per instructions
3. Rather than add more nodes I exited/completed the setup process with just 1 node
4. Within app disabled auto-firmware updates
5. Booted 2nd node and connected to first with ethernet — actually via a switch but I doubt this is relevant
6. Followed ‘add node’ setup instructions in app — which is accessible from the very bottom of the menu > set up a new product
7. First time round the 2nd node failed, but after rebooting it completed setup process
8. Again, exited/compete installation
9. Turned 2nd node off
10. Now for the problem 3rd node I noticed that the app had re-enabled firmware auto-update so disabled that again
11. Booted 3rd node and again connected ethernet
12. Followed ‘add node’ setup instructions from app and it worked!
13. Turned 2nd node back on
14. Disconnected ethernet cables from 2nd and 3rd nodes and they stayed blue and connected.
SUCCESS!! Now, I may not have the exact steps here and I’m tempted to reset and repeat the process, so I can make a note as I go along, but to be honest after perhaps 4 hours of messing about, I’m quite happy to leave well alone. Given I was trying multiple things at once, it’s hard to say if I solved the problem by messing with firmware auto-update settings or by plugging in ethernet during setup or a combination of the both.
Now it’s all working and I’ve very pleased with the results. I want to do more testing throughout the house, I’ve actually got 2 connected via ethernet — incidentally there are 3 x switches between these 2 nodes — and the 3rd is wireless but with ethernet connected to iMac. I’m on Virgin’s top home fibre optic service, getting 350Mb (which I actually do get when wired into the router). Over wifi, I’m getting speeds of between 100Mb and 200Mb throughout my house. I will do some more speed testing and plan to have the 3rd node wired in as long as I can get my iMac — which isn’t connected to my home network — up to the 150Mb speed that it’s getting from wireless 3rd node.
In summary, I’m very happy with my wifi throughout the house and so far all is working really well and super-fast. Setup on the other hand. Ouch, ouch and ouch some more.
Lastly price seems to have jumped up quite a lot since I purchased just a few days ago. Bit odd.
NOTE: that the setup LEDs on each tower apparently switch between – it says in the setup app – blue and purple. But if you’re red/green colourblind, then it’s impossible to distinguish between blue and purple! ..Just a small annoyance ..but still, a really stupid choice by Linksys.
After setting up, they – the whole ‘mesh’ network – really will deliver fast wi-fi everywhere. But setting up a wi-fi PRINTER to use across this new ‘mesh’ network may take another hour or two, I found. You may need to re-install printer drivers, etc, if your printer has already been connected to a different network. Using the online Linksys installation web-page (..although it suggests using the app instead, but the web page works great..) you can force the new Linksys ‘mesh’ to broadcast its own ID (..its ‘SSID’..) by clicking on the relevant onscreen button, as the units – unlike many other routers – have no ‘force-send-SSID’ button of their own. It may be a job to get a printer – e.g; our Epson L355 – to accept this new SSID as the network to connect to ..and so complete re-installation of the printer may be necessary – it was for us.
The usefulness of this long-winded procedure is, though, that we can now print from any room in the house – via the Linksys wi-fi ‘mesh’ – instead of having to go to the separate room where the wi-fi printer sits! ..Great!
What an absolute faff to set up using the Android app. Bought the 3 pack and the first node just would not set up properly. After getting extremely frustrated I put that node to one side and tried another. That worked!
Once I had one node set up the app was simple to use. I managed to get it mimicking everything that my previous router was doing in minutes (port forwarding, address reservations etc).
Then I decided to add a node to test the mesh capability out. Cue the frustration again. Neither of the two other nodes would add. Both would flash red implying that they couldn’t connect over Wi-Fi. Not to be put off, I plugged one into the network using a cable, reset it, logged into the web interface and it worked first time. Disconnected from the cable and Wi-Fi was stable. I can only put this down to a buggy setup process in the app.
Two days later and I could no longer log into the web interface, and the app would not detect any Linksys devices on the network – the Internet connection was fine though. I restarted the parent node and all has been fine since. I’ll keep an eye on this.
Re: speed, signal strength and Wi-Fi stability; everything seems fine and on a par with my previous router, but in a much more compact and pleasing on the eye package. I’ve been able to stream multiple movies in the house and speed tests show that I’m getting full download and upload from my ISP (350Mbps down and 20Mbps up) – don’t rely on the test available in the Linksys app or admin page as the download speed seems to be well out.
My devices that roam around the house seem to move between nodes without issue. Those that are static seem to stay on the nearest node, so all seems well.
Aside from the setup grumbles and the hiccup a couple of days later all is well and I’m currently happy with the performance.
I was attracted to Velop as opposed to some of the competing products as it operates as a true mesh (rather than master / slave) which can automatically find the most efficient path back through the network. Whilst this doesn’t matter in my 2 node configuration, I may add further nodes depending on works going on in the house and for the garden office. It also uses a separate backhaul wifi network, rather than stealing bandwidth off the main interfaces, so in theory there shouldn’t be any significant slowdown on nodes on the periphery of the network. Finally, it can use the inbuilt Ethernet ports for backhaul rather than WiFi, allowing individual nodes to be located further away from one another where structured cabling is present.
In terms of aesthetics, it is a matte white tall rectangular(ish) box. It does play with the shape somewhat, transitioning from a perfect square at the top to having bulged sides at the bottom. The rear sides and top have a uniform dot pattern which acts as the ventilation although not all the holes go right the way through the housing. A single multi-colour LED at the top indicate the status, which is normally illuminated blue if all is well. At the bottom is a cutout at the back allowing for the ethernet cable(s) and power to route neatly out the rear. There is enough of a recess under the nodes to accommodate ethernet cables with sleeves, and this is also where the reset and power switches reside. When compared with other white anonymous pieces of technology which sit on view, it is about 5cm shorter that an Amazon Echo and slightly taller and wider than a Netatmo indoor module. At the base of the nodes, offset on one side is the ‘LINKSYS’ logo which upsets my sense of symmetry and a little part of me wishes it wasn’t there.
The power supply is a wall-wart style which annoyingly is larger than average and doesn’t fit next to other plugs on a regular power strip, it’s also a bizarre oversight to see the branding on the plug be upside down when inserted into a regular wall socket.
Configuration is initiated by using the LINKSYS app on a smartphone which I believe initially communicates via bluetooth whilst setting up the WiFi network. It is annoying to find that these nodes must be configured using the LINKSYS cloud service and you have to create an account – I would have preferred an option to configure it locally. Once it is configured, there is a web interface which can be navigated to via the IP address of the primary node using the LINKSYS cloud account or the 5 digit code on the bottom of the node to authenticate.
During initial configuration, it does ask whether you have an integrated modem/router or separate devices but irrespective of this runs it in router mode. The routing functions are fairly basic, not including services such as a built in VPN server and so I have elected to run this in bridge mode (so only offering WiFi and relying on my existing router for DHCP, routing and other functions). In this mode, the nodes simply act as the WiFi interface for the network and I have disabled the WiFi on my router.
From a coverage perspective, this has transformed the WiFi in my house, for reference I live in a 5 bedroom 1920’s detached house with approx 2500 ft over 2 floors. With the nodes in the middle of the house on both floors I get excellent coverage, even in the extremities, with rates near the nodes at the advertised broadband rates, and those near the edges still in excess of 10Mb.
Installed with a moderate amount of effort across our home and large garden with outbuildings. We have five nodes, and we’re usually getting great wifi coverage. However, nodes do randomly decide they have had enough and drop offline and need intervention. It’s much better than the previous situation using a Virgin Media hub and then wired wifi devices in dead spots.
If you have an existing house-wide network with IoT devices like we did, be aware this product is not well designed for anything other than non-specialists wanting only wifi. Some things I have found out during one of my hours-long support calls:
* It is possible to attach a switch to the second ethernet port of each node, allowing wired network connection, but that fact is missing in everything I have looked at. I have our printers, Philips Hue Bridge and many other devices linked that way.
* It is not possible to change the DHCP to allocate addresses other than 192.168.*.* so if you want to use a 10.*.*.* network you are out of luck. I’ve had to change all the static addresses for printers etc.
* Some of the units Amazon sell (notably the two-pack I got to extend the network) have down-level firmware that results in inexplicable, annoying failure towards the end of the installation process if you use the phone app. It turns out there is actually a manual interface at 192.168.1.1:52000/fwupdate.html that will let you install the up-to-date firmware.
* There is then an interface for manually adding new nodes that just refuse to register. Attach the new node via an ethernet cable to the second port of the main node, then visit the web interface at 192.168.1.1 in a browser. Log in and look in the bottom right corner of the page. There is a tiny link that says “CA”. Click it and you now have an enhanced page. Notably, on the “Connectivity” page there’s now an option for “Velop Setup” that you can use to manually register the reluctant node.
* The web interface and the phone app each have capabilities the other does not, so check both if you can’t find an option you think ought to exist.
* However, their design point is to hide all complexity as they are selling to non-specialists. That means there are quite a few options that seem to simply not exist.
The telephone response staff are all patient saints (based in the Phillipines) who will help you for ever 24/7 – they even call back if you ask. Overall it was an expensive purchase but seems to do the job so far. If your needs are simpler than ours, you’ll probably find it’s great.
The whole procedure is slow and tedious. It doesn’t seem to matter if your phone goes into standby or not during the procedure, you just cannot see what is happening. You could stop your phone going into standby at all, but this will use even move battery power and anyway, the process will work or it won’t work. It seems to be a lot about luck. I also found that the app touch sensitivity can be flaky (I don’t have this problem with any other apps on my phone). Sometimes it just responds to touch very slowly, but when you give up waiting and touch twice, it moves on 2 steps (the missed one may be crucial).
It takes ages to locate a node from the app (which node, who knows, but presumably the new node you are adding). This is even when the phone is directly beside the new node. To see what is happening, you must check frequently, bringing your phone back out of standby each time.
I have a four-bedroom house and am glad I purchased the three-node pack, reduced in the Prime sale on 11 June. Previously, over the last 7 years I have used Wi-Fi booster plug ins from TP Link and later from BT and Netgear when the TP Link ones proved to have a short life. I still use the wired versions for two TVs and my husband’s PC for a fast and reliable connection, rather than using the Wi-Fi unnecessarily. I would still recommend the latter for devices that are permanent fixtures.
You do need the app to set up the system and add nodes, but you can also log in with the same username and password to the Linksys Smart Wi-Fi where there is much more information and, from a desktop PC, the system is much easier to administer. I have shown a couple of illustrations for this. Click any of the icons on the left to open the corresponding popup window, one of which is shown. Click the big left pointing chevron > to close the popup.
In conclusion, this is expensive and, contrary to the blurb, is certainly not easy to set up. It takes patience and concentration, which gets tricky when you get bored stiff. Better documentation would be helpful. As a software technical author, I know I would do it differently. However, I can now walk around my house and watching the Wi-Fi indicator on my phone I can see it changing from node to node whichever provides the strongest signal unlike the Wi-Fi boosters I have used before that you need to select in relevant locations. I am glad I bought this system and if it lives a good long time, I will feel that I’ve had my money’s worth. I also don’t have my husband moaning at me about having to select a different network when he’s upstairs or in the den.
I initially purchased two but for a 4 bed place a 3 node more suitable.
Pros
Setup is very easy. No messing round with modem mode on Virgin hub etc. You do need Linksys app on your smart phone, but very easy to set up. It took me about 1 hour to set up all three.
You can prioritise devices to ensure key devices get the best bandwidth if there is contention
Guest network is easy to setup and use, easy to change. I change my network to the name of the guest to make them feel at home
Wifi signal is much stronger in the original dead spots, but you do need to spend a little time positioning the nodes for best coverage
The Phone app is pretty handy to check speeds and availability of nodes and if node installed out of signal you are made aware and asked to install closer.
Units have Ethernet connection so you can plug your device into it, if wifi not an option- although I have not tested this feature
Cons
Coverage – Due to my specific setup (Distance) between each node If a node in the chain drops then the one connecting to it loses service. I would need probably two more nodes to be more resilient . This would be costly to add two more nodes. As such all nodes have been good so this is a potential rather than actual issue.
Found on some older iPads when they unlocked after being dormant wifi had disconnected. This may be to avoid too many connections , will have to check it out.
Potential for improvements
Software still at version 1.x so hoping Linksys will continue to develop and improve
Speed test shows great results but provides different output to popular broadband testers such as Ookla speed test ( Linksys app reports better download) so curious about comparison .
Price . Concept good as you can keep adding nodes but will be better one price per unit reduces.