2x4basics Hopkins 90192 Shed Kit, Peak Style Roof
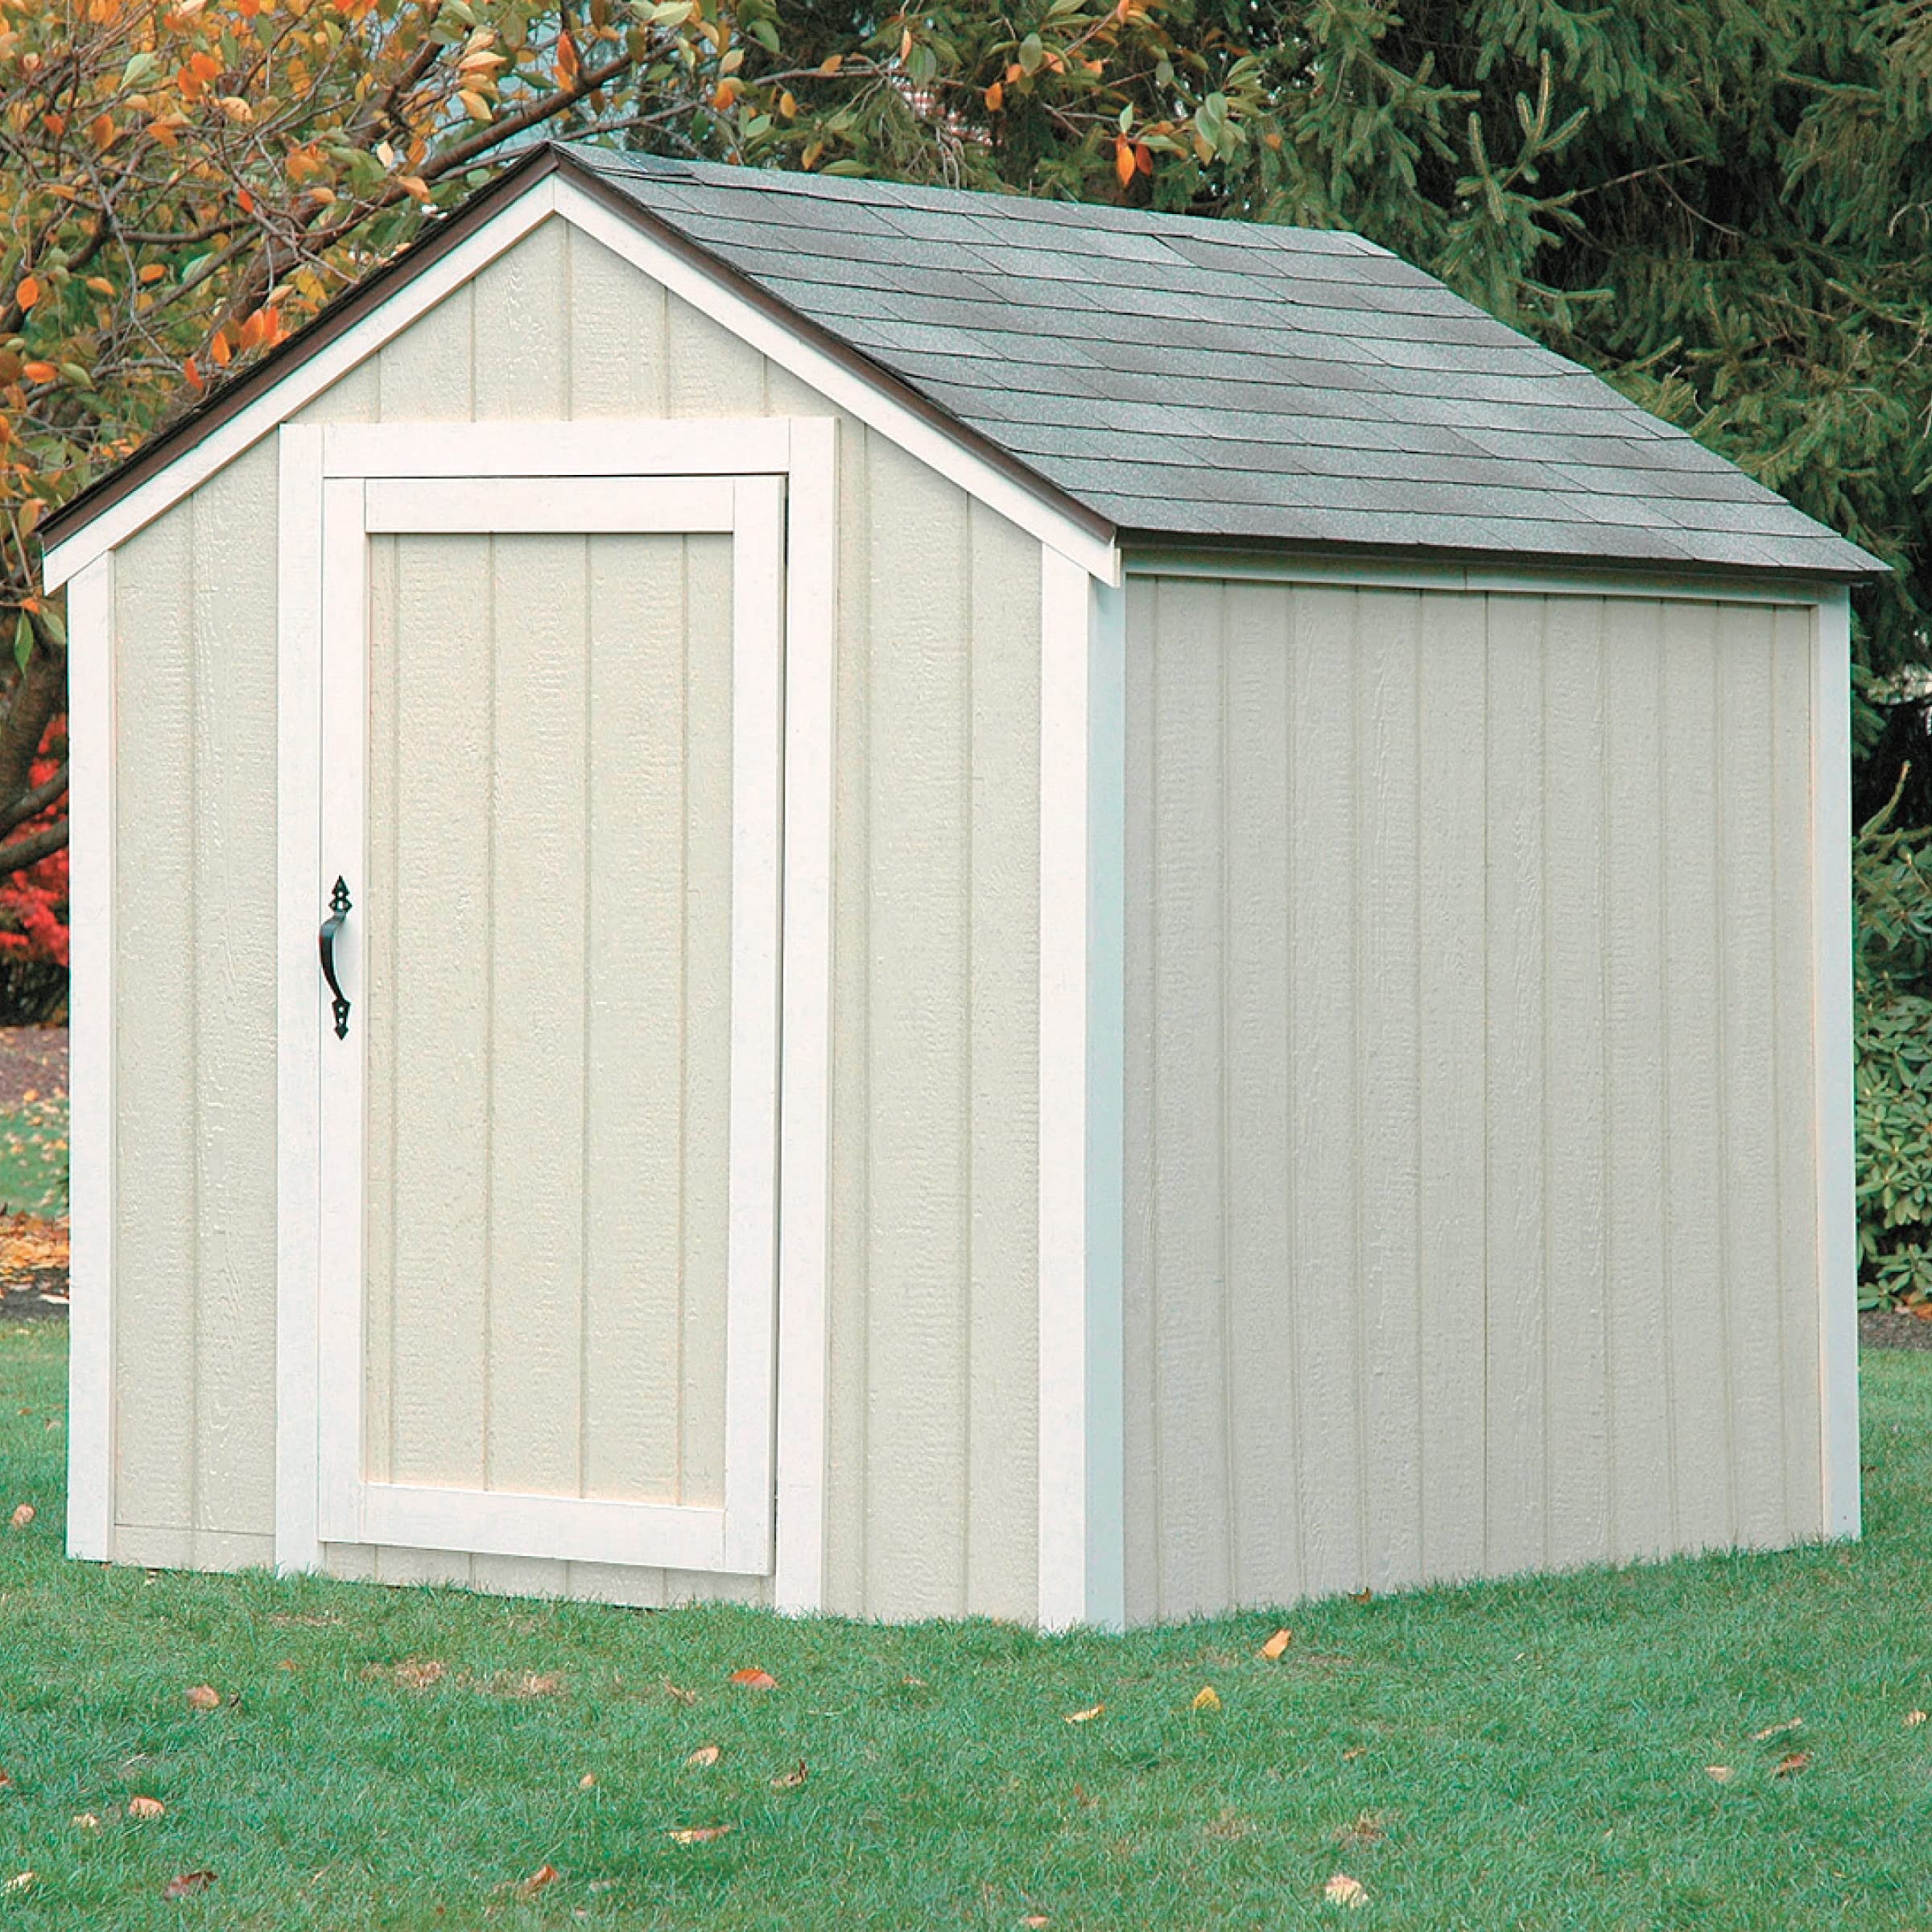
2x4basics Hopkins 90192 Shed Kit, Peak Style Roof
Customizable DIY Storage, Organization, and Outdoor Furniture Kits
DIY Projects Simplified
Our 2×4 Basics brackets have been designed to make garage organization and outdoor furniture projects as simple as possible. Only 90° cuts are required, no miters or angles, and projects can be built to any length up to eight feet.
To simplify the process even more, only 2×4 lumber is needed for most projects.
High Quality Products
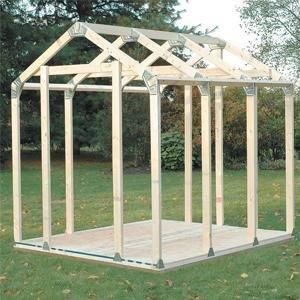
Being made of heavy gauge structural resin, all 2×4 Basics brackets have a simple yet durable design allowing them to hold up to rough conditions.
Includes
- 39 Connector brackets
- Materials needed list
- Lumber cut list
- Assembly instructions (enough to complete one 7×8 foot shed)
- Lumber Not Included – must purchase lumber separately
| Dimensions: | 12.7 x 29.21 x 17.02 cm; 4.4 Kilograms |
| Model: | 90192 |
| Part: | 90192 |
| Manufacture: | Blitz USA |
| Dimensions: | 12.7 x 29.21 x 17.02 cm; 4.4 Kilograms |
it all worked well except for the rafters with measurements are your guess. Took 4 tries to get it right, kind of.
J’ai aim mais je ne fait pas la construction d’un cabanon C’est pourquoi j’ai retourn le kit qui tait bien fait, je le recomande toute personne qui aurait le projet de construire un cabanon ou une petite serre.
Excellent for the DIY enthusiast..makes a potentially problematic job easy
If I was building another shed, I would change the orientation of the floor 2x4s so that they are orientated vertically instead of flat, that would give the floor more strength
I’ve put 3 of these up, and never had a problem with things being square. Instructions are WRONG depending on which build you are doing so DO READ the instructions and highlight each section for your build. Trust me, you will find a section that does not match. So…be sure you buy extra wood for kit so you are covered.
The angled roof brackets are thin, but they are mainly meant as guides to provide the correct angles. I dont think they are meant for anything structural really- the 2x4s do that. So even though you don’t have cut any angles on the 2x4s with this kit, I did angle cut the ends so they fit in inside the brackets better, which internet makes it a bit sturdier. For this kit, its a 30 degree slope/cut.
Once I figured out the correct lengths of each board for the base, the trusses, and height I wanted it, I pre-assembled the trusses and base. Then I started adding the wall studs. Besides the flimsy anchor brackets included, I bought 2×4 angle brackets to help keep the studs upright. Then I added the trusses, and the 2x4s across the top. I started to add the plywood exterior afterwards.
Because this is at a cabin in remote woods, I didnt have the rest of the wood needed to finish the shed, as it was getting late, so the pictures show whats been completed – in 1 day by the way – as of this review.
Overall, this is my 1st real project building something, and although I am mechanically inclined, this kit definitely helped in getting this project started. So depending on your own project, take your time, get things prepped with the tools needed and enough area to work in, and measure 3 times because you only get 1 chance to cut correctly. Finally, you WILL need a 2nd person to help at various stages, even if just holding something in place.
It took me a while to buy all the wood needed. I went over the instruction booklet quite a lot and found it easier to use a bright highlighter to isolate the instructions just for my size shed (there are instructions on the one booklet to create three shed sizes).
I spent an afternoon measuring and cutting down all the wood to the cutting list at the front of the manual and labelled the wood with a thick marker.
I found the design easy to adapt. The door goes on one end according to the plans but I wanted the door in one corner on the longest edge. Plenty of measuring and double checking there.
It took me about two full days to put the frame together and to clad most of it with OSB board.
I am due to felt it shortly. Very pleased with how solid and easily it went together. I would recommend two people perhaps but managed it on my own with the exception of the three long roof joists which fitted into the brackets.
Feather board to finish off the shed.
I can also say that most people could probably build this shed with the instructions mostly by yourself but I would not recommend it. I had to take mine all apart except the floor.
My best friend came over and with his help the shed is coming out much better than when I tried to do it alone.
Understand this is my first time doing anything like this so you will have to judge for yourself if or when you buy this shed kit. Overall for someone that can’t afford getting the sheds that cost mostly over a thousand dollars this kit is for you but wood is not cheap either but at least you can do this at your own pace a little bit at a time. I will try and update this when I’m done..update and I’m not done well being that the brackets that come with the shed kit are proprietary if you damage any you won’t have enough to finish and since my knowledge in angle cuttings nada! I have to order another kit just so I can finish my shed, (more updates soon) I hope update frame solid super strong for me, the upgrades for the 2×4’s has a made all the difference in my opinion but you should decide for yourself. One important thing you should know not go skimpy with the level perfect or nothing. Eeeeehh “it’s ok shouldn’t cause a problem doesn’t have to be perfect” attitude will go badly will make one more update.
Tomorrow I’ll put up some pics to show were we’re at so far.
Pretty thin and not as expected. Had to use extra bracing especially for the bottom pieces
Can build a basic shed , not sure it can hold the weight of snow up in northern Ontario
Good:
a. The angle brackets are sturdy, very strong
b. If someone follows the instruction to the dots, it’ll work out just fine
c. It did save some time
Bad:
a. Instructions were too simple, not practical; woods come in different shapes all the time, I had to re-adjust frequently
b. Edges are sharp, cut my fingers a few times
c. Anchor/bottom anchors were not strong enough, I recommend not using it, but make the frame bottom using traditional method, I had to re-enforce all the beams
d. For roof, I had to add extra beam
Overall, it is a good one, it took the fear out of me of building something new, and it was fun to use. Side note, you better have a mitre saw and Dewalt screwdriver to make your life easier, table saw worked but it was a hassle.
Good item for people with no experience in building a shed. The instruction plans include for sheds are very confusing at first glance and little less confusing after reading and looking over a few times.
The plates in this kit are not that strong in single use and bend very easy once weight was added, doubled up was a bit more stronger.
This kits makes it very easy for a DIYER to construct a shed by them self.
This kit is top notch for someone with no experience in constructing a shed.
Will give an update once the shed goes through a winter weight.
If I were to do this all over again, I would pre-cut all the parts ahead of time. Depending on your finishing materials, your total cost may vary. I used house wrap, shingles, and vinyl siding. I also put it on 6 concrete blocks on skids which added more to the cost. We have been using the shed for 2 months now and we are very happy about the extra space that was freed up in our garage. I attached a video time lapse of our build. I recommend this product.
Those who said the brackets are too flimsy, they may be at first but once the rafters are added it’s way more stable. I did add screws into the bottom of the studs at an angle for extra stability.
Overall, I am very happy with how it went together.
One thing I suggest to others is get the instructions off the website and study them. You can also buy your lumber off the instructions and pre cut all of it.
Purchased this kit and built a greenhouse with it. The walls are only sheets of plastic, so it isn’t super sturdy, but this thing survived Hurricane Dorian that just came through Nova Scotia! We decided to add a more protective roof and are getting it ready for colder, winter weather to keep growing all year round. The kit is easy to use and instructions were fairly straightforward. Would recommend 🙂
Update, DO NOT build the floor the way it says on the ground, use pressure treated and elevate it with piers or blocks, my sub floor rotted after three years, it has to be vented!!!!!!
Update: so after learning what not to use on the subfloor, I jacked up the shed, removed the rotted floor, installed pressure treated 4×6 perimeter with 4×4 pressure treated, 16″ on center, screwed and glued down 3/4 ” plywood, and sealed the plywood with primer sealer. I used blocks to elevate it 2″ off the ground.
This shed kit is great. When I first opened it, I was a little doubtful when looking at the metal pieces and seeing how flimsy they are by themselves. Worry not though. Once everything gets tied together it becomes very sturdy.
As a previous poster mentioned, you need to TRUST the measurements in the book. If you follow those, everything will all work out.
I bought 3 kits to make the 10×22 shed. One thing to be aware of is this. The 10×22 shed is 11 feet tall! By the time you add some bricks to keep it off the ground and 4×4 runners (which I highly recommend) it gets really tall.
One of the kits I got didn’t have all the correct pieces in it and I was 24 pieces short. I called the company and they promptly shipped me replacement parts.
When you go to build this shed, spend a little more time and be SURE the base is flat. I put three 4×4 runners under my shed and spent a long time making sure they were level all the way down. Time well spent because the rest of the shed went up with ease.
Oh yeah, after my comment above about following the directions…on page 13 of the book it calls for 2 pieces of wood labeled ‘NN’. Problem is they forgot to put NN back on page 5. Not a big deal since it’s easy to figure out the correct length (97 inches), but you’ll end up two 2x4x10’s short.
I also recommend printing out the instructions and then going through and marking out all the instructions that don’t pertain to you. Makes it much easier.
After all is said and done the 10x22x11 (WxLxH) shed cost around two grand total. That’s materials only, not labor of course. Not bad at all. Go price one that size pre-built somewhere.
As far as the person complaining they didn’t get an entire shed….REALLY???
* We built the 7×8 version.
* I’m a novice, but had help from my father who is more experienced.
Time
We had some foundation issues to work through before focusing on construction of the actual shed which took nearly a day due to concrete and mortar work. It was worth the effort to have a level foundation on which to build. After that, it took about 1 day to cut and frame, 1 day to put the roof boards and siding on and 1 day for shingling. So, all told, it took the two of us about 4 days to put up at a leisurely pace.
Cost
We bought some heavy tongue-and-groove particle board recommended for flooring, standard 2×4 studs, economy particle board for the roof and “Smartside” composite paneling for the walls, 25 year 3-tab shingles (3 squares but used about 2 1/2), tar paper, caulking, concrete blocks, concrete and mortar, mortar tool, aluminum trim for the roof, the screws and roof nails and the basics kit. I easily spent $600 on material – maybe even $700. For comparison, HD offers a Kingston 8×8 kit for $899 plus the cost for shingles.
I envy the guy that said he did it in 2 days for $400.
Additional Details
The support brackets that connect the 8′ 2x4s to the floor seemed cheap but the brackets for the roof made it easy to put together. After that, it was nice to have 2 people working on it. The end product seems very sturdy and should provide years of use. I would recommend this product – it was fun to build.