Duramax Top Shed 10 x 8 Metal Garden Storage Shed, Made
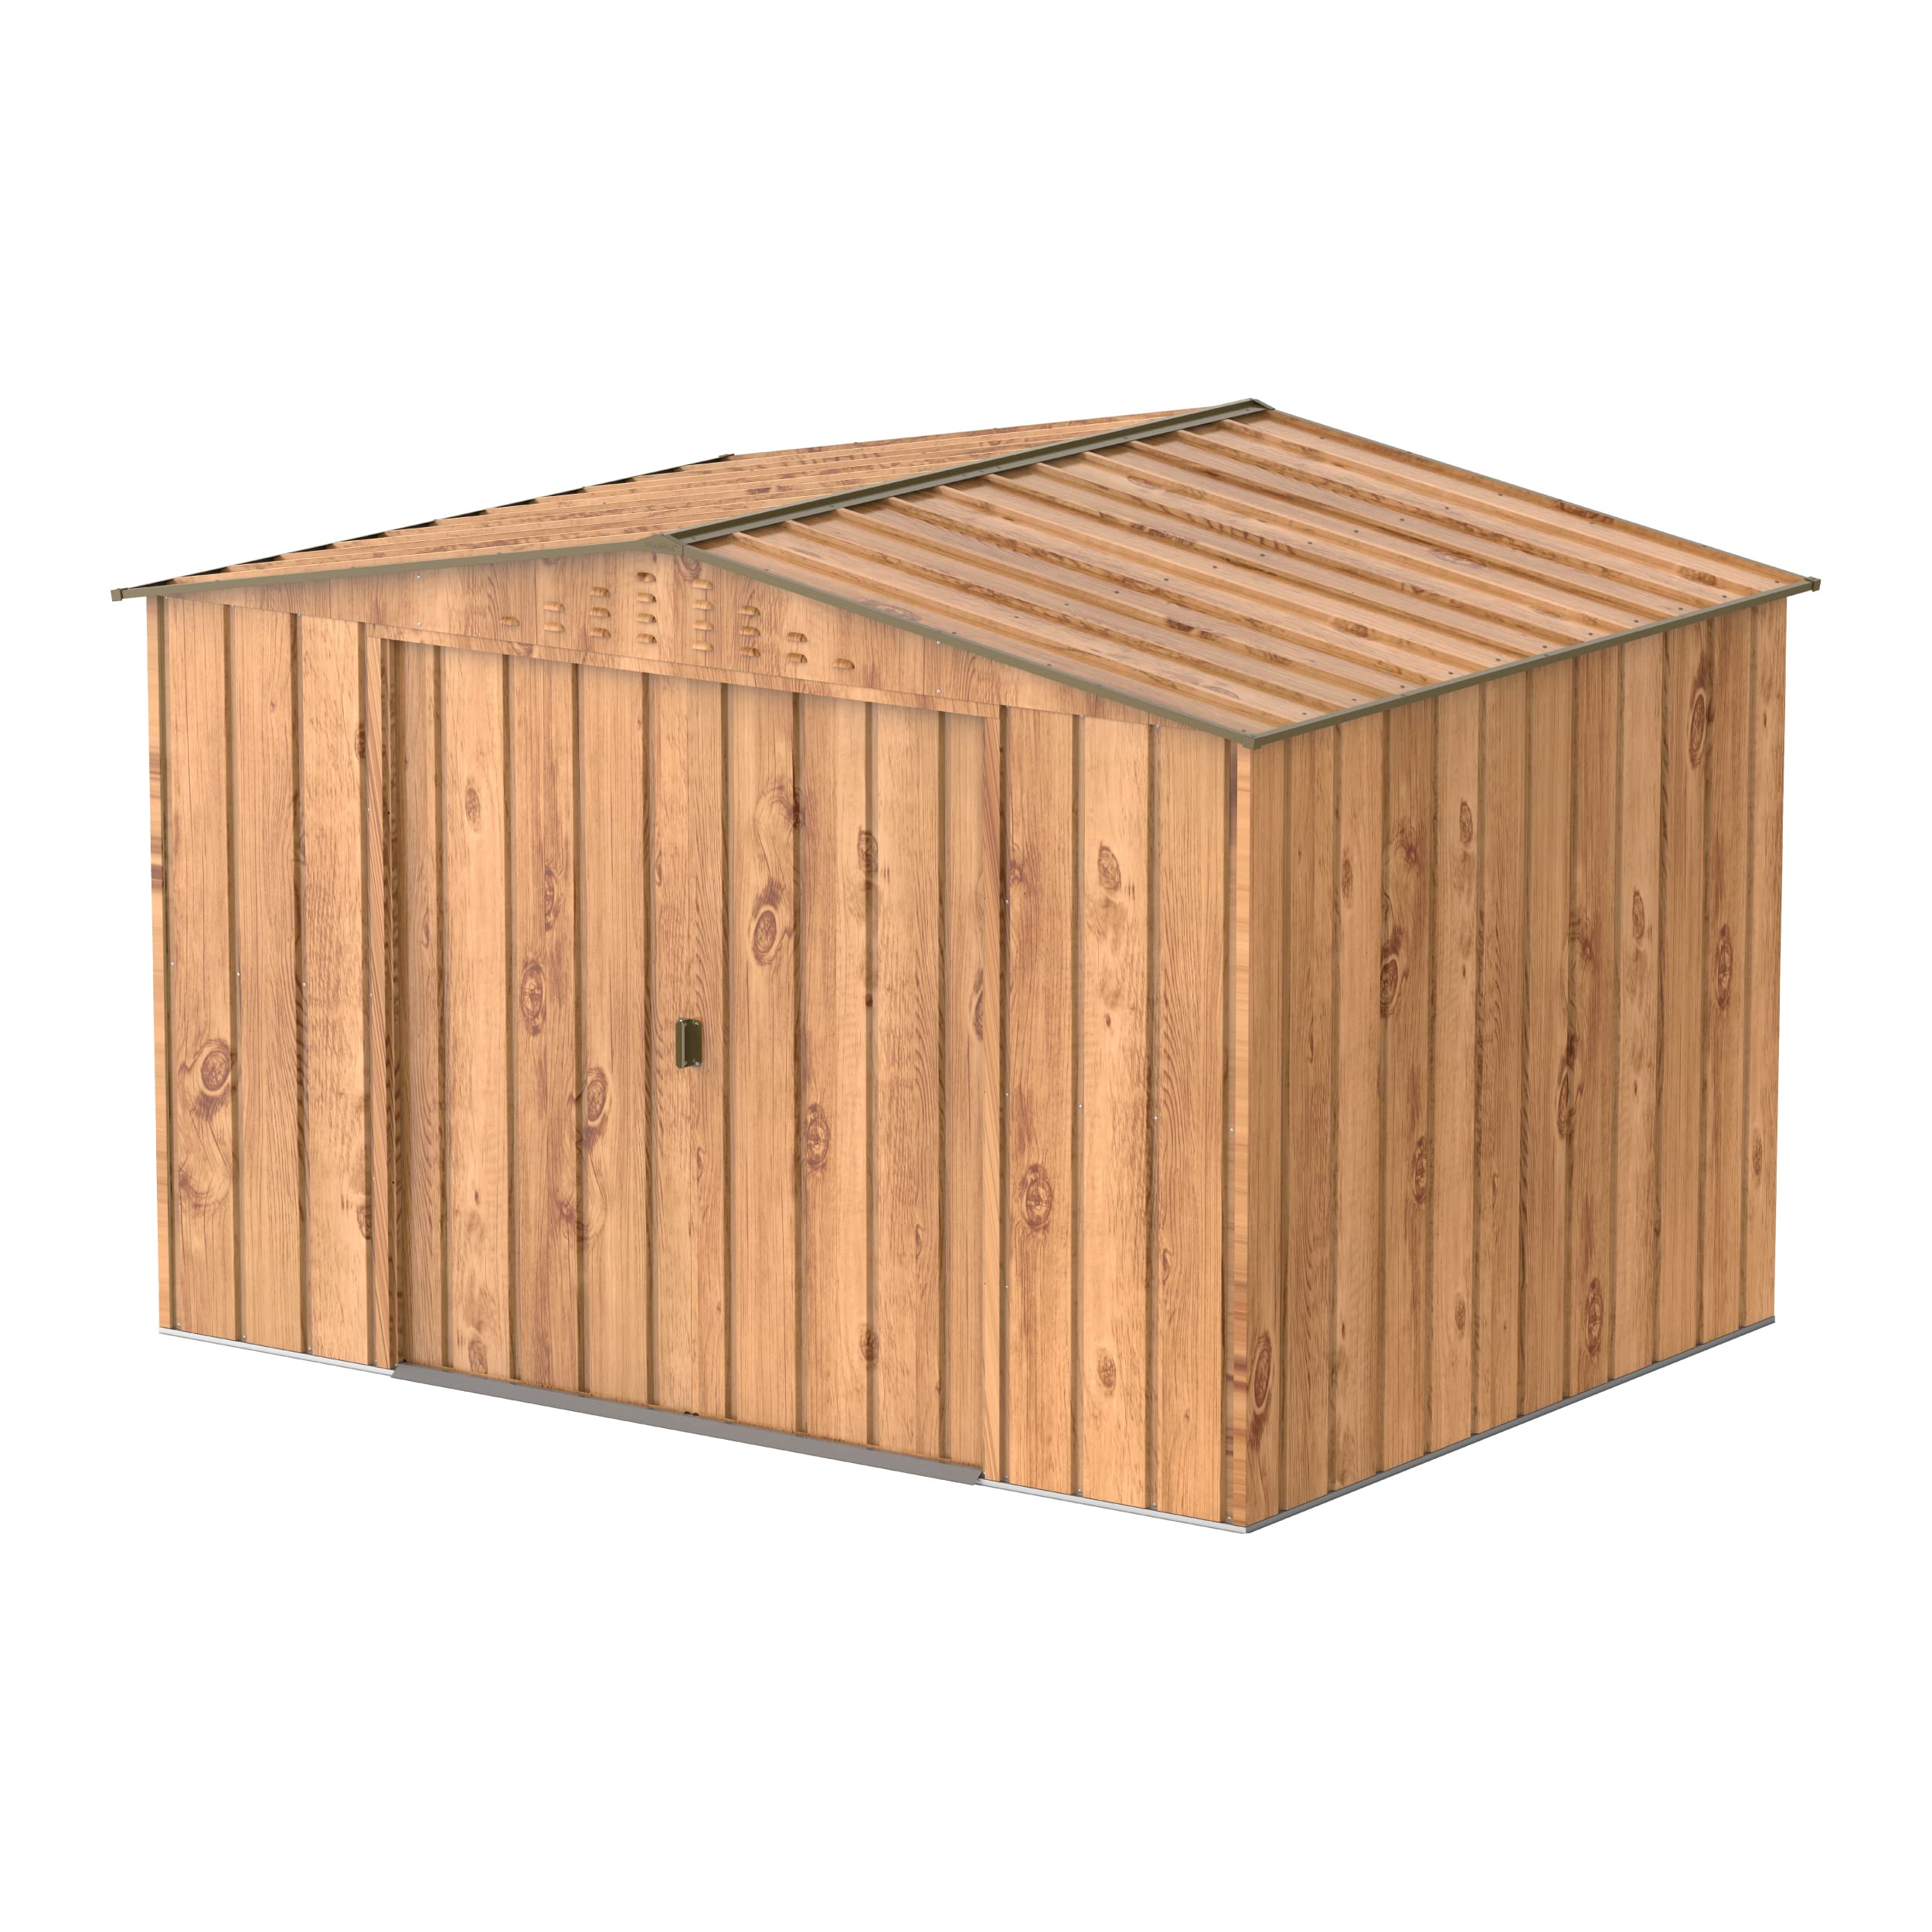
Duramax Top Shed 10 x 8 Metal Garden Storage Shed, Made of Hot-Dipped Galvanized Steel, Strong Reinforced Roof Structure, Maintenance-Free & Weatherproof Metal Garden Shed, Woodgrain & Brown Trimmings

TOP Sheds – Woodgrain
Features
| |||
|---|---|---|---|
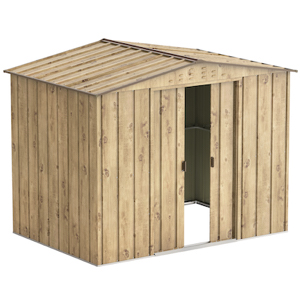
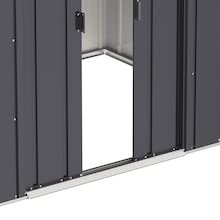
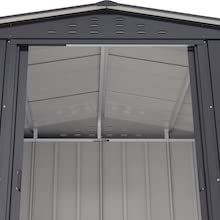
Easy sliding doors system | Ventilation system as slotted grill on the gable | Strong lockable door handles | Reinforced metal structure and roof truss support that can handle 20 lbs/sq ft. of snow load |
| Dimensions: | 187 x 72 x 17.5 cm; 101 Kilograms |
| Model: | 0638801052456 |
| Part: | 0638801052456 |
| Manufacture: | Duramax |
| Dimensions: | 187 x 72 x 17.5 cm; 101 Kilograms |
Appears pretty good. Instructions are detailed and pretty clear. I managed to put it together on my own using props to hold sheets, luckily there was no wind or this wouldn’t have been possible. Wear gloves as some of the edges are like knives! Took me a full day after I had made a concrete slab for it to sit on. As I put it in a tight corner I needed to build a different order to the instructions so I was building out in order to secure screws. Only issue is the installation of shelving. No clear way to fix shelving to walls. You would need to sandwich timber and screw through I guess, so probably free standing is the best option. Overall appears a good shed for the money.
Definitely needs two people to assemble as recommended. Also, when they say don’t erect on a windy day they mean it. When we first started putting it together there was a very light breeze. A few hours in and the wind had picked up which definitely didn’t help. Follow the instructions to the letter and be prepared to spend at least 6 hours assembling the shed.
Once all the panels and bars are in place it looks good and is pretty sturdy. We still have a few roof panels to install and once finished I’ll put up an image.
It’s bit of the effort to put it together by myself.
Bit flimsy and easy to over tighten screws with hand.
Out of the box 2 panels were damaged. One bent and other paintwork scratched to metal.
Overall not bad for money.
I cheated (I’m 75) and paid someone to put it up – one day job. It was cheap and I only paid neighbour same as vendor’s erection fee for a smaller, more expensive shed.
Huge shed, perfect for mobility scooter as I can drive straight in and plenty of room to get off. Lots of wind and rain up here in the Pennines but it is solid.
The only issue which will need to be sorted asap is the build up of water on inside on the roof lots of condensation inside the shed water & electric scooters don’t mix well, have been advised to use cans of expanding foam around the internal edges at the top which also to put insulation on the internal walls not really fire retardant which could potentially be an issue with insurance company if there’s a fire. Apart from the condensation. Great looking wood effect metal shed. Definatley good value for money compared to the many other companies price definatley better all in all its good solid long-term storage investment glad I got it my granddaughter really loves it too. Thanks Duramax 10 X 8 Top shed wood effec
The metal is pretty thin and has some sharp edges so a decent pair of gloves you can actually work in are a must. Once the ground rails were down the wall erection was pretty easy and went without a hitch. Attaching the roof panels is a bit of a faff as its a case of using a ladder and streching across the roof to screw them in place, I Really didnt fancy climbing on top of the half built shed. The roof apex pieces are flimsy and needed a bit of sealant added to where they bolt together to ensure a good tight leakproof fit. Would recommend you buy some better sealing tape for the roof as well (The supplied tape is quite thin).
The real problems came when trying to get the sliding doors to run easily on the tracks as the design of this system and the door panels is a flimsy ropey affair that sticks really easily, I havent managed to get them to slide completly smoothly, despite numerous attempts that included cutting down the lenth of the side panel fixing screws that were catchin the inside of the doors (yes I used the right size screws).
I will probably get some anchor bolts to hold it down in case of high winds as the shed is really not that heavy…
Verdict: Metal is pretty flimsy and reading the numbers pressed into some of the assembly parts can be difficult. however with two people it does go together in a day and looks Ok for your effort. Wouldnt like to erect it in an exposed location. Lets see how long it will last.
Assembly was not difficult, but it takes time, I did it over two days with the help of a couple other people. Once erected it looks good, feels sturdy enough for my needs. The secret is to get the base even, before even attempting to assemble I would recommend investing time in making an even base for it to be built on. Mine is built in decking, pathing stones would be equally as good.
A good looking wood effect, sturdy and arrived with more screws than you will need.
Use a cordless drill/screwdriver, even a really cheapo one will be good enough. Have the torque setting (number on the dial) set low, everybody’s tool will be different there, so that the screws bite but don’t just spin because this will effect the waterproofing later. Magnetise the bit or buy magnetised tips or bit holders. A magnetiser/demagnetiser is a great item to buy and only costs a few pounds.
Make sure every screw or bolt that is on the outside has one of the little fiddly washers. When screwing 2 panels together and the instructions aren’t particularly clear always make sure the bigger hole is the one the screw goes through first.
Get the ground as level as possible so the doors work properly and look neat. They are generous with the screws, nuts/bolts, washers, end caps etc so not like Ikea here. 🙂
The instructions aren’t quite as clear as Ikea BUT backtracking after a mistake/misread is not too hard. Every item is marked, some with a sticker and some are stamped. If you have the space then it saves a lot of time sorting the pieces out by item code. The sticker isn’t an indication of which way up you use the panel. I made the mistake of thinking if the writing is the right way up then that’s the way to install the item.
My build is waterproof the doors close perfectly. I had to slightly bend back some of the edge trim that sits just outside the door, I think I caught these with screwheads or something. It looks extremely smart and is a nice wide doorway, the doors slide very smoothly. The holes for your lock are 1cm circles and they are 9cm apart. I haven’t sorted out a lock yet. The only tools I used was my cordless drill with the screwdriver bit, 1 screwdriver a 7mm socket (easier than a spanner) 1 small hammer to tap the point protectors that stop you shredding your hands on the exposed screw tips once the build is complete. I wore gloves for some parts but I’m not good with tiny screws, nuts and bolts with gloves on. The nuts are really fiddly. If you put 2 nuts in the socket and gently spin it then the bolt will easily pick up the nut so you can tighten it, you’ll see what I mean with a bit of practice.
One huge problem was that the top joint on the roof is only protected by a thin roll of tape. There is a trim above BUT it is so high above that you can easily put your hand between. This is not good enough an that’s why I knocked a star off. Luckily I ha a tin or roof repair tar for a different job I need to do on my house. I tarred over the tape with a brush and got a strong waterproof seal that will last for years and years. If you buy that same tin then make sure you mix it really well as the lovely smelling resin floats to the top. ALSO wear gloves and clothes you don’t mind getting manky because it’s a messy job.
Give yourself a day to do it, get another person too. I’d have struggled on my own. The roof is near impossible alone AND I had to go off plan there. I couldn’t do it in the order they give. My work platform and ladder were good BUT I’d have had to lean over a crazy amount to do it their way.
I also bought a bike shed from the same company and they look great together.
A really high quality shed quite taken back really.
Top quality instructions and top quality kit and extremely sturdy.
I did single handed and took two days. Top tip, when you get to install roof loosen corner right angles as its roof that acts as set square and you need to wiggle walls to perfect right angle.
Also make sure you put it on a solid base with something to hold it down. I’ve heard of Plastic and metal sheds lifting off in high winds!
Requires 2 people as one would definitely need to hold sections together while the other uses the cordless. It took me and my 8 Yr old about 6-7 hours but it was fun.
Good value for money and looks great too.
I got this shed for the normal use in garden storage of various items delivery was brilliant even offered to help me move the box to where I needed it as it heavy in 1 single box but with this in mind there is no chance that any mix up can occur all items needed in one box, I built it on my own but a 2nd person would be handy the instructions are easy to follow and in very little time was erected.
When constructed the shed looks good blends into garden with the wood design softens it’s presence and is sturdy and well designed doors open and close with ease I am tall and can walk in and stand comfortably within the shed without knocking my head.
I would recommend this shed over the cheaper lower roof sheds everything feels better quality
The shed was delivered within a couple of days, rather than the many weeks you’d expect from other sellers. So far, so good!
On unboxing, the components were well packaged. The instruction booklet was clearly illustrated and highly comprehensive. Each component in the box was numbered for ease of identification. Even the instructions for constructing a base were highly detailed!
Although most of the job of putting it together could be done by one person, there were certain aspects that definitely needed two people, so make sure you’ve got someone to give you a hand.
Once built (a job that took a couple of days), it looked fantastic! I’m very, very happy with the quality, price and ease of build, and although it’s not yet been tested for its weatherproofing, there’s no obvious reason to doubt it.
I am a genuinely satisfied customer!
Needs two people for initial construction and to help with roof.
Beware of very sharp edges – they easily cut fingers! Instructions say to wear gloves but to be honest it’s difficult to do up nuts and bolts with gloves on.
Matching points are not very easy to see on the metal. It would have been far easier were it colour-coded.
Best to seal the areas where the panels slot into the base frame to make sure no water can get in when rain is torrential. A bath sealant would be ideal.
It’s easy to stand up inside for most up to 6ft and the sliding doors actually allow for greater use of internal space.
Arrived exactly on time as promised. Very useful to be able to choose day and time of delivery.
Visually very good, far superior to others I’ve seen.
Some reviews on here state that the holes don’t line up. I can only think that this is because they weren’t building the shed on a flat surface. I’d made a level concrete base two days before, and we found minimal issues with holes lining up. It took around four hours in total, with three guys at a minimum when the first panels went up. The construction feels floppy before the entire rectangle is made, but once together it feels sturdy and we’ll designed. The doors slide open easily (we found the middle holes worked best on the runners), and a standard padlock fits the holes perfectly. Overall it was a fun project to have a few friends over for a BBQ for. I have yet to test it in rainy weather, but the construction appears to be well thought out to have enough overlaps to minimize water ingress.
Incredible value for such a robust smart looking shed. I was amazed that it all came in one quite small box, very clever, although obviously it’s in many pieces! It took 3 of us to construct it in about 4hrs on a windy day, so one of us had the job of holding up the panels as we fixed them together. When the basic frame had 4 sides it was stable and once it was complete and screwed into the concrete it’s as solid as anything!
I sealed the frame to the concrete to stop rain from seeping in. This is the 6×4 version and is plenty big enough for all my basic needs, particularly after fixing a couple of shelves and brackets inside for tools etc. Highly recommended
All the parts were delivered and were un damaged apart from the doors. Contacted amazon support and was offered a 60 refund, full refund after return of shed or free replacement which meant I would have had to pay again for the shed to be taken down and then again for it to be put up. All I wanted was two new doors. Apparently this is not possible. Disappointing as it spoils the overall look of what would have been a good looking shed.
We read the reviews before purchasing this shed and was concerned about the amount of time it would take however we decided to go for it. Most definitely a 2 man/woman job and read the instructions carefully. We assembled it over a period of 2 days purely due to a couple of unexpected heavy shower. Once built it was easy enough to manoeuvre into the position we wanted. It is a solid, nice looking shed and we are happy with it. Worth the money
I read a lot of the reviews before buying. I was a bit hesitant at first but I chose to believe the good reviews. I was not disappointed! The instructions are very clear, every part is clearly marked. I did however have a few scratches on the doors and the doors don’t slide open very well. I will probably try to modify them with some drawer runners, but atm they are useable. Even with that I would recommend, the price was very reasonable.
The only drawback is that the screws are on the outside so if someone unscrewed a panel they would have full access to the contents
Note, you will need 3 people to do this properly, the box it’s in is insanely heavy and in it is a lot of pieces.
1. Lay everything out and read through the instructions first. You don’t have to follow the order. I wanted to build the back first and push it back against a fence so read ahead and work it backwards.
2. Some of the numbers on the parts are hard to find and read so look closely.
3. Negative Nancy that said the holes don’t line up has no mechanical experience. Get the shed straight on the floor and vertically. All the holes are over size so if you do all the screws up tight from the start when you get to the end the last screw won’t line up. Assemble as much loose as you can and tighten at the end. It will save you looking stupid on your Amazon review.
4. Have the right tools. You will need an electric screwdriver, a ratchet screwdriver, a 7mm spanner and/or socket and wrench and gloves (the edges are not all finished and some are as sharp as black death sweets).
5. Build the shed, take your time and enjoy the company of some good friends in the garden.
This mighty erection took just 4 hours including a lunch break and a lot of Tetly Tea (other teas are available – but not as yummy).
It’s not difficult and it is well designed but you will have to apply at least a little brains to the job or you’ll end up in a bit of a kerfuffle with holes that don’t line up and negative reviewitis.
Quite easy to build as all parts are stamped with part numbers. 2 people required. Bad bits. All holes line up until I put roof on. Had to wiggle bits around and eventually drill 5 holes due to not lining up. After completion I measured depth and width. Width was 8′ BUT depth was 5′ 7″. 5″” short on depth. No padlock. But hey they claim 20 yrs guarantee so we’ll worth the money.
I was unsure about a metal shed, but i really like it.
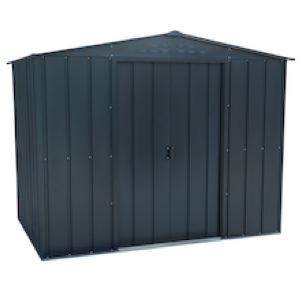
the only thing i would change is the roof could be grey like felt rather than wood grain.