Amazon Basics 4-Shelf Storage Unit with Height Adjustable
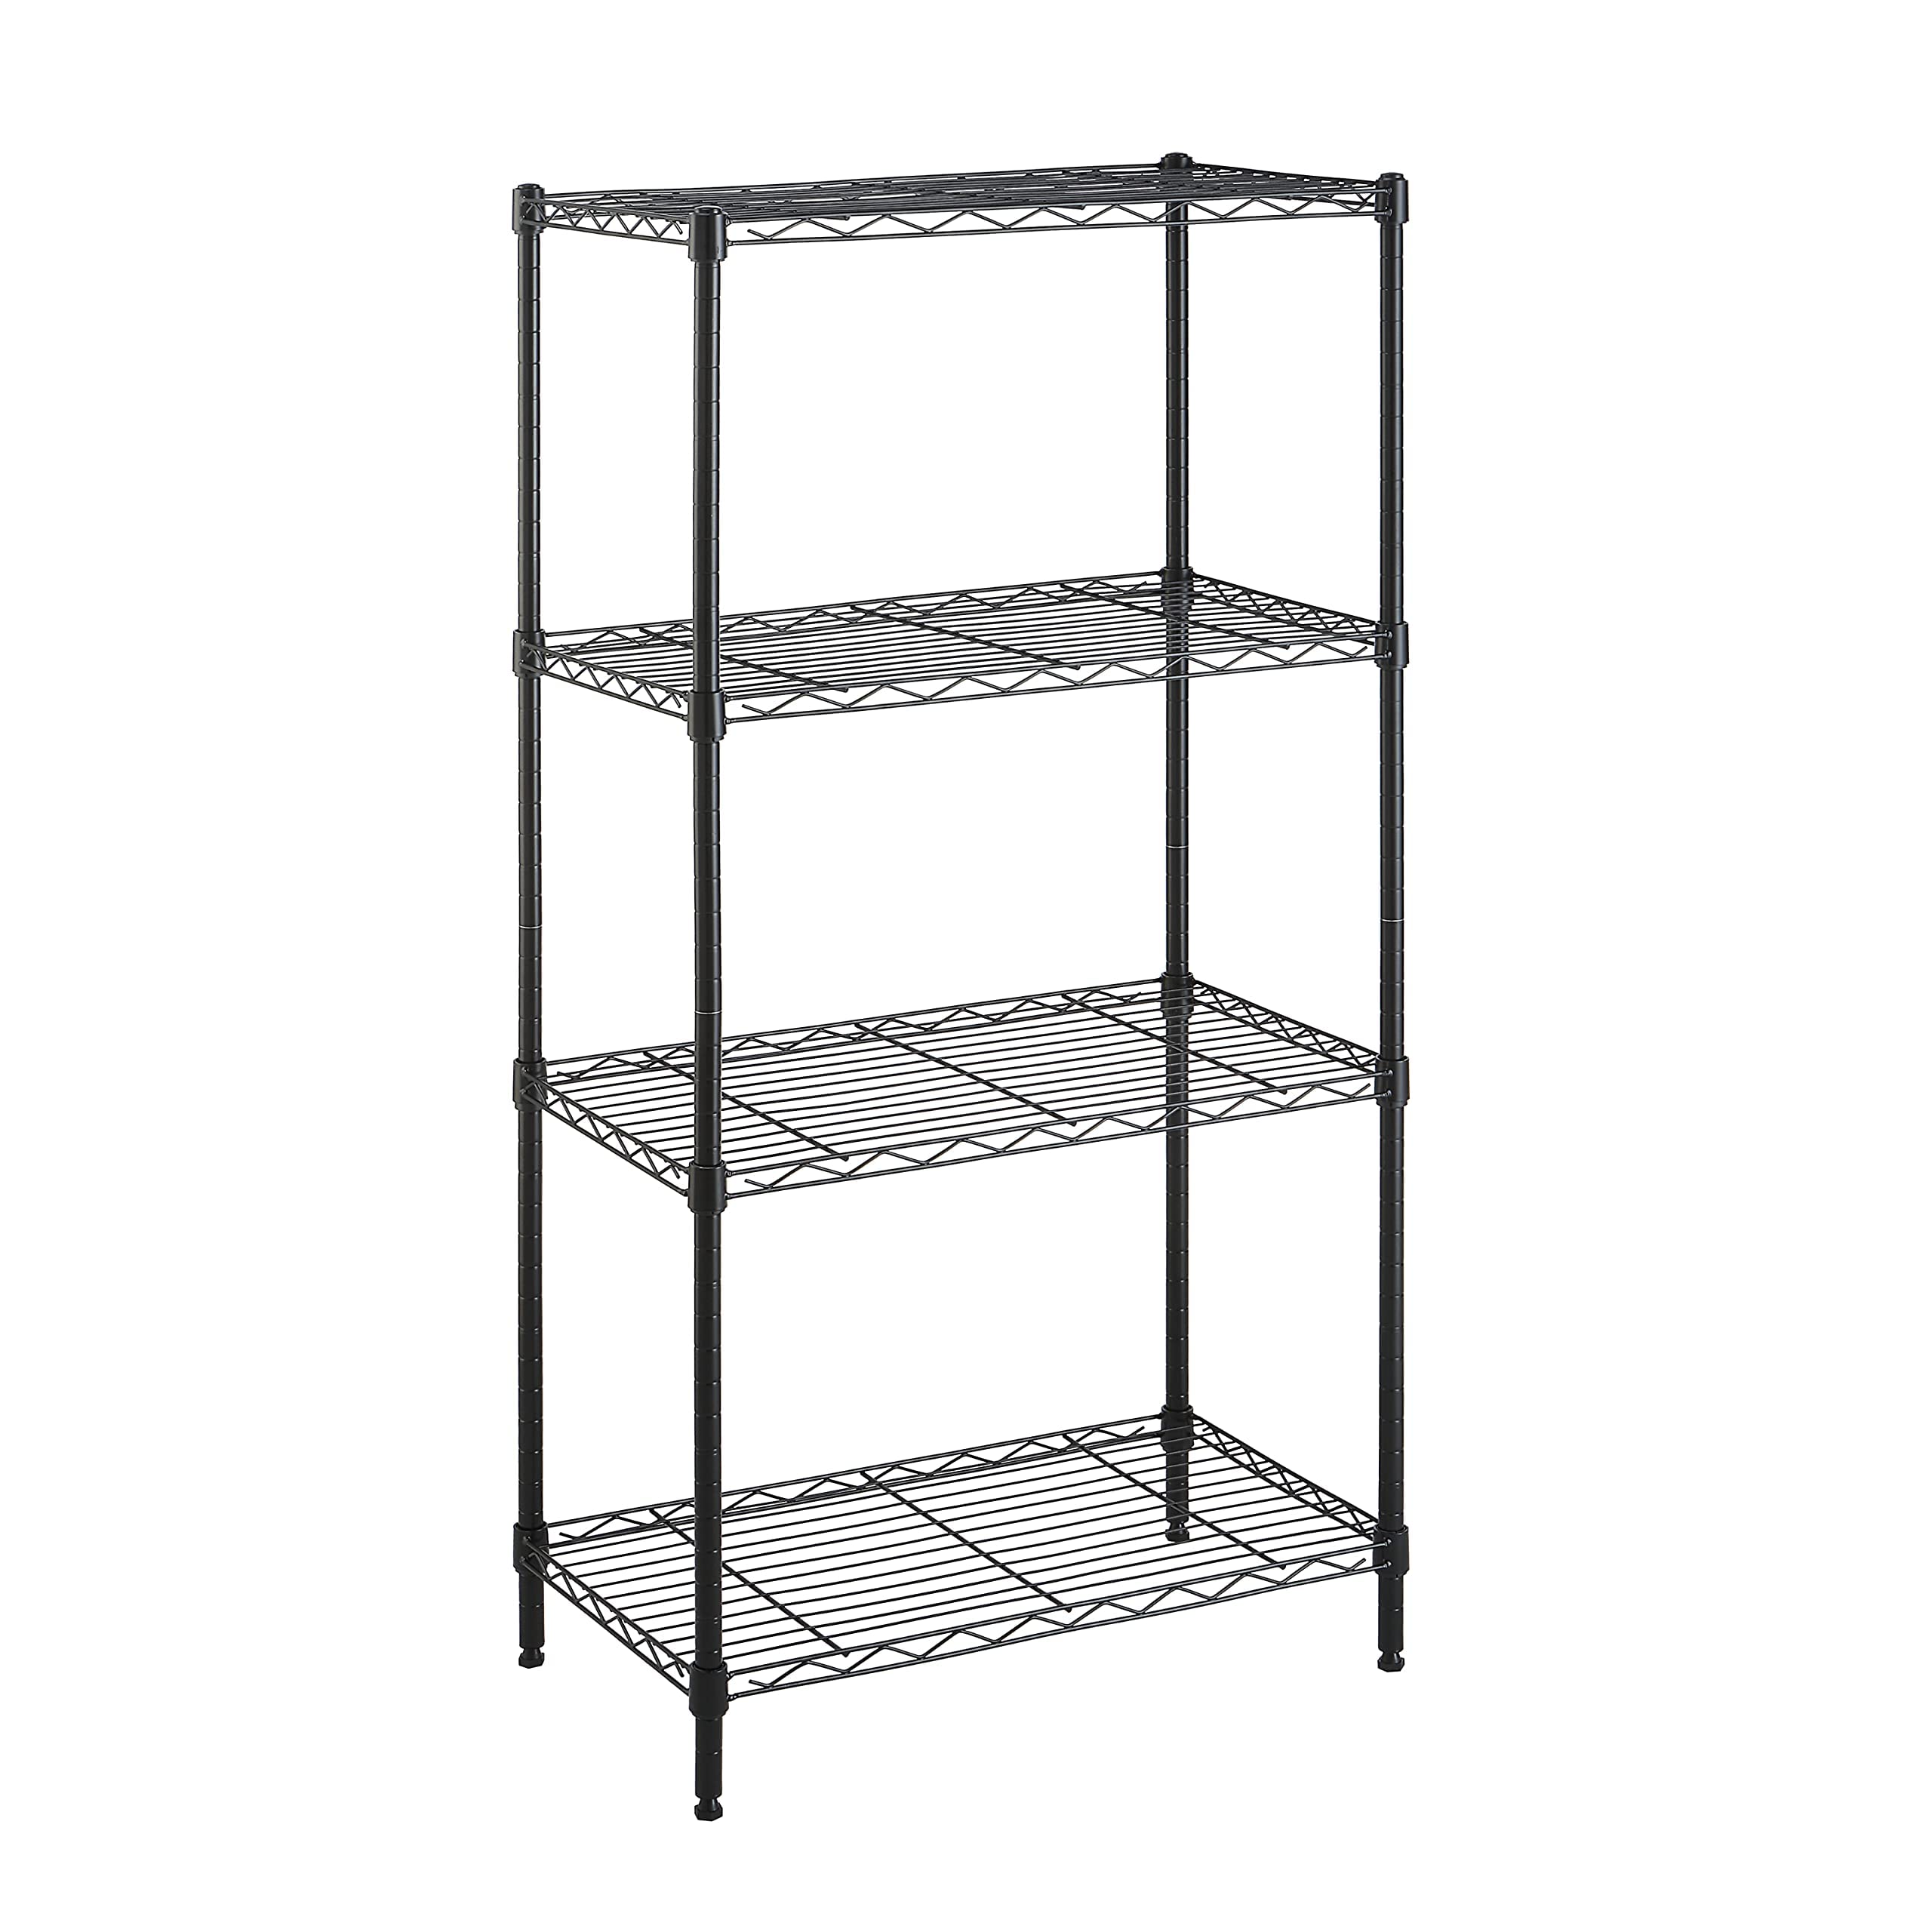
Amazon Basics 4-Shelf Storage Unit with Height Adjustable Shelves and Adjustable Levelling Feet – 363kg Max Weight, 58.9W x 34D x 121.9H, Black

| Weight: | 5.3 kg |
| Dimensions: | 61 x 36 x 122 cm (L x W x H) |
| Brand: | Amazon Basics |
| Model: | WSF-LD-142448-B-4 |
| Colour: | Black |
| Dimensions: | 61 x 36 x 122 cm (L x W x H) |
The product was as seen as described, nothing else to say.
Great to store extra bottles/boxes for in garage. Would definitely buy again.
Good quality shelving, sturdy heavy duty construction, easy to assemble. Shelves can be situated at any level allowing for spacing to accommodate various sizes of items.
I have 2 tall ones of these one in the shed with tools on the other in broom/shoe cupboard so bought this small one for my craftroom and as with the others it’s easy to build and takes some great weight. Will buy more when needed
Purchased for hifi separates as allows easy access and plenty of ventilation. Assembled without instructions in less than 10 mins. Ideal for tins, larder or garage also. Would definitely recommend and buy again. Shame it’s made in China.
Really handy for different things light easy to move around
I bught this item 2 time in 2 different sizees . Very good . Thank you
put mine on the worktop assembly easy when you get used to the shelves stable with adjustable feet and seems very strong and to top it all good price
Bought for seed trays and potting on as it’s a bit difficult for the slugs to climb, and the mesh structure allows sunlight to the lower shelfs. Not sure I’d buy again seeing the price has shot up by 50%.
Love this. Fits all my Appliances on and can wheel them in and out when I need them. Wish I got this sooner.
I’m storing 6.5ltr air fryer, hallogen oven, big glass food blender, rice cooker, slow cooker, health grill and a washing up bowl .
This product meets my requirements 300%. I have not seen another such product with perfect quality and affordable price. I bought that product few month ago, and this is my second order. I guess I will order again in the future if I need a similar product!!!
These are brilliant. Adjustable height to position the shelves at differing heights. So simple to put together. Strong and sturdy. These hold all my filled glass Airtight jars with dried pulses,flour, beans etc, and excess shelf stable food stock such as tinned,packet foods. Well worth the price as they’re far stronger than traditional wooden units. Will be buying more of these.
As described good product and great price one down side is the shelves I would prefer them to be the other way round with the lip facing up not down so things don’t slide off the shelf easily but it only works one way round but it is still a nice handy bit of kit and strong and versatile and great price
Product arrived with both feet and wheels, easy to assemble and sturdy. I used the wheel option with items on it is a little wobbly to move but over all happy
Disappointed with order I received as it had obviously been returned by someone else. One of Part F (from memory, 12 x plastic bits) was missing and one was damaged, probably the reason it was returned previously. However after 10 mins trying to work out where to put it, I realised it wasn’t at all necessary. Spent another 10 mins assembling the unit, which was very straight forward. So 4 out of 5 stars for opened package and odd part F. Main thing is shelf unit is good, maybe a little pricey.
I dropped 1 star as I have another similar shelf system and the plastic parts the shelves sit on are not as well made on this one compared to that. However this one did have two extra features that improved the design. The plastic parts have the word “Top” and an arrow so you know which way up to couple them together on the poles. Also the poles have a double line every five lines making it easier to work out on the other poles to match the height when adding the plastic parts. I agree the instructions for this were a bit limited so here are some tips.
TIP 1 – Make sure you distinguish which are the 4 x top poles and which are the 4 x bottom poles by looking at the ends first. You will be able to clearly see you have 4 with holes in the bottom that look different to the other poles.
TIP 2 – Always start building with the bottom shelf and the 4 x bottom poles first just to get a feel for what you are doing – I put my bottom shelf on the very first line so it is stable. If you put the poles together first then you have a lot more trouble adding and removing shelves.
TIP 3 – Keep the shelves relatively loose at first as you may find you want to adjust the shelves and it is easier if you haven’t tried to completely fix it in place by putting all your weight on them to fix into the black plastic pieces.
TIP 4 – We got two extra black plastic pieces in a yellow bag. They are not special apart from being spare in case you break or lose some.
TIP 5 – I find it is easier to build these with two people but it can be done with 1 person if you turn the shelves on their side instead of upright.
TIP 6 – If building in a different room make sure you have checked you can get it in the final place and decide if you need to build in two halves before moving.
I hope that helps if you are struggling with building it. Good luck and thank you for reading.
Five minutes in I was cross. Fifteen minutes in, pretty miffed (I am, after all, British). 45 and I was ready to smash it to smithereens.
The first mistake is to start, as instructed, with two little black clippy things. You try to clip them round the leg, as instructed. They don’t fit! They don’t meet! Occasionally they make a seductive little “click!” and your heart leaps! Until you realise that was YOUR side clicking and the other side has now unclipped. Cue gnashing of teeth. You repeat this, hoping those two clips were a manufacturing anomaly, on all the legs, getting progressively more livid. They aren’t. They’re all crap. You need Another Way. Don’t do any of this. Read on instead.
First thing – look at one of the shelves. At each corner, there is a metal tube. This tube is your friend. Not only does it fit over the pole but (something you’ll only discover after an hour of gnashing and wailing) it FITS OVER THE CRAPPY CLIPPY THINGS! HA! If you know this, you’ll also realise that the 1mm – 2mm gap where the crappy clippy thing doesn’t meet its partner DOESN’T MATTER. Got it? This is important. If you don’t know this the whole thing will go in the bin before you’ve got a shelf on. Hang on to this. It’ll keep you sane.
Right. 2. Grab two clippy things. You’ll be momentarily convinced there are two types. There aren’t. You’ve got one upside down. Make sure they are both the correct way up (with “top” pointing up). Put one of the crappy clippy things on to the pole and (this is CRUCIAL) make sure the little ridge inside the clippy thing is sitting into a groove on the leg. This ensures the crappy clippy things will only NOT meet by 2mm rather than, say, at all. Now clip the other side of the crappy clippy thing into the first one. Have you made sure they’re both pointing up? Both fitting into the leg groove? Good, then you’re fine. They won’t meet. This DOESN’T MATTER.
Do this at the same height on the four legs. Grab a shelf and lay it on the floor with its surface-that-will-have-things-on-it is facing a wall. Pokey a leg through a corner tube, right through until your first clip gets to the tube. In it goes! Snug as a bug and (this was my eureka moment) holding the crappy clippy thing pair together so they can’t boing apart. Ha! Repeat, poking the other three legs through and then stand it up. Feel marginally smug.
Put four more clips on, wherever you want your second shelf. Again, make sure the ridge and the groove are together, and make sure both have “top” facing up. When you have all four on, grab another shelf and GENTLY lower it down over the four poles. You may want help here – you want to get each corner tube at least a few mm over each crappy clip so they can’t ping off. Once all are slightly covered, go right ahead and bang that shelf down hard so all the clips are covered. Boom.
Repeat for the third one. Have a nice glass of icy Sauvignon and admire your work. You did not have a stress-related coronary. You’ve won.
As a side note: did anyone else get seduced by social media images of one of those over the sink drainer jobbies? I did. Then discovered they are between 50 and 80. Ha! Hahaha! No. I looked at all manner of wire shelves (Google “Elfa”) but, with wall bars etc, couldn’t get them cheap enough (I’ve done the leg work for you. Don’t bother. Everything else is more expensive). Then I found this. Fits the useless end bit of my work surface perfectly. The shelves are wire, so the dish water drains through. AND (bonus smuggery buggery points here) my plates, saucers and the dog bowls all slot into the shelf wires like they were made for them. BUHAHA HAHA.
I have reserved a chrome cutlery drainer at Dunelm Mill (3. 7 on here) and intend to attach it with S hooks to the shelf edge. I’m also going to screw the whole lot to the wall because I made some teeny weeny errors in measurement and one light sneeze and this whole shooting match is going sideways onto the tiled floor. But that’s not Amazon’s fault, it’s mine.
So, I have a fabulous, three tier drainer for 25. My plates etc fit perfectly and it all drains onto a tea towel. No longer am I washing stuff up and trying to jam the clean stuff amongst the filthy stuff on the teeny weeny drainer. This thing is perfect. And cheap. And sturdy (once you get the hang of it).
My blood pressure has returned to normal and I have icy wine to drink and smug staring to do. Good luck, brave assemblers. You can do this. I believe in you.
If you buy the similar 3 or 4 shelf unit, much of what I say will be the same, just ignore the bit about the second half of the pillers.
The MAIN problem people seem to encounter is putting them togther. The instructions are a bit uclear but the secret is making sure the corner pieces CLICK INTO the dips on the poles, and sliding the shelf down into the 4 corner pieces simulatneously so they don’t pop out or slip. With that in m ind, read on …
1) The systen is packed in the right order to put it up (well, mine was).
Start by taking out the first shelf and placing it where the unit is going to be positioned, with the NARROW side of the corner mounts UP (yes it looks odd, but the ‘lip’ edges of the shelves face down = this is so you can slide stuff on and off the shelves without the ‘lip’ getting in the way).
2) Unwrap the first two pillers. Note these have internal screw threads – the smaller hole is the bottom :-). Lift off the second shelf and place it nearby .. Then unwrap the second pair of pillers.
3) Open the parts bag. Find the FEET. Screw one foot about half way into the end of each piller (do it now = once the shelves are assembled you will have to tip it over to fit the feet or risk crushed fingers)
4) Right, next comes the secret of getting the unit level and the shelves in the right positions.
a) Place one piller in each corner of the pre-positioned shelf. This will align the pillers upright in the 4 corners.
b) Decide how much space you need under the shelving. This is best done by placing whatever box etc. is going under onto the pre-positioned shelf on the floor and noting where it comes up to on one corner piller. Yes, this means you will add an inch to the space, but thats all to the good everyone overfills storage boxes.
c) Find one pack of 8 corner support halves. There is a ridge inside each half piece . This goes UP !
Snap one half onto the piller and slide it down until the ridge clicks into one of the dips on the piller.
Sliding it onto the dip is the only easy way to be sure it’s lined up on a dip and not floating between dips.
To get the other 3 corners absolutly right, just take them all out and line them all up on the floor. You can then snap the supports on at the same level. WARNING. there are some ‘double dips’ in the pillers. This might help with counting dips when lining up BUT you can end up with supports on different dips ! To use a double dip, I slid the corner support DOWN onto the top dip of the pair (the bottom one seemed to be slightly shallower).
Place the pillers back into the corners of the shelf on the floor and check there is a good inch between the bottom of the support and the top of the box or whatever is going to fit under the bottom shelf.
5) With all 4 pillers being held aligned by the shelf on the floor, slide the other shelf carefully down from the top (with the WIDE part of the coner DOWN) onto the 4 corner supports. Then press into place. Once you have done this, you can remove the shelf on the floor which you used to position the unit and align the 4 pillers.
6) For each of the next shelves, do them one at a time and leave AT LEAST one dip between the top of whatever box you are using to set the shelve position. I actually used a box on the first shelf and moved it to each corner in turn to get the position right
TYPICALLY you will have 3 shelves on the bottom pillers.
7) Unpack the rest of the pillers and screw them in. Then assemble the rest of the shelves.
8) BEFORE loading the unit with boxes full of stuff, adjust the FEET to level the unit. NOTE after leveling I unscrewed the front feet a bit extra so the whole unit was pressing firm abckwards against the wall == otherwise you should use the anti-fall-over kit they supply.
9) IF you get a shelf in the wrong position, it is a relativly simple task to knock it back up and unclip the supports UNLESS you already loaded it with +++kg’s ! Then it’s a bit harder, best done with a lump hammer and an old book to prevent shelf damage, one corner at a time.
10) The extra corner pieces in the yellow bag are SPARES in case you loose some 🙂
Finally, the black plastic coin packing spacer pieces really are needed to protect the shelve corners during shipping. Two were crushed on the borttom two selves of my pack but the shelf corners themselves were fine.
My final observatiuon is that whilst the shelves might be best placed in a corner to take advantage of the walls to stop stuff falling off, the average house never seems to have perfectly straight 90 dgeree corners. So the two walls and floor are never in perfect corner alighment. In my case, the FEET allowed enough correction so the shelving could be pushed tight into the corner, however this required a lot of fiddling.
GOOD LUCK !