EasyFloor© Self Adhesive Floor Tile Vinyl Flooring
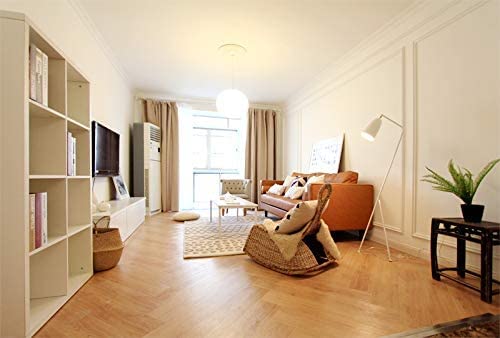
EasyFloor© Self Adhesive Floor Tile Vinyl Flooring Natural Oak Wood Effect Peel and Stick Tile 15X90cm 35pcs Wooden Flooring for Kitchen Living Room and Bathroom Floor Planks

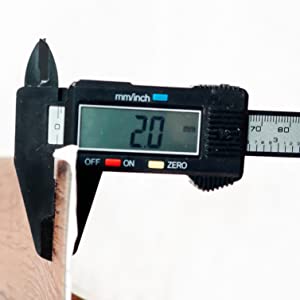
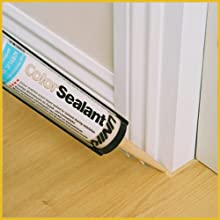
Clear Cut
Use thick blade scissors or Stanley knife for a clear and neat cut.
DO NOT use thin blade scissors as it will make the edge rough and crack.
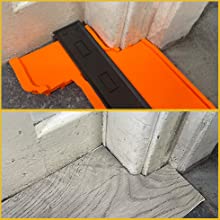
Use Gauge
Contour gauge is a handy tool to measure and shape the awkward wall shapes, corners or joints at door.
Floor Clean & Extra Glue
Based on our experience, the self adhesive may not work perfectly when there are residues or grease left on the sub-floor. When it happens, apply a little bit extra adhesive will resolve the issue. If you need help, just ask us.
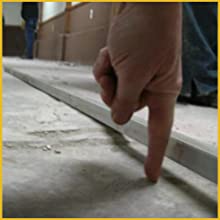
Uneven Sub-floor
For Uneven sub-floors, it is highly recommended to do a self leveling before stick down the floor planks.
Important Things To Consider Before You Buy
- Colour is crucial to this product and the color may be slightly different from batch to batch. Therefore free sample is available for you to check before purchase.
- Please note that all the products are packed with yellow duck tape as new from manufacturer. This outstanding colour of tape is to help workers to check all the products are sealed properly. Please do not mistake the item is second-hand packed due to this as some customer complaint about this with mis-understanding.
- Working out room size and packs you need sometimes can be confusing. Please note that if a room is 5m long and 5m width, the room size is not 5sqm, but 25sqm. We offer free consultation on this.
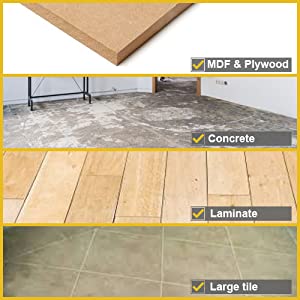
- Tips on floor preparation – For concrete floor, please erase any bits that sticking up and fill all the cracks. For laminate floor and tile surface, as long as surface is flat and clean, it’s god to go. For MDF or plywood, it is recommended to have a layer of primer priory to the plank installation.
| Weight: | 15 kg |
| Dimensions: | 92 x 16 x 7 cm; 15 Kilograms |
| Model: | Natural Oak |
| Part: | B200002S |
| Colour: | Natural Oak |
| Batteries Required: | No |
| Batteries Included: | No |
| Manufacture: | Simple Home |
| Dimensions: | 92 x 16 x 7 cm; 15 Kilograms |
Have used 3 packets of this now, very easy to cut and lay, i laid mine on concrete floor and and number of the planks didn’t stick well, so applied a little bit HardAsNails adhesive and all is well
As in previous reviews we found just one or two tiles that didn’t stick but sorted this with a dab if strong glue. End result looks fantastic. Very pleased.
I love the look and how easy it was to put o on!!!
I’m not one for writing reviews, but honestly i love this flooring, i was just going to have this as a temporary floor for my hallway, but it is so beautiful and looks hard wearing for my wheel chair, i have decided to keep it, its easy to lay, very sticky i found, i had help to lay it, but i would highly recommend and now i have decided i want this in my living room too, thank you so much for the quick delivery and a great floor, i laid mine straight onto a concrete floor and it was perfect 🙂
If I can put the floor down, anybody can very easy, I’m very nice, very happy five stars
Fantastic product , quality shines through and it’s great to use and does exactly what it’s designed for ! Recommend using floor adhesive as well as backing adhesive to get a really professional grip ! Thanks and well done for providing a superb product !!
This flooring was really quick to lay, and looks like quite expensive flooring.
(Still got to seal the edges) Great value, easy to lay, easy to trim, feel good under foot & only needed one box for the bathroom
I bought spray glue but didn’t need it was fitted on top of lino very sticky
I was a builder and decorator for 15 years and can turn my hand at anything. Also used to lay tiled and wooden flooring so know what I’m doing.
I started with a completely flat floor, cleaned, scraped and used latex where there was any low spots.
THE GOOD
This vinyl is so easy to cut. score with a sharp Stanley blade on the printed side and snap.
You can use sharp scissors for some of the architrave if you need to.
Easy to clean, I used sticky stuff remover for the spray glue where it had got on some of the planks.
Damaged plank, cut out and replace easy unlike click together.
THE BAD
The glue is rubbish. Really bad. I wish they were not adhesive at all. The only thing I think they would stick to is other vinyl.
I used spray contact adhesive but now wish I bought proper strong adhesive and a fine combed trowel/spreader.
Everyday I wake up with a few boards that have lifted slightly which I pull up a little and stick down with strong super glue.
THE INSTALLATION
I left for well over a week flat at room temperature.
First off, any of the reviews where people have laid this floor with planks next to each other without staggering, What are you people smoking?
Also 5 metres squared is 5 square meters not 5 metres by 5 metres. That would be 25 metres squared people, c’mon seriously lol.
Packet contents are accurate.
Make sure to stagger your joints!
An easy and effective way is to measure 2foot and cut a board.
You’ll have a 1′ and 2′ cut from 1 board, basically one 3rd and two 3rds
Find your centre and lay your 1st full board and keep repeating.
Use a straight edge to keep them perfectly straight.
Then next to it lay the 1′ and next to that lay a 2′ and repeat.
This is easiest way and looks way better than a brick pattern.
I bought 1 packet for the hallway as a test, I’m still debating whether to buy the other 9 packs.
I think with decent adhesive it will be fine so might buy another pack for a cupboard and test that.
Overall I’m mostly happy but time will tell.
It’s just a shame boards are lifting in places as the pictures show.
I think it’s great for the price and with the right approach can be laid perfectly.
Just wish they had an option with no adhesive.
My husband says it’s easy to lay and looks a million dollars.
Sticks well, so haven’t needed any extra adhesive.
Highly recommend this product.
1 pack was enough for my hallway. It covers 5 metre squared. I decided to try the herringbone effect with a border to make my hallway look wider and I LOVE IT. Straight edge Border was tricky. So if you are not that into DIY or geometry then just do normal staggered layout of herringbone to the edges. Make sure you measure the centre point and you’ll need a protractor/angle measuring tool. To make sure it is at the right angle or it can go wonky. Mark on floor with pencil.
Used a Stanley knife at first to cut, then discovered big kitchen scissors work a treat! Mark out where to cut and carefully trim. Sooooo quick! I did this on my own with my daughter helping a bit as she wanted to.
Thought it would take longer to lay but I pulled up carpet, removed underlay, and carpet grips, filled holes in concrete, sanded,
Swept all the dust off, and lay all the floor in one evening. With Netflix on
Just waiting for some wood seal/grout to fill in any layers, and I’m looking for a varnish/waterproof sealant to go on top. Not sure if that even exists.
Some planks were lifting a bit so, I’ve weighed them down overnight with the other packs I bought for the lounge. This morning they seem to be pretty secure. I’ve also got extra spray adhesive but didn’t need to use. I might in the lounge and if any lift.
I really like the textured wood grain feel of the planks.
Tip: make sure you look at the wood pattern before laying each plank and mix it up so that your floor looks more realistic. So the knots and patterns don’t repeat too much.
So far so good!!! 🙂
As long as the surface is smooth it lays well
Did need spray adhesive for a few areas
Great quality for the price, did my whole living room floor (23m2 or so, oddly shaped room) and only cost 250!
Quick customer service too, they fixed the slight problem we had which wasn’t fault of there’s. Would recommend. I was weary at first, but so glad i bought this item.
These are a good size so you feel like you’re getting a good chunk done quickly. A couple of boards haven’t stuck well, but I’ve bought 5 packs so far and only 2 or 3 haven’t stuck, so not bad at all and that could well be something to do with my floor. You should obviously use a Stanley knife but for ease, I used really sharp scissors to cut them and it worked perfectly well. My previous floor felt very slippy and the dog slid about on it. These are much better but I’m not sure why as they feel perfectly smooth. I did my living room and was so pleased with them I’ve done my dining room too. Very much recommend and definitely worth the price.
A year later and this flooring is still great! I’ve just done my 3rd kids bedroom. So far durable, easily cleaned, easy to lay, great price, quick & looks good. Perfect for my kids rooms!
So far I’m delighted with this purchase! Durability remains to be seen, however the quality of the product looks very good so I’m confident this flooring will be up to the job. I’ve laid it on a smooth concrete floor which I sealed with SBR first. I found the process very easy, and completed it myself in a day, and I’m not a professional! I feel that these vinyl boards look much better than the vinyl roll, and were in some ways, easier to lay. I will now be doing my other two kids bedrooms!
Overall I am very pleased with this product….I purchased 8 packs…….did 2 large rooms and 1 galley kitchen. My one regret several months after completion is that I did not use additional heavy duty adhesive while laying the floor because in each room the ’tiles’ are lifting and we will have to remedy this with extra work. So in conclusion I will say that I would recommend this product BUT strongly urge you to source your own adhesive.
Had old dark brown and damaged floor in the lounge. As I couldn’t possibly to empty room of furniture , putting standard vinyl in wasn’t an option. Those were. With an effort ,moving furniture around I managed to lay them down. I love natural oak color. I am not sure if it was me or not all of those strips were straight.
No matter how much I tried I have a few gaps between them, usually on the shorter ends. Nothing extremely major ,but bit visible. Nevertheless I am much happier with this oak floor than I was with old and dark one.
Delivered right on time!!!
So easy to lay and cut. I used scissors to get all the shapes around skirting boards and door ways. I did use extra adhesive spray due to putting in the entrance hallway. But also used on my landing on top of already lay laminate flooring which stuck down quite well without actual adhesive. You can lay them in all different patterns.
They look lovely. Already had some really nice comments about them and they’ve only been down 2 days. Not sure how long they will last. But my old ones lasted about 7 years and they where square tiles from the pound shop. So I’m hoping these will last a long time.! I bought 2 packs of them so 100 pieces all together. Have a few small pieces left. Probably would have had more if it wasn’t for the small area on the landing and cutting them down. I would definitely get them again maybe for my lounge. Colour match was perfect!!!
I purchased this floor as a temporary finish whilst we renew our bathroom next year.
I only need 4.7sqm so this pack was perfect and very affordable.
The thickness of the floor was a pleasant surprise and it covered existing mosaic style floor tiles perfectly with no pattern coming through.
It cut perfect with a sharp Stanley knife and left a nice neat edge. The flexibility of each sheet was ideal for helping with those awkward cuts.
The adhesion was good as I’d give the sub floor a really good clean, if you clean the floor prior to installation these will stick with no need for extra adhesive.
Once I finished installation I finished the edges of the room with a neat bead of white silicone and the end result was spot on, looked like a high quality floo
My pack was damaged in transit and a few of the boards reflected this, the seller sent replacement boards really quickly with a tracked service which was great.
The adhesion is poor and the planks would be better off not being self adhesive. The next time I use these planks I will put floor adhesive down first.
I used a pair of old hairdresser scissors to cut the boards to size, lay them, then the next day lifted them piece by piece in sections to put the floor adhesive down. (I would have been better off just doing that first, but thought they would stick).
I then sealed each board with oak coloured sealent, went round the edges and, when that was all dry, a layer of vinyl friendly floor varnish. I went ocd on the job as I’m fairly sure my floor is not completely flat and as it’s high traffic wanted it thoroughly sealed.
This was a super easy job, and looks really professionally finished. I’ve no experience at all with flooring and have my little 7 month old, so I only had bouts of 20 minutes with which to complete it. What I would love to do is buy these planks again and cut them into strips, to lay a parquet floor, which would look so great and be so easy to do.
So, if you’re tossing up whether to give these planks a go, go for it, they are easy to lay (just put floor adhesive down first), easy to cut and the look is lovely. I went for natural oak I think it was. The seller is trustworthy and, like me I’m sure you will be really pleased with the end result.
Before purchasing I asked for a sample of 2 colours, which came the next day, and I decided to go with White Oak. This Frontroom measures ^4.66 *>3.66 which is the largest room in the flat. We bought 4 boxes and only used 3 boxes and probably 3/4 tiles from the fourth box to complete it, leaving us with enough spare to cover the hallway or bathroom (we plan to do the entire flat).
The tiles surface is textured and along with the colour variants it serves wooden floor realness. It was easy to install and I preferred to use scissors when cutting rather than a Stanley knife. We have ordered extra adhesive as some of our floor is uneven in nature so doesn’t allow for a flush finish in areas. We have hoovered as well as (microfibre) mopped and for small marks wiped it with anti-bac wipes – overall very easy to clean.
All who have seen it thinks that we had professionals come in and do it, however, it was just us two strong girls who love a bit of DIY. Both our mums want it now, I would highly recommend this flooring to everyone as anyone can do it.
I found the adhesive fine even though bought spray glue as reviews advised (I never used this in any rooms) It looks beautiful and very pleased with results (colour – Washed Grey) I have attached some before and after pictures!
Great delivery! Great product! Great price! Now time to do another room
Update*** – 2nd Room (Hallway)
Completed the hallway within two hours of opening the box and again ticked all the boxes and looks great! DPD delivery in the morning same as last time! – You really can’t go wrong just need some basic tools to fit (I used):
Stanley knife
Metal ruler
Pencil
Scissors
Then you are good to go! Kitchen next!
For the price of 10/metre squared it isn’t too bad. However a couple of pieces in the pack had patche dog what looked like bleach staining where pigment hadn’t been printed on them. They were very easy to cut with scissors, I found it more accurate than a Stanley blade. The adhesion may very depending on the surface but I found the on hardboard they needed contact adhesive. Also some of the edges lifted so had to apply more. Overall happy with the effect for a cupboard but would be hesitant using for more than that.
Our kitchen has a lot of space to cover and we opted for a herringbone effect. The adhesion to tiles was pretty good but we also used spray contact adhesive to ensure a tight grip to the flooring.
The flooring was easy to cut to size with scissors and despite a few tiny blemishes it was of really excellent quality. I’d recommend ordering a little more than you need just in case if you go for herringbone!
The effect really is great, and in this case we used grey silicone to fill any tiny gaps around the edges which was really easy to carry out. Highly recommended!
I know Nothing about flooring but fitted this with so much ease. The quality of it is brilliant,I did have a couple of dodgy planks because the adhesive was put on the wrong side but used them up where hardly anyone goes(downstairs cupboard).
I ordered a total of 3 packs throughout my project of covering the living room floor which equates to 15 metres squared.
Make sure you prep the floor by sweeping up dust, making sure there’s no bumps on it and make sure that the floor is clean and smooth.
As a general rule of thumb, I would recommend the following tools to use with this flooring-
Stanley knife with replacement blades, it blunts it after a while.
Metal ruler for precision adjustment of the planks
Carpet spray adhesive for tricky bits such as around door frames and edges that don’t quite stick to the floor.
Very impressed with these tiles. I bought x2 packs which were slightly different, one seemed to have a shiny coating so I just mixed them up. I also used a spray glue but ran out halfway but the ones with no glue have stuck with no lifting so far. I placed weights on them after laying to help them stick down as I went. These were placed over floor tiles. They are thick & very easy to fit. Very pleased as they complete my kitchen makeover. I still have plenty left so will do the bathroom too.
Since installed though, there seems to have been a small amount of shrinkage or movement, some small gaps (only 1mm or so) opening up between tiles that weren’t there when first laid. (Had left them for 24hrs at room temp before installing – but only just 24hrs, maybe it’s worth leaving for longer?)
Still looks way better than the grubby+worn tiles below, though. A pack of these and a coat of paint were quite effective as at least a temporary fix for a bathroom that could really use a complete refit.
Arrived really quickly by DPD. Also requested a sample which was sent free of charge.
Flooring is easy to install, I fitted 13 SqM in my kitchen over a weekend. Adhesive wasn’t particularly good on a concrete floor despite it being sealed. I purchased spray adhesive to get round this and it worked well.
The flooring, once laid looks to be much more expensive than the cost and it’s easy enough to fit for anyone. Just make sure you have a sharp stanley knife, a metal ruler and I bought a floor roller as well to smooth it down which helped a lot.