8Bitdo Micro Bluetooth Gamepad Pocket-sized Mini Controller

8Bitdo Micro Bluetooth Gamepad Pocket-sized Mini Controller for Switch, Android, and Raspberry Pi, Support Keyboard Mode (Blue)

8Bitdo Micro Bluetooth Gamepad Pocket-sized Mini Controller for Switch, Android, and Raspberry Pi, Support Keyboard Mode (Blue)
This controller is compatible with the Hover X1 drone for manual flight mode, and while the initial setup is a bit tedious, it functions quite well once you get it working. The controller connects to your phone via bluetooth, and then the Hover app on your phone connects to the drone to relay the controller commands.
First you need to put the controller in “keyboard mode” and map the buttons to keys that correspond to the supported flight controls (forward, backward, up, down, strafe, etc). This involves running the 8bitdo app on your phone and connecting the controller to it, which I expected a modern mobile app would walk you through, but it provides no instructions when launched. You have to click the lower-right button with the checkered pattern on it to power on the controller, and then hold it close to your phone until the app displays a picture of it, at which point it tells you to click the power button again to connect it to the app. The controller isn’t actually paired yet, but the app can now update its configuration. At this point, it will tell you to switch the controller to keyboard mode if you haven’t already, using the little slide switch at the bottom. The app UI is very basic with no real guidance, and it forces an awkward horizontal layout, but essentially you will click on the “Buttons” tab and then assign each button to a key, and finally click the “Sync” button to upload the key mappings to the controller. On Android at least, keep in mind that if you switch to another app and then switch back, it restarts the 8bitdo app every time and loses everything you’ve done that wasn’t synced, forcing you to re-connect the controller and navigate back to the button mapping screen. Very annoying and frankly unacceptable for a commercially-developed app in this day and age.
You can find a guide online for the supported flight control keys, but note that all of the guides and videos that I’ve seen map the controls backwards of what you’d expect when flying the drone from the camera perspective. I guess these folks are flying it with the camera facing them.
When you’ve finished setting up the button/key mappings, you can close the horrible 8bitdo app and will only need to use it again if you want to change the mappings. Now you pair the controller with your phone as you would any bluetooth device, but first you must hold the tiny button on the bottom of the controller for a few seconds until the blue light blinks quickly, at which point it will show up in the bluetooth device list on your phone. Once paired, you just turn the controller on with the power button when you want to use it, and it automatically powers off after some time of inactivity.
Now you can launch the Hover app, connect to the drone, go to manual mode (you’ll need to activate this under “Modes” if you haven’t used it before), and then click the “RC” button at the top right of the screen. It will show a “Connect” button but if you’ve already paired the controller with your phone, all you have to do is click any button and the app should immediately update, telling you it’s connected.
Finally, you’re ready to launch the drone and fly it! The first-time setup is a little rough but it will be much easier every time after that.
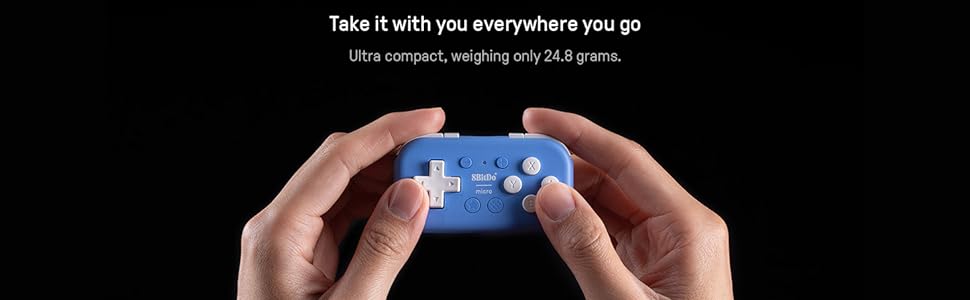
I’m so glad for 8BitDo. I’m glad someone showed up and said “all these mobile controllers out there – there has to be a best, most portable version of all of them, well built, and for a reasonable price” and then built them all. My Micro is perfect – I don’t think it could be smaller or easier to carry, and tough enough for a pocket, but also actually playable at length. Get two!
Wie vom Hersteller gewohnt ein guter Controller. Luft ab der Switch einwandfrei und ist eine Alternative zu den Joy Cons im Handheld-Modus, oder fr den Urlaub, wenn der Platz im Koffer nicht mehr reicht.
I use it for hand mobility reasons, but it *really* speeds up your workflow.
I have used the 8bitdo zero two for drawing on ipad for years now.
Because procreate doesn’t have custom keyboard shortcuts, I wasn’t able to use the zero 2 for procreate (I used clip studio instead).
I saw a recent review on here that said many procreate shortcuts CAN’T be mapped, such as undo, but that’s not true!
You can map pretty much any button or key combination. Just keep in mind that the “command” key is apple’s equivalent of the Windows key, which the other reviewer probably didn’t know.
Edit: Its only been a bit over a week, but this little thing has improved my workflow SO much!! Because you can set profiles, it takes about 10 seconds to switch from my shortcuts for clip studio, to procreate, to goodnotes! I can use it for virtually any app that has any shortcuts.
The battery life is GREAT, and since it uses USB-C you can just use your ipad cord. I’m recommending this thing to all my friends haha
All 16 buttons are programmable. Put it in Keyboard (K) mode to connect to windows. The D-pad and buttons will output a letter, so you will have to either use their software to reprogram it (easy), or assign those preset letters to be the shortcuts in your program. The button remapping software was pretty decent, you can assign any keyboard character, combos like CTRL + F3, or functions like Pg Up. I had to download the app for iphone and connect it to the iphone to do the remap first and then connect it to the PC, ok fine it was easy enough. It also will save multiple remap profiles but not on the device only through the phone app. It is an awesome little remote control for your computer. Pair this with autohotkeys for a very powerful device!