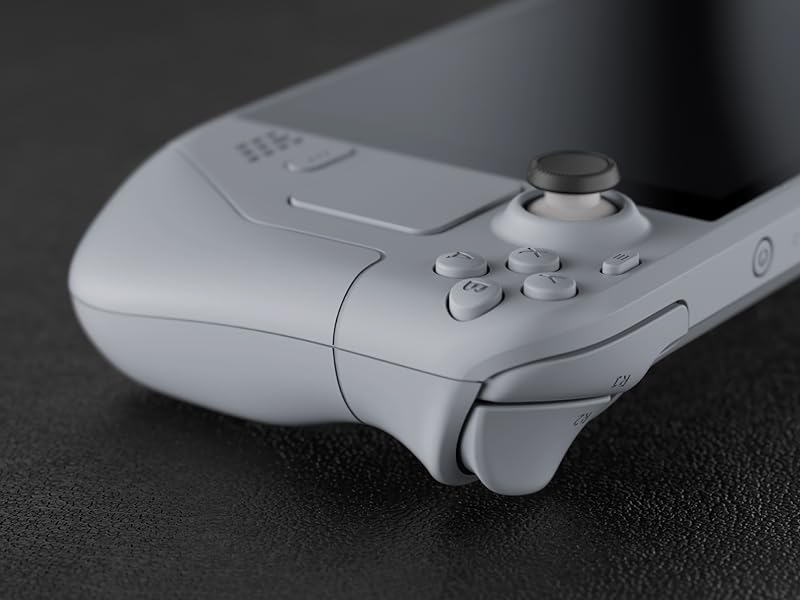
eXtremeRate New Hope Gray Custom Faceplate Back Plate Shell

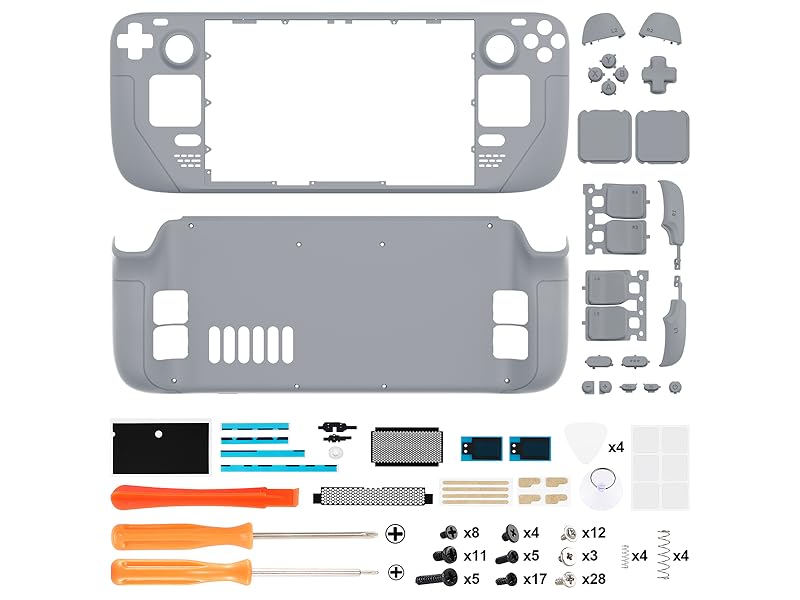
eXtremeRate New Hope Gray Custom Faceplate Back Plate Shell for Steam Deck LCD, Handheld Console Replacement Housing Case, DIY Full Set Shell with Buttons for Steam Deck Console – Console Withou
Would be awesome if you combine it with the replacement buttons from eXtremeRate
 Face Clicky Kit |  Cherry Blossoms Pink |  Chrome Gold |  Clear Atomic Purple |  Chameleon Purple Blue |  Scarlet Red |  Chrome Purple | |
| Customer Reviews | 4.6 out of 5 stars 49 | 4.3 out of 5 stars 27 | 3.4 out of 5 stars 12 | 4.4 out of 5 stars 46 | 4.3 out of 5 stars 11 | 4.3 out of 5 stars 27 | 4.5 out of 5 stars 2 |
| Price | £17.99 | £18.99 | £18.99 | £16.99 | £18.99 | £18.99 | £18.99 |
| For Steam Deck | ✔ | ✔ | ✔ | ✔ | ✔ | ✔ | ✔ |
Replacement shells available in a variety of colors and patterns
 Cherry Blossoms Pink |  White |  Chameleon Purple Blue | 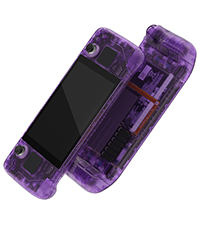 Clear Atomic Purple |  Scarlet Red |  Chrome Gold |  Wood Grain | |
| Customer Reviews | 4.3 out of 5 stars 23 | 4.6 out of 5 stars 47 | 4.1 out of 5 stars 29 | 4.4 out of 5 stars 230 | 3.5 out of 5 stars 7 | 3.7 out of 5 stars 3 | 4.7 out of 5 stars 14 |
| Price | £42.99 | £42.99 | £42.99 | £33.99 | £42.99 | £42.99 | £42.99 |
| For Steam Deck | ✔ | ✔ | ✔ | ✔ | ✔ | ✔ | ✔ |
I recently upgraded my Steam Deck with the eXtremeRate Cover, and I couldn’t be happier! The installation was straightforward, thanks to the comprehensive instructions. The cover fits perfectly, giving my device a sleek and customized look. The quality is top-notch, with durable materials that provide excellent protection. In fact, the quality is so good that I prefer it over the original Steam Deck’s casing. This one is way more sturdy and stiff—this is what the original Steam Deck should have been. I particularly love the vibrant color options that make my Steam Deck stand out. For those worried about the shell replacement being hard to do, if you take your time and organize your parts and screws while taking apart your Steam Deck, the job is pretty easy. Note! This case doesn’t fit if you have a Steam Deck OLED, but I am sure eXtremeRate is working on one though. This cover is a fantastic investment for anyone looking to personalize and protect their device. Highly recommended!
This mod was the most exhilarating thing I’ve ever done in my life and I’ve given birth. I don’t know where I shook worse, being on the fent and sliced open during the c section or removing the screen from the steamdeck
Point is, like birth, it was definitely worth it! My steamdeck is gorgeous and for added detail I went ahead and inked the buttons and indent lines with gold alcohol ink, which has held up fantastically through dozens of gameplay since.
So hab mein Steamdeck komplett umgebaut. Hab mir von Steam ein 64GB refurbish LCD Steamdeck gekauft. Hab dann erstmal ne 1 TB SSD eingebaut, HAL Effekt Sticks usw. Das ging alles Recht gut und einfach. Dann dachte ich mir ach ne neue Hlle sieht bestimmt toll aus. Eins vor weg, wer noch nie an Elektronik gearbeitet hat, Finger weg! Es gibt ein tolle Anleitungs-Video allerdings sind darin alle Teile vor gelst. Genau hier liegt das Problem. Akku und Display Lsen ist ein Krampf. Eine mini falsch Bewegung beim lsen und Knack, Display kaputt. Also bitte nur erfahrene Elektronik Schrauber. Aber das Ergebnis ist Mega! Hab ein paar Knpfe vom Original behalten, wegen dem Kontrast, Aber sieht einfach Mega aus.
These looked great in the photos and I’m happy to say they do not dissapoint when you recieve them.
These sheel replacements look and feel great. A fun way to make your steam deck stand out. The plastic feels high quality and the colouring (I order the Chameleon Purple/Blue) looks outstanding. It’s not simply two tones, but actually has a pearlescent quality where the colours appear to shift from Blue to Purple depending on the angle of the light.
Includes several useful tools for making the replacement which is helpful. I would reccomend using plastic guitar pick rather than the metal one include. The metal one should work fine but a plastic one is a bit safer. Everything you need to complete the shell replacement is included in the box.
5.5/5
Looks good but… if you have not stripped down devices before, this may be a little too complex for you.
The online video instructions are good, not sure why the white costs more than some of the other colours but, for the amount of design, effort and effor that has gone inyo the product , it is good value for money
Die Qualitt ist definitiv da, das Video ist sehr hilfreich.
Man sollte selbst dem Video exakt folgen, auch wenn einem manche Schritte komisch/unntig erscheinen.
Ich selbst bin seit 20 Jahren R+F-Techniker und habe sehr viel mit Reparaturen, aber sehr wenig mit kleinen, verklebten Displays zu tun gehabt.
Trotzdem hab ich beim ersten Umbau ein paar “Abkrzungen” genommen, die es beim folgen des Videos dann schwerer gemacht haben.
Zum Umbau sei weiter zu sagen:
– bei mir war das Metall Gitarrenplektrum nach unten scharfkantig ausgestanzt. Beim ersten Umbau hab ich das nicht gemerkt und hab mir mein (altes) Steamdeck-Case damit zerkratzt. Fr das zweite Steamdeck habe ich vor dem Umbau die Grate dann weggeschliffen.
– bitte nicht wie im Video fters gesehen auf Kontakte fassen (Platine und Flachbandkabeln), das fhrt immer zu Problemen in der Zukunft.
– super vorsichtig sein mit dem Flachbandkabel frs Display. Eins meiner Displays ging nach Tausch nicht mehr an, und musste ich als Austausch von ifixit fr 65 nachbestellen. Das ist kein Problem von diesem Kit (!), sondern einfach weil ich beim ersten Umbau unvorsichtig mit dem Flachbandkabel war. Leider passiert dies (laut Reddit) fter, die Kabel sind leider sehr empfindlich, und ebenso leider kann man dieses nicht einzeln bestellen.
– beim Display ausheben/auslsen nicht (!) and die Ecken des Glases kommen, das bricht sofort. Auch die Wrme gleichmig nur auf die Kanten des Displays, nicht auf die Flche. Ein 3D-Druckerbett auf 60C und das Steamdeck dort 2-3min ruhen lassen (facedown) ist ebenso eine gute Idee um den Kleber anzuwrmen.
– nehmt euch Zeit. Besorgt euch viel Licht, eine geeignete Unterlage, und eventuell noch einen halbwegs ordentlichen Feinschraubendrehersatz.
Was quite easy to for their YouTube along the way and I am really happy with the outcome. 100% on the kit apart from the sharp guitar pick
I did cut myself whilst removing the screen so I’d be careful when you get to that part. The kit has everything you need to get you through it for a stylish steam deck and it looks fantastic
-Be mentally and financially prepared to replace your screen if necessary. The hardest part of this was not damaging the screen, and even after reading a lot of advice and watching vids I was extremely close to damaging mine multiple times while I was trying to remove it. On top of almost cracking it, I also almost separated the screen from its component because it’s seriously the tiniest space you need to pry the glue away from, if you go too far in you’re going to damage it. I took a picture of the back of my screen to try to help. DO NOT SHOVE TOOLS IN FARTHER THAN THE OUTER BLACK LINE.
-If you don’t think you damaged your screen but it won’t turn on once you plug it in and turn the console on, go back in and shove the screen to mother board ribbon cable in a little harder than you think you should.
-I wasn’t able to swap my track pads. Even with a heat gun I couldn’t separate the chips from my old track pads. I’m just using a skin on mine which I think looks just fine, but heads up it’s not easy to make the swap.
-The tools sent with this are a little sub par. Like many other reviews I also recommend getting the ifixit iopener kit.
-There is no thermal paste included with either of the kits (this one or the iopener). In the extremerate video they tell you to take your heatsink/fan off of your motherboard during teardown. I strongly recommend either leaving it all stuck together or purchasing thermal paste to reseal your heatsink during reassembly. The MB and cooling system really don’t have to be disconnected to remove or replace them safely.
-The finish on my case is similar to a soft touch joycon. I love it and find it comfortable, but I know that’s not for everyone!
-I have medium-low tech experience and this took me about 7 hours all said and done.
Ultimately if you have the time and you’re willing to pay for your mistakes I really do recommend performing the reshelling with this brand 🙂