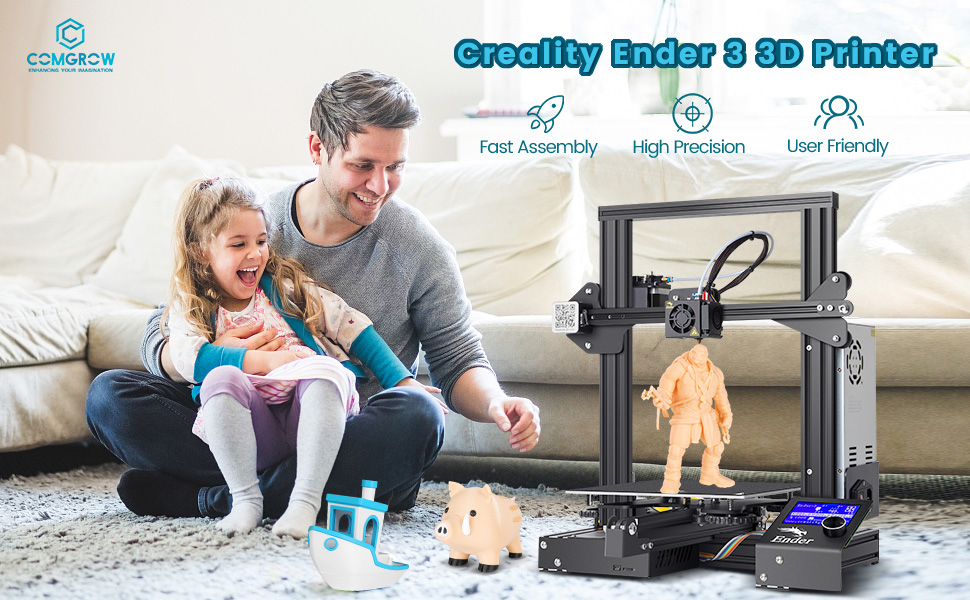
Creality Ender 3 3D Printer Aluminum Diy with Resume Print, 220X220X250mm


| Weight: | 7.95 kg |
| Size: | Creality Ender-3 |
| Dimensions: | 22.1 x 22.1 x 24.89 cm; 7.95 Kilograms |
| Model: | Ender 3 |
| Part: | Ender320180323 |
| Pack Quantity: | 1 |
| Batteries Required: | No |
| Batteries Included: | No |
| Manufacture: | Creality3d |
| Dimensions: | 22.1 x 22.1 x 24.89 cm; 7.95 Kilograms |
| Quantity: | 1 |
| Size: | Creality Ender-3 |
This printer is best value for money and print quality is good
A perfect 3d printer for someone looking to get into the hobby. Easy to set up. Watch some videos on using slicers such as cura, and you’ll be printing stuff in no time. I absolutely love it.
Pour faire des gear et cap de roue de auto de luxe et bien d autre chose juste un problme il a pas dessus changer de filament parce sa me prend a pour mettre differente couleur comment je peut remdier a a
Merci
Very good for beginners and new to printing just the instructions suck watch a video to put it together.
Great 3D printer for beginners. I’m easily able to print pretty much anything I want. The cost is amazing for what you get after you assemble.
Good product, a background in technology definitely makes it easier to work with this printer.
Parfait! Je retire une toile pour le bruit car certains modles font moins de bruit!! Mais bon! C’est vraiment parce que je suis chiant avec a !!
Great 3D printer for biggeners. Print quality is good too at this price but you have to calibrate the bed everytime before starting any printing.
Right off the bat this is just an amazing printer over all, easy assembly, great quality, perfect price. No, I was not bribed to make this review by Creality even though most companies do that. This is a very genuine and honest review.
Print quality: As shown in the photo, I printed a nice spiral vase. It came out AMAZING. Apart from a few layer adhesion issues, (which was caused by the filament, not the printer), the layer lines were practically invisible. I also printed a full size Mandalorian Helmet which blew me away, the quality was once again outstanding.
Assembly: The manual was very detailed and I was able to assemble the printer in under an hour. I am a 12 year old so if I can do it, an adult can easily make their way through it.
Overall Rating: Amazing printer. I recommend it for a beginner. Overall rating is 10 out of 5.
This was my first 3D printer. The packaging was really nice and secure to protect the printer inside. The build took about and hour. The instructions that came with the box can be a bit confusing. I recommend to watch a YouTube video and follow along to assemble. Use the instructions as a guide for which bolts to use as some of the YouTube videos do not provide the correct descriptions. My kit however was missing one bolt but that was okay, I was able to put another bolt that I had from home.
The filament that came with the printer was not long enough to complete a test, but what was printed was extremely sturdy and well made.
I highly suggest watching a YouTube video for calibration before using.
Super simple to use. Easy to create printable files on the provided flash drive. I love it for my first one.
Easy to use and works well and items it makes are nice
Had a concern and seller was very quick to help. The product is great, i cant wait to work on it more <3
A quick bed leveling and off to the races if you are new or old printer doesn’t work anymore this is for you prints way better out of the box than the first printer I bought 2 years ago
I ordered 4 of these for school and they turned up really quickly. We had them built and working in the classroom within a day.
Really good.
Now some background is that I was very interested to get started in 3D printing but also did not want to break the bank either, this seemed like the perfect fit for someone budget oriented but not afraid to put their own machine together with a little bit of DIY, as long as you follow the guide step by step and make sure all your cable connections are exactly where they need to be it shouldn’t take a rocket scientist to set this thing up.
FIRST PRINT- came out perfect, I was in awe at how awesome the benchmark dog that I printed came out, everything looked ready to go to find some files online to play around with in Cura to get some new stuff around the house!
THE FOLLOWING PRINTS- After I found Thingiverse and started playing around with Cura I swapped out my filament for a different color and got to printing….. or so I thought…… I started noticing some under extrusion in my following prints and I had no idea what that is, basic explanation, your prints look and feel brittle as if not enough filament was pushed out to make it a completely solid piece. Now I figured this was normal and searched high and low throughout the internet to find solutions. Many forums and threads talk about heating temps, nozzle clogs, making sure your filament is free of debris (dust, hair, etc.) so I started my troubleshooting adventure, FOR 5 DAYS, and during this entire time I played with every setting you can imagine. Calibrated my Z steps, made sure my retraction settings were properly set up on the cuts, and even cleaned out my nozzle between every prints…. but in the end it still wasn’t enough to get the print completed the way it should look and feel.
SIDE NOTE***** Make sure that your bed is level and take the time to do it right, that alone by itself will create so many issues that would drive a normal person insane and question your technological abilities.
Back to the issue at hand, I had ordered a new magnetic bed and a metal extruder drive feed for my Ender 3 to have as a back up when I needed them. Low and behold the extruder drive feeder that comes WITH the Ender 3 is plastic, and what does plastic do when it heats up?… Exactly, once I swapped it out for the METAL extruder drive that I had bought on a whim I’ve been printing for hours with NO ISSUES.
Conclusion, 3D printing can seem a daunting task and has ALOT of troubleshooting that can be involved to get your print looking the way you want it to, but when you do get this machine up and running to its full potential it produces some of the most beautiful prints that you can get for a printer in the $200 price range! Just make sure that you will have them time to INVEST in your prints so you can get the results you’re looking for, once that one little piece is swapped out this machine runs like a well….. machine! 🙂
Superbe impression,produit facil a mont, prise en main facil
Facile monter, utiliser, tous les outils sont fournis avec, excellente prise en main et qualit d’impression irrprochable. Un rapport qualit-prix imbattable. Je recommande vivement pour dbuter 🙂
Very good for its money. It was a present for my husband and he is very exciting. Very good for beginners.
I got lucky and managed not to damage the board removing the glue from around the plugs but some blobs remain on contacts that I pray ill never need! I will be complaining to Creality about this but it should be a light warning to others who buy this model that you may face the same.
Have noticed it doesn’t seem to save the setting on the printer it’s self. As soon as you start a print from the SD card and set it up to whatever temp and speed setting you want once the filament reaches it’s temp it goes back to default and you have to set the temp and speed again, but that may be something I’m doing wrong. Also tested it from a USB wire direct from a PC and worked great as well.
When using a slicer the settings on the printer get overridden to whatever the settings the slicer were set to. Again I think this is something thats normal as I’m still learning, but still wanted to mention it just incase.
It really is the tinkerer’s dream. You can customise it, leave it standard, make it work however you wish.
I personally watched stacks of YouTube videos before buying, and even more after.
There is a huge community of support out there for this machine, and it is a solid basis to 1) start printing really quickly, and 2) to learn all about printing and materials.
I modified my machine with drawers, storage, guides, filament holder, more storage for electronics and a Raspberry Pi 4 (running OctoPrint).
Great machine, really useful. Get one. 🙂
I like that it was eay enough to fit together and celebrate. First print came out well. One some tweaks were made in the software the speed on the print was faster and the quality was much improved. Great starter printer for a hobbist with a budget.
I bought this for my son for Christmas as he was obsessed with the though of being able to print something in 3D. I must admit, I’m quite taken with the idea myself. The fact that you can download a file or design your own thing and then print it is pretty futuristic!
This Creality Ender 3 printer was simple enough to put together but took a long time. You should easily put aside 2-3 hours to make sure you get this done in one sitting. The build instructions were concise and easy to follow, it just takes time because there’s quite a lot to do.
Once put together, we loaded it with filament and printed a test dog file – see my pics. This came out amazingly and my son was over the moon with what had just happened! Since then, he’s printed all sorts of stuff such as a Thanos bust, a replacement clip for his Microphone to replace his broken one and all sorts of bits and bobs for other people including playing figures for Monopoly! It really is ingenious!
Although the PLA filament is plant based, it still stinks so you won’t want to keep this anywhere in an enclosed environment. We’ve relegated ours to the garage and setup a little wifi camera so we can check progress of prints as they’re going as some of them can take a long time depending on the quality of the item you’re printing.
Sometimes the prints can be difficult to remove from the bed so it might be worth investigating some sort of film you can apply first (we use strong hair spray!) or upgrade the bed to a glass one.
Summary: This is a fantastic 3D printer that is simple to put together, although time consuming, but the rewards are 100 fold!
Got this for my son he is now producing great quality prints – purchased a glass bed as the generic one was difficult to use
My husband used his Amazon vouchers to buy this, the price was irresistible. It took him a couple of days to perfect the settings but once done it is really impressive. It’s been used for loads of projects almost daily. Great buy!
So from the begining.
Assembly: strait forward enough considering my job is as an electrical/mechanical technician. I just followed the instructions. Maybe not so easy for some, but with a couple of hours and any one of the many youtube videos ive seen since building my own, im sure even the most technophobic amoungst my family could build this and probably enjoy it. Like lego.
I happened to buy a few extras with this at time of purchase. Stepper dampers which arent an easy fit so are still in the box. Silicone sock for hotend which it came with anyway. Metal extruder arm also which is the only one i installed. Basically id advise getting it before ordering parts that may have been updated already and wont fit or arent needed. Silly me.
First prints: Well i started by wiping the memory card and printing a bency. I downloaded cura seperately. Trouble free so far. Benchy turned out great. I was pleased as punch.
Afterwards i printed a few upgrade parts for the printer. A tray, a side spool holder, a fan cover. All still going strong. Happy days.
Afterwards when printing my 3rd mini, i broke my bed. The surface came up with the model where all 3 minis had been printed on the same spot. I was reckless maybe. I was pretty aggresive with the scraper. What i should have been doing is waiting for the bed to cool, unhooking it, and flexing a little. But unclipping 4 mini bulldog clips everytime just seems such a hassle. I got the magnetic bed afterwards and id reccommend this as a good choice. As far as i can tell its the only reason to go with the ender 3 pro over this model. But the price difference is more than just getting the bed as well.
Pet-g: So until about 3 weeks in id only printed with PLA which has been wonderful. One of the parts i kept putting off for an upvrade was the part cooling fan duct. So here begins my annoyance with pet-g. Despite great adhesion with PLA (to the point of me breaking my bed) i struggled to get the pet-g to stick at all. Eventually i managed it, and the print came out fine. But my god is pet-g messy in comparison. It seems impossible to stop stringing. Despite checking temperatures for best printing the material doesnt like to snap off in the way PLA does so the nozzle just oozes. The pet-g end up sticking over the print, the nozzle picks it up again and you just end up with it all over the place. Ive now printed a couple of parts in pet-g and its likely to remain on the shelf. It might be stronger but be aware it is not the easy clean, trouble free material PLA is and will require a bit more effort.
Best bits: I recently moddled some very small parts for a friend of mine. The parts required a 8.9mm external diameter and a few other precise measurements. After learning blender and making them up as stls, booted them into cura and printed. The result was astounding. Wherever i measure them the external diameter is within 0.02mm of what i asked for. This accuracy from a printer that cost this little nearly flawed me.
Worst bits: The original bed is my only gripe. Just not quick and easy like the magnetic one. You dont get good smooth prints like glass. A bit too middle of the road i feel. For your adverage joe i think the magnetic bed like the pro model would be preferable.
All in all I’d strongly reccomend this printer to anyone. Get some good PLA andget stuck in. There might be a fair bit to learn but i imagine you were expecting that when you first looked into 3d printing and the community around this printer is very informative and helpful.
Happy printing.
This is my 1st 3d printer and I have always been put off after learning everything you need to do, such as using slicers, bed leveling, adhesion, building the machine itself. But for 175 I thought I would take the gamble and buy one.
I’m so glad I did as I have loved every minute of using it. There are lots of YouTube videos and Facebook groups to watch and join that will solve every issue you could possibly have.
This is still a budget printer but the print quality is amazing with some minor upgrades, most of which you can print on the machine itself.
If you are on the fence about getting a printer then this is definitely a great buy or the pro version or ender 5 might be a better option for slightly improved features and improved print quality.
Had this just over a year. A great purchase!! I wanted to get into 3D printing for a while and after checking around I decided this was the one I wanted. Ive not been disappointing. Ive had some ups and downs but worked everything out along the way. I would say to get into 3D printing you need patience and a willingness to learn if you have them you’re ready to go. Easy to setup and with a few youtube videos on the basics your well on your way!
The printer was pretty easy to put together with prints of good quality resulting. I did have an issue with the heated print bed but this issue is quite rare and Comgrow customer service bent over backwards to help. A+++++
My son bought the printer and is very happy with it. There were some initial problems during construction but watching the YouTube video cleared them up. Then had an issue with a warped bed but Comgrow sent a replacement free of charge.
Overall very happy with printer and customer support.
Quality is a lot higher than you would ever expect from an even more expensive printer.
I had to follow an online video to assemble as the instructions are way to vague.
Print bed adheres well for around a month then I needed to find alteratives ( pritt-stick is a godsend )
My first printer, which is great. Simple to assemble and use. Only negative I find is the lack of adhesion. I use brim and hairspray for every print in order to make sure it works.
This was a little tricky to assemble but not beyond the ability of most. There is plenty on YouTube to help. When set up it just works. It is easy to level and keeps level for a long time unless disturbed.
My second Ender 3 and it’s all good like the last one. Some improvements made in the last 6 months since my first, like a silicone sock on the hot end, new spool holder and a couple of other tweaks resulting in an ever so slightly better printer.
All good stuff!
My third, and by far favourite, printer.
Assembly was very easy, took around 2 hours, I highly recommend watching a build tutorial video online for tips on adjusting things as you build, it meant no troubleshooting later and perfect prints straight away.
The XT60 connector seems to be good quality on the model I received.
My only minor gripe is the build surface has to be held on with binder clips. It’s a fantastic surface, everything sticks well, you just lose a small amount of build area with the clips.
The instructions are just useful for confirming which nuts and bolts you need but there are a few good build vids on Youtube. But to be fair it’s easy to put together and the quality of the prints is not what I was expecting as they are brilliant far better than I expected for the price, an absolute banging product 🙂
Excellent first 3D printer, easy assembly, and easy to operate.
First of all I never seen a 3d printer in real before this. The package arrived in time and in 90 minutes after received i printed my first object with no issues. I cannot compare with other product because i m absolutely new with 3d printing but i have nothing to complain execept the software wich cannot be install. But not big deal to download from internet free software .
The printer work well but because the printing process is too long i recomand to buy 2 printers to use at the same time if the time of project is limited. Apologies for my poor english. Regards Toni. Londo
Let’s start with the issues – The XT60 connector (The yellow part that connects to the power supply) is made quite cheaply (sourced from elsewhere I believe) and has a tendency to warm up. This is not good. People have reported fires and burning from this connector. It is an easy fix but I don’t want to void my warranty doing so. As I am only doing small prints (6 hours max) It never got to a temperature that concerns me and I will continue to use it unless I find that it gets too hot. (Creality is aware of the issue and may fix this soon)
The next issue is the heat bed: It can warp. I have fixed this by simply placing picture frame glass there and using a glue stick to make a better printing surface.
Apart from that, the printer works perfectly! The filament that comes with it (although there is very little of it) works brilliantly and after over 50 combined hours of use, I have only had 1 partial clog with many different filaments (Which is to be expected). Z-axis just needs the 2 bolts loosening (There are some good videos online about it) and the online community for this printer is above anything I have ever seen before. Any issues you have will be fixed by the helpful facebook group members.
Final verdict: I definitely recommend picking up this printer. It creates brilliant prints with quality very comparable to higher end printers around the 400 -500 mark or higher. The issues that I have talked about have fixes and Creality is working with the customers to make this printer a better product for everyone
Printed the test print which came on the sd card and was very impressed for a first attempt. Other people have said that levelling the bed is difficult and annoying, but I havent had any trouble. Generally I check that it is level and at the right height before each print, but it normally doesnt need adjusting. A business card really helps get it at the right height – adjust it so the card just touches the nozzle at each corner of the bed.
Have now been using the printer for about 3 months, and am very happy with it. Thought it had broken when the extruder feed motor started making a clicking noise and snapped backwards every few turns. I emailed Creality asking for help, they didnt reply. I emailed the seller (TechnologyOutlet) and they replied with a checklist. After spending about 8 hours trying to fix the clicking stepper motor, finally found that the cause was that the Bowden tube wasnt pushed into the hot end enough (should push in about 3cm, but also gives some resistance at about 1cm). This wasnt on the checklist, but its now fixed at least.
Some reviews have said that the print quality is terrible, but I think that the problems might be caused by incorrect assembly. I hope the recommendations below help.
RECOMMENDATIONS:
– Buy one.
– Check parts are correctly aligned and flat before assembling.
– Assemble it properly. In particular be careful pushing the roller wheels onto the aluminium extrusion (x-axis). Its quite a tight fit, and my wheels have slight flat spots where I pushed them on. Make sure the drive belt is tensioned enough on the x-axis. Check the Bowden tube is pushed all the way into the hot end and that there isnt a clicking noise coming from the extruder motor.
– Use a bed temperature of 60 C for the first few prints for better adhesion, then 40 C normally.
– Level the bed using a business card as a spacer, and positioning the nozzle over each of the corners.
Its a great printer, however the assembly instructions are poor. I advise you to watch a few build tutorials on YouTube before you actually assemble the printer, it will save you time and headaches latter.
Just takes practice to get right settings with various filaments. Needed some resetting and tightening though on some of the preset bits.
This was a present for my stepson (13) and it took me quite a few hours to set up. It’s not that difficult, but follow the instructions and if you get lost, watch the plethora of YouTube clips to show you how. It is very important to spend some time calibrating and levelling the print bed, but the test print was excellent. I would thoroughly recommend reading up as much as you can and joining the forums to ask any questions you have as the people on these are pretty much always helpful and will have experienced any issues you have. We are now a month in, many models printed and have a very happy lad!
P.S. Buy a 1kg spool of filament. What comes with the printer isn’t even enough to make the test model
This is an excellent 3D printer. The quality of the components is much better than other printers I’ve assembled and used. The print quality is exceptional considering the price. I would recommend using the online instructions (available at Ender’s website) when assembling the printer, the sheet that comes with printer is okay but there are a couple of times during the assembly you need a little more information. There are also lots of other resources online (youtube etc.) if you need help. Overall this is a brilliant product, I would completely recommend it.
The Ender 3 is my first 3D printer ever. Assembling it wasn’t difficult, you just have to follow the instructions. Using it is also simple and generally works fine.
Good points:
+ The price is really good.
+ So far, my prints are coming out really well. I’m mostly printing parts for some models.
+ There seems to be a lot of people making ‘mods’ so it should be easy to improve some things.
Bad points:
+ During assembly, I had to double check some pre-installed screws, as they were not tight enough.
+ After stopping using the machine during Xmas, I noticed that the heated bed has warped a little bit, making levelling a hard task.
+ The power supply wobbles when you plug in the cord. This feels a bit cheap and I think it should be fixed.
Overall I think this is a great entry-level printer.
I’ve been running the Ender 3 continuously for a couple of weeks now. The story so far:
Build
——
It took 3 or 4 hours to read up and build the printer (with 9 yr old daughter helping). The supplied instructions are not as comprehensive as the online manual from Creality, and the YouTube videos help too. Its important to square up the frame during the build by nudging the aluminium extrusions exactly into place before fully tightening. At first, I’d got the X-beam at a slight angle and so couldn’t level the bed. The bed was level but I’d not fitted the X-beam straight so the nozzle was too high when on the right and too low on the left. After correcting that, the first test prints were excellent. I’m impressed by simplicity of the design and quality of the parts. First test print first was fine.
Firmware
=======
At the time of writing the supplied firmware does not have thermal run-away protection in the temperature control code. Also, the menus are a bit glitchy and could be simplified, particularly when doing bed-levelling moves. Conveniently, the “TH3D Unified Firmware Package” fixes both these problems once you’ve managed to install a boot-loader (requires an Arduino Uno, programming wires and a PC running windows or a Mac). It would be helpful if the manufacturer installed a bootloader so owners can easily flash the firmware from the USB port.
Bed and Levelling
==========
The supplied flexible sheet bed is not great. A 235mm square pyrex sheet is much better. I’ve found 50/50 PVA and water to be ideal to get good bed adhesion. For bed levelling, the A4 paper trick is quick and easy. I don’t see a need to set up auto-bed levelling. My method is: Pre-heat the bed; move the nozzle to a corner of the bed either by disabling the steppers and pushing manually, or using the printer’s menu; Lightly trap paper between the nozzle and bed by adjusting the nearest bed levelling knob; repeat for all 4 corners. The Ender 3 seems to hold its level well once set.
Printable Upgrades
==============
There are numerous upgrades for the printer that you can find on thingiverse. For me, the most important were:
* thing:3015832 “2020 Snap On Filament Guide – Ender 3 / CR-10”
* thing:936611 “Bowden Tube Clip”
* thing:3042208 “Beatliner’s Ender 3 Fan Cover”
Software
=======
I use an up-to-date install of Ubuntu Linux which comes with “FreeCAD” to create models, “Slic3r” to turn models into GCode for the printer. I upload the GCode to the printer over WiFi using a Raspberry 3 running “OctoPrint”. Its helpful to have a USB webcam for the Raspberry Pi. OctoPrint comes with some helpful plugins like “OctoLapse” for timelapse photography, “EEPROM Marlin” for tuning the steps/mm of the stepper motors.
For the money, I couldn’t ask more of the Ender 3. Upgrading and getting this working is the way to learn about the technology.
After wanting a 3d print for a few years my missis finnally bought me a printer for chrismas .ive done a few small prints now and the test dog 2 times the test sample they give you isint enough witch is a shame cause my first print was pretty tidy ,not much else i can say really its a 3d printer it works well if you know what your doing and check everything twice .
First time 3D printer user. Easy to assemble, to level the bed was difficult but maybe the bed was defective, because after the third try printing the dog, the bed got a bubble on top of the “D”.
This is an excellent printer for the money. Compared to the printer I purchased 5 years ago (which cost 3x as much as this one) the prints from this one are far better. Its also very easy to use and, after a short initial build time, it will print very well straight out of the box! Would recommend to any interested in getting into 3D printing! Also get the Comgrow filaments for it, they print really well on it.
Setup: I am technically minded. I found the setup to be incredibly fun. The supplied instructions are not good enough to get things right first time. I HIGHLY recommend you load up a youtube build video and go through it step by step on video. It will make such a difference to your build experience. It took me an hour to build,.
First print: It is important to level the bed of the printer carefully. You need to see the first layer squashed down onto the plate like smeared toothpaste not beading on the surface like a bead of glue. You can adjust the wheels as the print is going so I recommend doing gentle adjustments as the first lines are printed to try to get an even coverage.
I also highly recommend a slower printing speed. Whilst printing, turn the knob left and adjust the FR (flow rate) percentage down. People who are struggling with bed adhesion and other issues are probably printing too fast. I tend to go for 30% for the first layer or two. Up to 50% speed for the next few layers and increasing to 80% or more for the rest of the build.
It printed a benchy for me first time. So far, I have had only minor issues with bed adhesion. The heated bed supplied seems to do a good job and I have not yet needed adhesives to help.
The rest: This printer is a total steal at under 200. If you take care on build and take the time to fiddle with levelling and speed/quality, you will get professional quality results. I loved it so much that I have just bought another one. MY last few points are:
It is not particularly quiet out the box but there are cheap upgrades that can cut down on the noise hugely. Cheap stepper motor dampers really do look effective.
I highly recommend the range of 3d printed upgrades for the Ender 3 (thingiverse.com) you use your new printer to actually print these in your first few days and they really improve the user experience. Ones not to miss are:
The filament guide, The fan cover, The anti-snag back leg and the LCD cover.
There is a strong smell of plastic for the first day. This is not permanent. It only made my house stink for one day.
Be aware that this thing will produce lots of fine plastic waste and plastic dust. I would not have this printing in the babies room. Keep away from young children..
I have had no problems at all with build quality or part failure. So far, amazing.
BUY ONE.
Excellent printer
Pros
– Overall a brilliant energy efficient printer
– Easy to use and great end product
Con
– Ender3 need to make their products more consistent as the next gen came with a magnetic bed which I would have much preferred
I have been printing with SunLu PLA+ (various colours) which is awesome, and also Geetech wood PLA which is also very good. Put it at 200 nozzle and 60 bed and it just works.
I had issues with the fan in the print head and also the base, but Comgrow resolved this via email (back-and-forth to China), and sent replacement fans.
The PLA they sent you is useless, just don’t bother as there is not enough to make a viable test print.
UPDATE: I had an issue with the printer again, and upon removing the base cover I found one of the screws holding the fan had fallen loose and was lying on the motherboard. I guessed it had shorted it, and Comgrow eventuallly confirmed this to be issue. They sent me a replacement motherboard via Amazon so it arrived next day!!! Again, awesome service from them.
Great 3D printer for a beginner. It does have it’s flaws (no auto bed level, poor quality bowden fittings etc.) and can be a pain to get the settings right, but it produces some great prints when you do.
My only major disappointment is that the bed is warped in the middle and it does ruin larger prints spreading across the length of the bed. Will have to look into a glass bed I think.
I have made a lot of useful additions to the printer and many other useful items found online on sites such as Thingiverse. I have even started to learn how to design my own 3d projects with free online access to various design programs.
I do not normally write reviews, However, the after sales customer service from Comgrow Europe was been outstanding and very fast. I had a noise from the PSU and emailed them and within 2 days they have arranged a replacement through Amazon to be delivered within a further 2 days. AMAZING!!.
I would have no hesitation in recommending the Ender 3 3d printer from Comgrow via Amazon. Great item and great customer service
This came well packaged, all the instructions were easily labled (Although watching YouTube videos helped a lot!) and all the parts were labled and in their own packages, took just under an hour to assemble (taking time to check, re-check and check again) but was very easy to assemble.
Setting up the Print bed and nozzle height took a long time, but thats because I wanted to get it spot on, my first print was a simple peice of track (for wooden train set) and it came out flawlessly printed at 0.02mm with a brim, I found 205c Nozzle and 80c bed worked wonders, I was using PLA and I know this isn’t supposed to need a heated bed, but when I tried without I got a lot of curling up as the print cooled.
I have had this for a couple of months now and it has been a solid work horse, running flawlessly since, I have done a lot of prints on it a nice warhammer scenary set as well as a nice set of models from my favourite games (all models are from Thingiverse too)
Yes it is noisy, I will be honest and there are many modifactions you can do to relieve this noise, I might invest in it one day, but I have learned to ignore it now. There are some must have printed mods for the printer you can find on thingiverse.
A cover for the fan, a cover for the control panel (back is exposed PCB) and a tray that fits in the gap underneath are a few I have seen (I only have the fan and control panel mod myself)
I use my 3D Printer on a mostly daily basis now, printing out home hacks, or just models. My little girl loved painting models from the kits you can buy, but now I just print a load and she paints them, and there are some xmas gifts in the bag.
I wouldn’t say 3D Printing is for everyone, these do require a bit of TLC and a lot of patience to get going and make sure everything works well. But if you are interested in 3D Printing, as a hobby then this is a great introductory printer that will give some outstanding quality prints (if everything is setup just right)
Oh also, a little bit of hairspray keeps prints on beds too if you don’t want to use the heated bed element, not sure of the implications of using hairspray, but it might be easier to obtain that some of the 3D print glue and stuff.
Amazing printer. Had no issues assembling it or getting it running and it always produces amazing prints.
Really good printer especially for the price! I use it for printing components, figures, statues etc and it pretty much deals with anything and everything. Comgrow have fantastic customer service and were really helpful when I had a problem. Well worth paying the little bit extra buying from Amazon for peace of mind.
Great printer. Really happy with the prints. Easy to put together and run. The first print came out better than expected
I would, however, budget a little more for some essentials.
Firstly, purchase some PTFE tubing (4mm OD, 2mm ID) and replace the stock bowden tube, it’s too tight. (print the bowden tube cutter from Thingiverse to ensure you cut the ends parallel.
Print off the bowden clips from Thingiverse and fit them. Purchase the optional glass plate, it’s much easier to get it dead level.
Finally you may have z-axis binding issues. To fix this, print the oversized (+0.8mm) bracket from Thingiverse and fit, then, if necessary, shim the z axis motor at the rear with a thin piece of card or possibly two. The z axis screw should fit into the coupler and the coupler to the stepper motor without using any force. Make sure the top screw mounting bracket isn’t too tight, it needs some ‘give’ in order to ensure the z axis moves freely.
And purchase a silicone sock for the heat block. It will ensure that heat radiated from the block doesn’t compromise part cooling.
As far as filament goes I recomment Geeetech at the budget end; I’m really pleased with their product. Surreal PETG works well also and is very reasonably priced. Finally Polyalchemy make some truly unique PLA that has a beautiful metallic lustre without being abrasive. This is definitely worth purchasing even though it’s more expensive, it’s just unique.
Unbelievable quality from such a low priced printer. All the tools fixings and spares you need. Works great right out of the box but please please please do some reasearch on setting this up right before you try and print. I hastely rushed through the build and tried to print the test print on the memory card provided but didnt level the bed corectly causing the nozzle to gouge out a track through the aluminium bed. But now its all set up and added motor dampeners, tl smoothers, 3d printed feet and new bed springs it prints perfect every time
Fantastically good prints for such a low cost machine – I had to loosen the two small bolts holding the brass ‘nut’ next to the extruder motor as the tall ‘z’ rod wouldn’t turn, this allowed the nut to sit level and unjam the threaded rod – runs perfectly now 🙂
I bought this 3D printer for 145 with a spool of filament, it took me about 3 hours to put together (my fault for not following the instructions closely enough). I didn’t expect it to work straight away and it took another 3 hours to get everything sorted (levelling the bed, flashing new firmware and bootloader, testing profiles in Cura), however, once I had got past the preparation stage, I have come to the conclusion that is this the single greatest purchase I have made under 200. Once you’ve got the profile just right for your print, you can make some seriously beautiful prints.
If you do decide to buy this printer, make sure you put a lot of time and research into what needs to be done. The first prints anyone should do when buying the printer is a filament guide and a fan shroud.
HIGH RECOMMEND!
Extremely pleased with this 3D Printer. Instructions really easy to follow and all the components are clearly labelled and correlate to the instruction sheet. There’s even an instruction video supplied on the SD card. Once built, followed the additional instructions on the SD card explaining how to print. I couldn’t believe how well the sample print turned out – way better than I had expected! Highly recommended.
if your wanting to get into 3d printing or wanting to expand your printer farm this machine is a no brainer.
I got this on a Lightning Deal and so glad I did, it comes as a kit, partially built so some assembly is required but a novice can put this together no problem as long as you follow the included instructions exactly, took me around an hour and a half in total. there is guide on YouTube if you run into any trouble
when built it’s a very solid machine, and doesn’t move at all, if it does just loosen the screws at the bottom on the side it’s rocking press on the lower beams and tighten up again, worked for me and is now rock solid.
plugged everything in, motors, endstops and extruder and turned it on, worked first time.
levelling the bed is a breeze with the huge adjusting wheels, make sure you select pre heat on the nozzle and bed before you do this to allow for thermal expansion of said parts first and leave for say 5 mins to properly warm, use a standard piece of printer paper under each corner until you feel it slightly drag and repeat on each corner until it feels the same, may take a while but will pay off later.
the only issue I have had with this machine so far was the z-axis motor, some have this some don’t but the postion of the motor causes the axis to bind slightly when moving up but can be easily solved by printing these parts and installing,
thing:2925230 on thingiverse
just shim for the bottom and side of the z-motor, they just adjust the postion of the motor to give a better angle.
i can also see myself having to change the extruder drive gear to an all metal one as the included plastic one will eventually wear away, these are relativly cheap so not a problem and easy to change.
other than this it’s a well built and can see this being the machine i use on a daily basis, for the price don’t think about it just get it you will not regret it one bit..
Ideal entry level printer with print quality on par with much more expensive models. Out of the box your printing in an hour. Very good build quality with one of the stiffest frames of similar entry level printers. If your thinking of getting into 3D printing or just want to add a cheaper very portable workhorse to your collection, I would highly recommend this amazing printe
Printer:
This is a very, very inexpensive printer. It comes partially assembled however I wouldn’t consider it partially assembled at all. I recommend anyone buying this to dismantle the lower half and reassemble with due care and attention. Assemble the whole printer on a flat surface and a set square. Ensure the whole frame is square and the z rod is square and parallel to the frame. Ensure belts are tight, and ensure the carriage, z gantry and bed wheels are tensioned correctly before beginning to print.
Carefully assembling the printer will make troubleshooting print quality amazingly simple. I would recommend using Simplify 3d as the slicer with this printer.
Overall I am getting incredible prints now with this printer. For <200 it is unbelievable. I have previously worked with multiple ultimakers and gigabots and I'm seeing comparable quality in finished prints here.
Comgrow:
As equally impressive as the printer. Wow. I had a couple of issues with the printer regarding the flatness software the bed. This made first layers difficult to get dialed in. They quickly recommended a solution and shipped replacement parts with no quibble. I provided a video of the performance and some images showing the problem and they knew this was a genuine query and rectified it immediately. They offered some advice alongside this also. Turn around time was more than acceptable and I had a great experience dealing with Nancy from Comgrow. I would highly recommend buying from this seller.
Best printer to price what I pay. But will be better when having straight away glass heated bed include. have some problem with sticking to the bed.
I just completed a 43 hour print with no problems whatsoever, very impressed especially after problems I have had with other printers recently.
You should probably buy a spool of filament with it, the bit in the box you get is not enough to complete the sample on the SD card that you get.
The price may give the impression of this being a less capable 3D printer, truthfully, this is a brilliant printer, ridged frame, proven design and produces the best prints I have seen.
It comes with Cura as the slicer to convert your STL files to gcode for use with this printer. I upgraded Cura to the latest version and after a print the screen still shows abort or cancel but nothing can be clicked on. This is a Cura issue not the printer.
This is a smart device that will continue after a power fail, it leaves off where it stopped, this can be a problem too. If the system thinks the power has failed as it keeps track, it will come up with a message awaiting ‘Awaiting User’ which requires a push on the knob to continue. Again this isn’t physically the machine it’s the firmware used in the controller over reacting.
I have used the Geetech I3 Printer and the Ender 3 wins hands down in every respect. Some people have concerns with the part sticking to the bed. This bed just needs proper leveling, and just a wipe with Rubbing Alcohol to make it free of any surface issues. PLA I run at 60degrees for the bed and 200 degrees for the extruder, usually 0.2 mm layer height, and boy are the prints clean and smooth.
If there is one negative point, it doesn’t come with a USB cable which is a standard to mini, not micro as in many phones, it’s the older type. It’s not essential as you have a memory card to USB adapter to transfer your gcode prints to Micro SD, and insert in the controllers slot to run independently of a PC hookup.
This is an excellent printer for the price, build it carefully and it will print in great quality, a great starter machine and beyond, there are lots of upgrades to print and buy to make it even better, do your research and buy this one…..I did!
As with my all my reviews of more expensive items I have broken this review into Quick and Detailed Versions:
QUICK VERSION
PROS
– Inexpensive
– Very easy / fast build
– Looks and feels like a much more expensive machine
– Excellent customer support
– Power supply and control screen built onto the machine (rather than separate)
– Nearly all parts are metal (rather than plastic of some type)
– Very capable machine
– Good quality components
– Good design
– Lots of upgrades available online for free to print
– Good quality print surface (holds heat and easy to remove prints)
– Good clear instructions for the most part and also several full build videos available online
– Little to no fiddling or messing around to get the machine printing
– 24 volt PSU so faster at heating up than a 12v machine
CONS
– Minor SD card reading issue (you need to try a few times before it reads.. see below for more info)
– A little awkward to level the bed
– Bed un-levels itself after a couple of prints and needs to be re-leveled (see below for more info)
– Filament holder not great (see below for more info)
– Only a little filament included
DETAILED REVIEW
As I said above a good friend of mine surprised me by buying this machine for me. I have recently had a very poor experience with a Tevo Tarantula machine that is roughly the same sort of cost and because of this I had been put off trying 3D printing so my friend who is well known in the UK maker and 3D printing community done a bit of research and decided for the money this is the best 3D printer on the market and bought it for me as he didn’t want me giving up on 3D printing and I am very glad he did.
The printer arrived well packaged and protected in a large cardboard box. The machine compared to a lot of other similarly priced machines was a very fast build and was completed in well under a hour. A lot of the awkward parts of the build had already been done at the factory so the “build” was more or less just putting several prebuilt parts together. The instructions were very good with good quality graphic design and simple and straight forward to understand.
I was impressed to see that almost all of the parts were made from metal rather than any type of plastic and the only plastic parts on the machine apart from the rubber wheels is one of the end stop switch holders / brackets and even the plastic used is injection molded rather than printed which I thought was a nice touch.
The power supply and the control screen for the printer all attach to the aluminium frame of the machine which is great as means its easy to pick the machine up and move it around and overall a neater experience. The power supply is 24 volt rather than the more common 12 volt which means this machine will be faster to heat up both the nozzle and bed than a 12 volt printer which is a good thing.
The first negative experience I had with this printer was in trying to level the bed which is a pain with any 3D printer and overall with this machine it’s not that bad however I did have to fiddle a bit with the Z axis end stop and move it up and down a bit before I finally found the sweet spot of where it should actually be and not where the instructions said. Once that was figured out then leveling the bed is usually a 2 to 3 minute job and is done by adjusting four over sized wheels (screws) located under all four corners of the bed and you use a piece of paper between the nozzle of the machine and bed until you feel the paper being gripped…. it’s not ideal but it’s also not difficult or time consuming and every machine at this price range will level the bed with the same procedure.
The printer prints very well and is capable of speeds that others in the same price range are not. The printing surface is excellent as it transfers the heat well and comes with x4 mini bulldog style clips to keep it on the actual bed which makes for easy and fast removal so you can easily remove prints from it I only use two of the clips and works just fine. The machine operates smoothly and noise isn’t a particular issue even for someone with sensitive hearing it sits right beside me on my desk as I work and doesn’t bother me during long prints.
There is some minor day to day printing issues I have experienced in the last week of owning and running the printer. The first is that I use the included micro SD card to transfer the gcode files from my computer to the printer and on the control screen you need to select the option to “Init SD card” and then you will be presented with a option to print from the SD card…. however and this is very minor but most of the time you will need to select “Init SD card” a few times and if it doesn’t read the card you will need to pop it out and put it in again and then it will read just fine so as I say very minor and not sure if this is common across all the Ender 3 machines or just mine. Also quite a worrying issue is the filament holder which is just a plastic tube that the filament spool very loosely sits on… as the machine is printing and extruding (pulling) the filament off the spool the spool will eventually get very close to the edge of the holder so I have found I have every 20 mins or so had to push the spool back from the edge because with a brand new 1kg spool falling off could do quite a bit of damage to the machine…. now it hasn’t actually happened as yet but I personally will either print or make something to stop this issue from occurring.
Also I have found that every 2 or 3 prints the bed is out of level by quite a bit and I need to re-level the bed which is only a quick job but still pretty annoying especially if you forget to do it and a failed print happens because of it. So far my failed prints because of the bed issue has been caught within the first 5 minutes but I would be very annoyed if it failed half way or more into a 10 hour print. My friend who is a 3D printing guru thinks it might just be because the machine is new and still bedding in or could just be the way my personal machine is or all Ender 3 machines so as I say not really a massive issue if you remember to re-level the bed every 3rd print but still a pain. Final minor issue with this printer is that the filament is pulled at quite a considerably steep angle from the spool into the extruder which while I haven’t had any failed prints or jamming as a result it does appear to be a common complaint with other owners of the machine and also the filament can rub against the z axis screw (threaded rod) which isn’t ideal however I was able to print and install a excellent upgrade part someone had made available on Thingiverse (free site to download 3D print files) which adjusts the angle and solves the issue.
Even though this machine is still pretty new to the market at time of writing this review (July 2018) there is quite a few upgrades available for free online that you can print and install including the filament angle fix detailed above. Another upgrade I have printed for this machine is a fan cover for the fan that covers the main circuit board of the machine as it faces straight up making it very easy for filament and other debris to fall down into.
The machine comes with a number of tools which again you don’t always get with machines at this price range…. in addition to the usual hex keys for assembling the machine it also comes with a sharpened scraper to allow you to clean up the print surface, flush trim cutters for removing extruded filament from the nozzle, and a couple of spanners and a little screwdriver for fine adjustment of the machine which thankfully I haven’t needed to do since it has ran so well from first build.
Usually with 3D printers in this price range you need to be prepared to do a lot of hands on fiddling and experimenting to get the printer running properly and while this printer is no exception to this rule with the end stop fiddling I had to do detailed above it was very minimal compared to what is usually required and with my other Tevo printer I was over 20 hours of fiddling before I even got it to the stage of printing so to be up and printing within an hour of receiving this printer is testament to just how well designed and manufactured it is and is perfect for 3D printing beginners as well as experienced people too.
Sorry for such a long review but wanted to detail the overall experience both the good and bad. Hope it helps someone!
Wow – nicely presented good instructions for assembly. Does require some diy skills but if you follow them you will get a very nice printer within the hour. First print was the part on the supplied Sd card. After a little time levelling it printed perfectly. I did however purchase a glass bed as others had problem with the original. Glass bed works well just clipped over the top of supplied one. Overall I would give this 5 stars for value for money.
Fantastic kit besides the warped bed (expected as much) but got replacement glass bed from creality which is better although still warped unfortunately. Prints are however fantastic when properly calibrated. Recommended budget printer.
i have had a printer be for this one which was a prusa i3 the ender 3 is by far alot better then that one only took 1hour to build and first print came out perfect with no trial and error what so eve
Having messed about with this for a few days now pretty impressed it did print right out of the box…. but the bed really needs leveled and there is NO auto leveling, but for the price that is not a surprise. But once the bed is level I did not need to relevel it again.
I printed loads of little add-on attachments (google for ender3 mods and you’ll find them). Shame the printer didn’t come with them really as some are so obvious.
I added a LANMU microSD card to SD card reader (from amazon) as I have a pile of fill sized SD cards so can print sliced STL files, converted to gcode directly from printer (after transferring the files from PC/laptop). The PC/Laptop USB cable print works fine, even tried an iMAC, the provided Cura software is for Windows only so you’ll have to download other versions from them directly. Once installed you setup a custom printer and start to define the printer parameters then prints are easy. Shame the SD card printing doesn’t tell you how long to go (yes there is a progress bar) but it does tell you how long you have been printing.
The ability to do a filament change process in the software is a nice touch too.
For the price definitely recommended.
I would note that once a print finishes the bed and the nozzle cool down to ambient.
I checked the power spades on the power supply before connecting mine all up, the switch spades were loose.
It comes with a 0.4mm nozzle, which is pretty standard for a 1.75mm filament printer. I have nozzles from 0.1 up to 1mm as well and they swapped in easily (MK8 head). Makes for an interesting comparison.
Marin software that this is based on has the ability to add an auto-level and thermal protection, but adding that will void the warranty 🙂
Update… months later. Still going strong, I have also added a Glass bed and lately a flexible metal one. (Both Creality versions). I’d still recommend this printer.
The poster-sized assembly instructions are good, really good. All the parts are labelled right down to the bolts. You can’t go wrong.
The promise from Creality is that this takes 2 hours to assemble. It took exactly that. Once assembled this is where the instructions end. There is the promise of a user guide and a test print in the included SD Card, but alas as so many have reported the card was empty.
Not a problem. The printer is very popular so there are a number of good quality videos on YouTube (search for “build and setup Ender 3” from 3d Printing Canada).
My advice, as so many will say: level the bed (see the above YouTube series), takes about 5 minutes and you are set; download the tugboat sample from Thingiverse if your SDCard is blank, download Cura (it’s free) and open the STL file and click on slice, it will offer to save it to an SD Card, do so, insert into he printer, open the SDCard from the menu and stand back in awe.
Worked flawlessly first time for me, probably because I spent a little time watching the videos on YouTube.
Get in contact if you need help.
Excellent little machine to add to my collection of CR10’s.
The poster-sized assembly instructions are good, really good. All the parts are labelled right down to the bolts. You can’t go wrong.
The promise from Creality is that this takes 2 hours to assemble. It took exactly that. Once assembled this is where the instructions end. There is the promise of a user guide and a test print in the included SD Card, but alas as so many have reported the card was empty.
Not a problem. The printer is very popular so there are a number of good quality videos on YouTube (search for “build and setup Ender 3” from 3d Printing Canada).
My advice, as so many will say: level the bed (see the above YouTube series), takes about 5 minutes and you are set; download the tugboat sample from Thingiverse if your SDCard is blank, download Cura (it’s free) and open the STL file and click on slice, it will offer to save it to an SD Card, do so, insert into he printer, open the SDCard from the menu and stand back in awe.
Worked flawlessly first time for me, probably because I spent a little time watching the videos on YouTube.
Get in contact if you need help.
The printer was simple & quick to assemble & worked straight out of the box. Had problems getting prints off the bed so bought a glass plate which eased the problem. I’m a retired engineer, those without a mechanical background might take a little longer to assemble it but there are lots of videos on you-tube to help you.
Very pleased with it so far.
i got my printer built today went to test print after leveling the bed to find my print would not stick and was horrid re leveled the bed 3 more times then realized my bed was warped aparently this is a coon issue on this machine so i will have to do a glass bed so if you are thinking about buying this i highly recomend getting a glass bed aswell
Only one problem. The stepper Z-Axis is way off and I did not come up level with the top head, so I need to use a small spacer behind a stepper.
After arriving yesterday, I had the printer printing within an hour.
The design is easy, the instructions although not perfectly clear, if you are the type to want a 3d printer you will be intuitive enough to put this together.
I printed the included model on the SD card, word of advise, don’t use the small filament sample that comes with the printer as it isn’t enough to do 10 minutes of the print.
I have 5 printers now, including a CR-10 and I already rate this printer higher.
I’m sure it has its issues but I haven’t noticed any yet, prints flawlessly, quiet compared to most machines too.
Definitely a well deserved 5/5 for this. Will recommend to anyone looking for a printer.
Had it a few days now… Make sure you take time to level the bed, and also… use the spanner to adjust the rollers a little until they run smooth. My bed was notchy every 5cm or so. Backed off the tension nut underneath and it’s much better. Do this for all axis.
No shortage of info and YouTube videos online. Do your homework … then buy this one!
Everything works fine with default cura slicer for a CR10 and setting right build size.
The bed is not perfect but will work, I cut a 3mm thick mirror down to place on the build plate for perfectly flat (its worth it whatever 3d printer).
Happily churning out prints in PLA, TPU and ABS.
Very little banding very good overall quality.
Does need a little patience to dial in settings.
The brand of TPU i’m using likes 240 with no bed heating and PLA like’s 215 with 60 bed.
Just practice and persevere if its your first printer. This printer is easily capable of great prints.
Easy to assemble, took a few print to get the settings right, incredible for the money
Got this to start prototyping 3D models.
Still early days but the quality of the prints is fantastic.
Notes:
1. The instruction are not as clear as could be but just youtube if you get stuck as there are plenty of easy guides to follow.
2. Ensure you check the print bed level mine was a bit off.
Can do some pretty nice detailed printing.
Comgrow Creality Ender 3 3D Printer Aluminum Prusa i3 DIY with Resume Print 220*220*250mm
Ordered one day and came the Next!
The quality of this machine for the price is outstanding and I would recommend to anyone who is looking to start out or even someone looking for a second machine…..it ticks all the boxes for me
I ordered this printer for my father who wanted to be able to do some printing at home (I have had several different brands of budget printer Tevo/CTC/DIY etc but never a Creality so this was a bit of a punt, but wanted something simple to use.)
Amazon shipped using Hermes, which caused a delay of a few days due to mis-routing, but not Amazons fault – and I suspect a one off, but even if you are prime do not expect their own couriers to deliver this.
The printer itself is superb for the price point. Assembly was part done out of the box, so finishing up took us around 2 hours without rushing. Instructions were basic, but with a bit of common sense applied can be interpreted easy enough. Pay particular attention to the holes in the extrusion shown in the diagram for clues as to the alignment of each piece. The instructions omit some basic things like how to adjust the v-slot wheels for smooth operation of the axis but if you have watched any of the assembly videos on YouTube you can figure out how to do this. Same goes for levelling the bed for first print, and loading filament – these instructions are not there and you will need to figure it out for yourself / YouTube it.
The tools provided are adequate for assembly and actually pretty good quality (hex ball end Allen keys, sharp scraper not blunt, included pair of side cutters). Wiring was easy, about a dozen pre-labelled connectors (including XT60 connector for power which I was pleased to see.) The power supply terminals are all properly crimped and not just bare threaded into the terminals – so safety has been considered at least a little with this design.
I used Cura to set up the first print, creating a custom printer with heat-bed and setting the bed size and then imported a model to test print – I left every setting at default fully expecting the print to fail and to start the long process of calibration. It printed perfectly first time. I was genuinely impressed with the quality of the print and how sturdy the printer was.
The printer uses a micro-SD card (included) and there was a free USB micro-SD card reader in the box making life simpler. The only comment here worth noting is that it is easy to post the SD card into the control box through a gap just above the actual slot – so care is needed when inserting the card into the printer.
I will be buying a small army of these for mass printing.
Good Points:
* Simple set up, 2 hours for experienced users, maybe a little longer if its your first printer.
* Sturdy design, frame directly bolts together using tapped threads in frame without the use of silly brackets etc.
* Good initial print quality out of the box.
* Part assembled. Wiring done safely.
* Well packaged and protected.
* Plenty of spares / tools.
* Bowden tube makes the X axis lightweight and works well.
Bad Points:
* Wires are routed through a cut out in the underside of the aluminium bar, this has sharp edges and I was concerned about wires rubbing against them during movement (I chose to wrap the cables in a cable protector to mitigate this risk where they pass the cut aluminium).
* Easy to post the SD card into the machine, which would then require partial disassembly to recover it. Extra caution needed.
* Instructions could be a little more elaborate in certain areas. Use community assembly videos on YouTube to get around this.