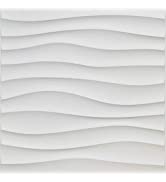
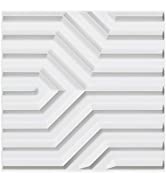
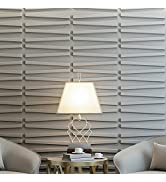
Art3d White Wall Panels Modern 3D Wall Decor, Moon Surface
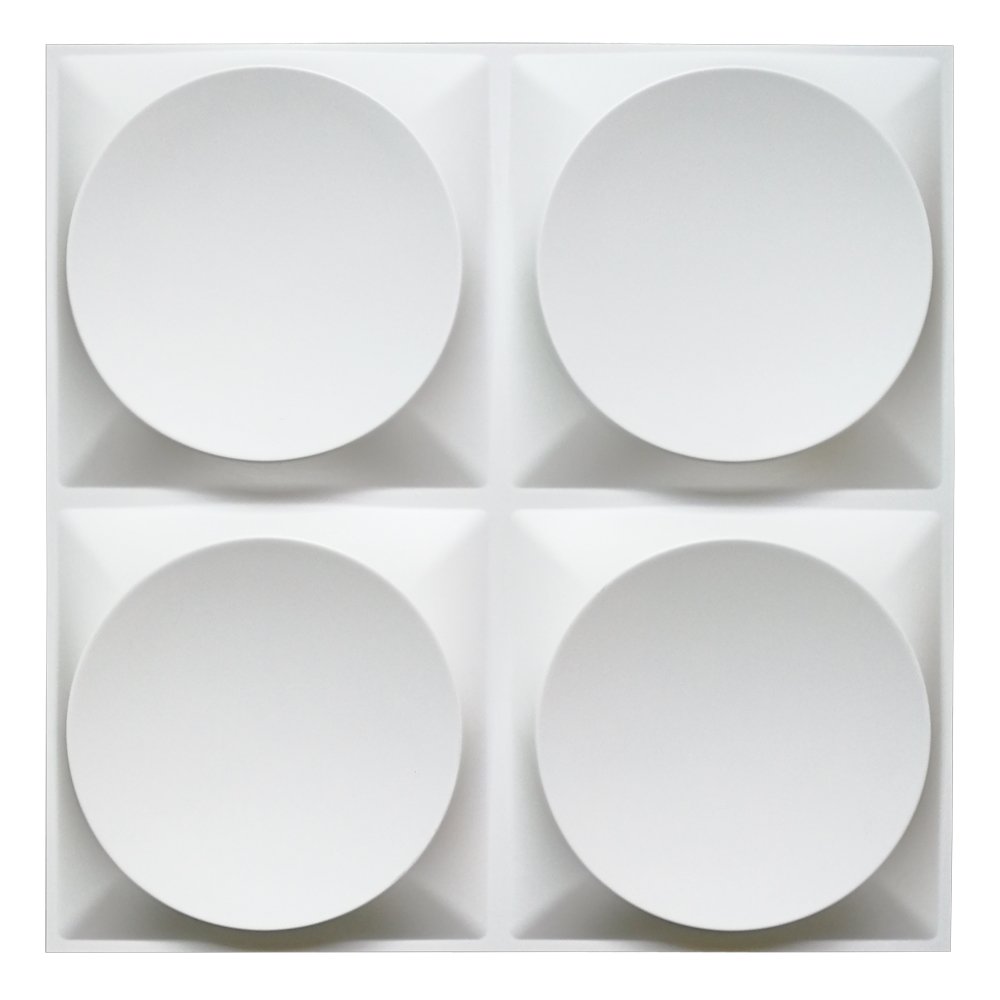
Art3d White Wall Panels Modern 3D Wall Decor, Moon Surface Design, 12 Tiles 3 Square Mete
From the brand
3D Wall Panels
| Weight: | 340 g |
| Size: | 50*50cm |
| Dimensions: | 50 x 50 x 0.48 cm; 340.19 Grams |
| Model: | A10017 |
| Part: | A10017uk |
| Colour: | White |
| Pack Quantity: | 12 |
| Batteries Required: | No |
| Batteries Included: | No |
| Manufacture: | Art3d |
| Dimensions: | 50 x 50 x 0.48 cm; 340.19 Grams |
| Quantity: | 12 |
| Size: | 50*50cm |
I have used other patterns of these in my old house. Chose this pattern this time and I am very happy with it. See the photos! I used caulk on the edges to install them. Worked fine.
I love 3d wall panels. Did a square one in my previous apartment. This time I wanted to get a bit more creative and put a dimensional pattern inside. Wow! Did I bite off a lot to chew lol. Took about a month to finish, just because I started to get overwhelmed. But was excited to cross that finish line.
I love 3d wall panels. Did a square one in my previous apartment. This time I wanted to get a bit more creative and put a dimensional pattern inside. Wow! Did I bite off a lot to chew lol. Took about a month to finish, just because I started to get overwhelmed. But was excited to cross that finish line.
I wanted to make ceiling acoustic panels and use these PVC panels on the bottom side for aesthetics. I wanted something visually appealing and lightweight since these panels will be mounted on my stereo room ceiling. I bought the 500 mm square product and then built my panels in metric units to simplify the design. These PVC panels were exactly what I expected after looking carefully at the specifications – satin finish, lightweight, interesting pattern. I looked at mounting tape and adhesives as alternatives to fix them to my wooden acoustic panels and decided on a white sealant/adhesive that I applied to the panel edges using a calking gun. The flat portion of the panel edge – i.e., the gluing surface – is quite narrow, so I applied a narrow bead of the adhesive along the edges, then used a glove-covered finger to smear the glue over the gluing surface (about 1/4″ – 3/8″ wide surface) then used light weights to hold the PVC panels down on the wood. Note that many construction adhesives are NOT compatible with PVC, so you need to choose your adhesive carefully for compatibility and probably for color so the seams between panels do not stand out. While the overall project required some fussing, these panels were exactly what was specified and they look pretty good mounted on the ceiling.
I am very pleased with the finished product, but this project was not easy. Thankfully, I am very handy and have a lot of DYI experience. Measuring and planning are essential. I used scissors to cut the pieces and liquid nails for adhesive. I filled in the gaps with joint compound, then lightly sanded the entire project with 320 grit. I installed the molding next to the window to give it a complete look, then painted everything with a semi-gloss pure white. Over the course of three days, I spend about 12 hours.
The tiles are lightweight and are of good quality.
My wife loved these panels, and wanted to put them in our entry hallway. Reading the reviews and realizing that there wasn’t anything for the surface to adhere to made me hesitant to get started. Looked around and saw that Musselbound Adhesive Tile Mat was an easy way to put up a tile backsplash. Why not use it for this? Didn’t use full sheets, cut it down to 1.5″ strips and put up a grid on the wall area. Used a straight edge on the underside of one panel to find all of the high spots, marked it to use as a template of where to apply construction adhesive within the backside interior of each panel. Trimmed it out with molding. Great results.
Good quality
I bought these for my attic ceiling and I love it
Better than expected. Good quality.
To use spray adhesive
The look great , I didn’t tackle cutting them as think it might ruin the look. I tried using no nails to fix , but as the panels are quite big moved about to much , so used spray adhesive , worked great . Be careful to not get any adhesive on the front of tiles as it’s really hard to get off . You can butt them up well but to get a better finish I had to grout into the gaps . Which then has given me the issue of getting it off the front from show . Managed to get most off . You can paint them but I wanted white . Not sure if you would need to spray paint them to get a good finish . Once fixed to wall they seem sturdy and don’t dent when you press on them. It has covered a terrible wall that needed plastering !! I used a bit of caulk to fill gap at top where my wall to ceiling ran out . I would recommend drawing round them on your wall so you know where you want them and can keep them straight to your lines when gluing . Great product ! They look good
I loved it. It’s nice once finished, but it’s really hard to cut through to fit around corners. I wish it had came with glue already attached to it that would’ve made it so much easier I will definitely buy again , because I really like the outcome.
I was hesitant at first but I was happily surprised. The panels added a wow factor to my wall. I tried to use the Amazon suggested adhesive on a painted wall, but it didn’t work at all. I used a strong double sided tape to get the results on the picture and I love them.
I have installed many many of these Art3D panels. The negative on this particular design is that there is not enough of an edge for the adhesive to grab on. Yes you can still install them but there’s about a eighth of an inch to a quarter of an inch on the edge, that’s really minimal. Other styles have wider edges. Use the fast dry caulk/adhesive to save them from sliding down the wall and use painters tape to hold them in place until they dry. Still a super simple application! I love these panels! I am a minimalist and they really add a modern look without adding too much chaos on my walls I even covered a door with these because it was brown and really bugged me!
Queda muy bonito
Queda muy bonito puesto . yo lo he puesto en una pared con gotele y lo he pegado con cinta de doble cara , he comprado una cinta un poco decente . Y pega perfectamente
I ordered from Amazon, because Home Depot’s website did not offer an option for home delivery. Not a huge deal, but at the time of shopping Amazon was a better choice for me. I already have these installed and I’m adding them to another room. The panels are identical. My experience with installation was easy, but I decided to reinforce with cap covered screws at the corners, and that looks decent. It doesn’t detract from the overall look. If you don’t spray on the paint you’ll be left with brush marks. I haven’t experienced any paint scraping off, but it looks like it could happen in a high traffic area. Very sturdy, challenging to cut. Laser line and some type of power tool are probably best for cutting. I like them a lot. I didn’t realize these are self-adhesive, as the review alludes to (Adhesion? stars).
I ordered from Amazon, because Home Depot’s website did not offer an option for home delivery. Not a huge deal, but at the time of shopping Amazon was a better choice for me. I already have these installed and I’m adding them to another room. The panels are identical. My experience with installation was easy, but I decided to reinforce with cap covered screws at the corners, and that looks decent. It doesn’t detract from the overall look. If you don’t spray on the paint you’ll be left with brush marks. I haven’t experienced any paint scraping off, but it looks like it could happen in a high traffic area. Very sturdy, challenging to cut. Laser line and some type of power tool are probably best for cutting. I like them a lot. I didn’t realize these are self-adhesive, as the review alludes to (Adhesion? stars).
We made a headboard out of them. I built a frame and attached them to that, then hung it on the wall so it could easily be moved with no damage. We painted it matte black to match the rest of the furniture in our room. It’s absolutely beautiful!
They weren’t easy to work with and didn’t want to lay flat but we used an entire tube of gorilla glue for only 8 tiles, and put the whole thing flat on the floor, then weighed them down with books, paint cans and whatever else we could find and let them dry overnight. It was a bit of a pain but totally worth it. Everyone loves it!
If you’re thinking about it, buy it. You won’t regret it. Great quality for the price!
If you’re thinking about it, buy it. You won’t regret it. Great quality for the price!
Let’s start with the good: the panels are made of very durable and printable PVC. They are well cut and packaged well. I went through 9 boxes of them and did not find any defects or damage to any of the panels I used.
The tougher part of these is the installation. If you’re just applying them in full sheets to a section of a wall or you only have to do a couple simple cuts, you’ll be just fine. Anything more than just trimming them takes some realtime and skill.
After a bit of trial and error, I found the best and easiest way to install was with a combination of some heavy duty construction scissors and a blow torch with a curved linoleum or construction knife. The edges of the design are where the heated blade comes in handy. The panels are thin enough to where you can melt through them with a hot blade.
Overall I’m pretty happy with the product even with the struggle of installation. I have a background in construction and have built homes and restaurants before, so I had the skill to do the job. If you don’t have experience with tools or are uncomfortable using sharp objects, maybe another product is right for you. These worked great for us!
These tiles do look great when installed. They are a bit flimsy by design, so if you plan on installing lights, or in my case, ceiling speakers, you need to take most all the weight off the tile. I did this by cutting/installing 1/4″ MDF sections to hold the weight. Then you can overlay the tile. One thing I did not anticipate is that border sections (around the perimeter of ceiling) do not look good by simply cutting the tiles to fit. This is probably the case for any decorative tile. I gave the product a 4 because they did not include nearly enough blank tiles for the perimeter. I have no idea how to get more from the company but was able to order similar ones from another company.
These were a breeze to put up. Main thing was to wipe the wall clean before starting. I used loctite power grab all purpose glue to adhere the panels to the wall. And painted them. Run out of panels so I’ll update the final finished product. But very happy with the results.
We had a ceiling installer install this ceiling tile. First, We used AcrylPro adhesive ( sold at Home Depot 1 Gallong size $11.00) When we first installed ceiling tile & tried to install crown molding (too many gaps & shadows. We had to remove the tile that was butted against the wall . Then applied pvc trim ( 3/4 inch by 1 inch by 12 feet long (around the room) then we applied 11/16 by 3 1/2 flat crown molding by 8 ft. long below that piece of trim. Then the tile that was next to the wall was cut to fit next to the wall-No shadows or gaps due to the 3D appearance. We used PVC trim so no painting required.
The middle of the tile curve in a little bit but can be fix with some paintable silicone caulking. I used liquid nail to stick the tile make sure to let it rest for 3 to 4 days.
The middle of the tile curve in a little bit but can be fix with some paintable silicone caulking. I used liquid nail to stick the tile make sure to let it rest for 3 to 4 days.
I love these tiles there great if your walls have cracks or just want a quick change I recommend these tiles 👍🏼
I love these tiles there great if your walls have cracks or just want a quick change I recommend these tiles
Got 3 boxes for the Master Bedroom wall ! East to install. Used liquid nails. And exacto knife and scissors to cut tiles. Just Amazing. Will buy more. different design for another room.
Got 3 boxes for the Master Bedroom wall ! East to install. Used liquid nails. And exacto knife and scissors to cut tiles. Just Amazing. Will buy more. different design for another room.
I was a little intimidated to get started on my large wall with these tiles but they were really pretty simple, just make sure you figure your layout and get everything level first then it will be a breeze!
I was a little intimidated to get started on my large wall with these tiles but they were really pretty simple, just make sure you figure your layout and get everything level first then it will be a breeze!
I like that it’s a thin plastic material. The edges are very smooth. Although trimming with a table saw was chipping the edges, but for my application the chipping was of no consequence
Couldn’t be happier that I achieved this look for $90, including adhesive. Super easy installation only took about 2 hours. They are thick and sturdy enough that I’m also going to use them as a headboard.
Almost forgot, the directions, with photos are printed on the back of the box in a hilarious mix of English and Chinese. If not for the photos they would be useless.
Loved how they lifted the complete look of my dining area wall. Just have construction scissors/drimmel(if u plan to cut curves) and some gorilla glue.
Any wall gets a complete unbelievable makeover!
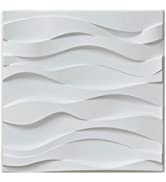
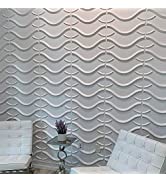
These panels accomplished the exact look I wanted for our office. We wanted to create a space for the foyer and our office is near the ocean and has a general beachy feel with a modern touch. I thought about doing it myself but you do want to make sure that the seams line up so I hired a handy man who did the whole job for $450 (36 panels). He used contact cement that he rolled on the walls before applying the tiles. He tried a couple of other adhesives but we’d either get a bit of lifting or the tiles wouldn’t be perfectly flat, which is important because the edges are very thin. We did get a touch of shadowing on some lines (it’s impossible to get all seams 100% perfect even if we are taking about the max of a millimeter or two in separation) Some white caulk took care of that. My handy man came up with an ingenious way to handle the outlets, which is why I provided the last two pictures. He basically shoved paper towels into the gap and smoothed caulk over it to create a properly contoured edge that aligns with the waves. Yes, up close you can tell it’s a type of compound, but trust me when I tell you that I could walk 1000 people through that room and no one would detect a thing unless they got as close as the camera.
LOVE! I struggled a bit cutting these and getting it straight, but it was well worth it. I used DAP Alex Flex latex caulk to fill in any uneven cracks against the ceiling and wall. You will also need extender outlet boxes if installing around light switches and outlets. That was probably my biggest challenge in the whole process.
We used these panels in our bathroom remodel & they are fabulous! I really wasn’t expecting something this high quality, so when they arrived I was pleasantly surprised. If you’re worried that these are flimsy, don’t. They are very sturdy PVC and can take some abuse. They’re pretty easy to install although be aware that because they are three dimensional you have to have a plan at the edge of the wall. We did a few different layouts before we found one that worked well. We used liquid nails which worked well, and since the panels are PVC they’re really easy to clean.
We spent a lot of time considering wall treatments that would work in our br remodel. Now that it’s finished people are just crazy about it. We love it too!
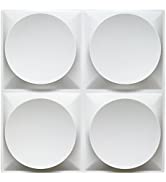
Yay! I’m the first review! It was hard finding information about this product before I bought it so I wanted to come back here and share my thoughts on the Moon Surface 3D wall panels to help other people who might be interested in purchasing. Some of the product photos look like they were Photoshoped so I wanted to share some real feedback.
I renovate and flip mid century modern houses and I wanted to add texture and depth in a way that would compliment the home while adding a unique design feature that would be memorable to potential home buyers. These panels did the trick. From little kids to my mom, people loved the look and feel of these panels.
These panels add instant wow factor to your walls! Each panel is super light, yet sturdy enough to keep its form. They are PVC and have a matte finish. I’m guessing they can be painted but since they came out of the box looking so good, we did not paint ours.
The instructions are simple. They say to measure the wall and find the center and work your way out but I wanted the end of the panels to end at the corner of the wall as seen in the attached before and after photo, so I started with the corner edge of the wall instead and worked my way to the right. I would say measure from whatever part of your wall is most important and plan out where you want your pattern to line up.
You can install these yourself with a $5 tube of Loctite Power Grab or Gorilla Glue.
To give you a final idea of how amazing I think these things are, I just ordered 10 more boxes because I’m going to make this feature wall a signature of all my remodel projects.