PEI Sheet 235×235 mm, Ender 3 Bed Magnetic Flexible Heated
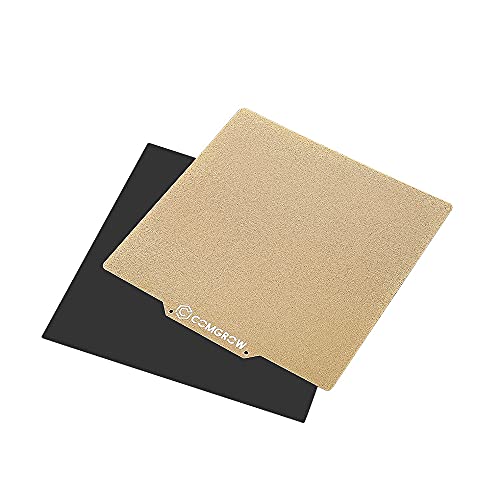
PEI Sheet 235×235 mm, Ender 3 Bed Magnetic Flexible Heated Bed with Adhesive for Creality Ender 3 Pro/Ender 3 V2/Ender 3 S1/Ender 3 S1 Pro/Ender 3 Neo/Ender 3 V2 Neo/Voxelab Aquila 3D Printe

User notes:
- Please clean the dust with a soft cloth. Do NOT wash or clean the PEI with any water, strong chemical reagents or strong detergents.
- Please make sure measure it correctly before removing the adhesive and stick to the 3d printer heated bed.
- Recommend to an add extra 5 degrees on the both nozzle and the bed temperature to have the best printing result.
- Adjust the distance between the nozzle and the PEI board to ensure the appropriate leveling height.
- Let the model/the steel spring plate cool down for about a few minutes after printing is completed.
- When disassembling the printed model, bend the steel plate to easily disassemble it.
| Weight: | 608 g |
| Size: | 1 Set |
| Dimensions: | 23.5 x 23.5 x 0.03 cm; 608 Grams |
| Part: | ZZDYB |
| Colour: | Grey |
| Pack Quantity: | 1 |
| Batteries Required: | No |
| Batteries Included: | No |
| Manufacture: | Creality 3D |
| Dimensions: | 23.5 x 23.5 x 0.03 cm; 608 Grams |
| Quantity: | 1 |
| Reference: | ZZDYB |
| Size: | 1 Set |
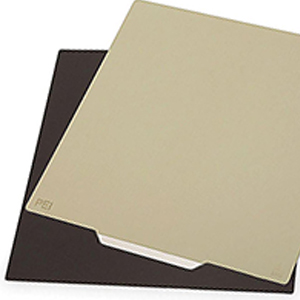
Perfect prints, from the smooth side
We now get perfect prints every time, from the smooth side. We’ve found the rough side has less adhesion and the corners can peel up, so we only use the smooth side, but that is perfectly fine for our needs.
Fixed all my adhesion issues
Having tried 3 or 4 different build plate surfaces I wasnt holding our much hope for this product. I cannot believe how much this has imporved the build plate adhesion for my Ender 3.
Before I had been using Crealitys own Flexi plate which helped with my issues but still didn’t work for larger flatter prints and often caused warping on the corners. Since switching to this PEI build plate I haven’t experianced any peeling or shrinking from my prints (Some of which have been up too 26hrs) and they are super easy to remove from the sheet. I would 100% recommend giving this a go if you are having issues.
Excellent PEI Shee
I have always used the Creality own make of spring steel sheet (and been very happy with them). But when I accidentally engraved my last one, rather than printing on it, I thought I’d try a cheeper version.
This PEI sheet is as good, possibly better, than the Creality one. I am very impressed, and will definitely buy another.
Easy to install and leaves a nice finish on prints
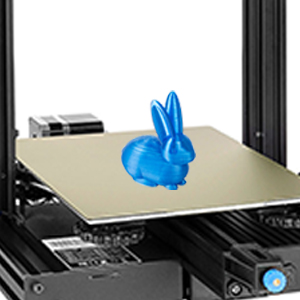
This is exactly what I wanted. A nice cheap PEI-coated spring-steel build plate.
Bending it makes it easier than ever to remove a finished print. During normal use the filament sticks well.
The magnetic bed also gives you more space since you no longer have the clips in the way.
Worth Every Penny
I just want to echo what other people have said. Why have I waited so long to purchase this item? It’s a game changer! After an easy installation and a quick level, I quickly saw that I could easily fine tune my levelling to achieve the best initial print to date (in my experience). The filament has stuck like a magnet to the sheet with no curling around the edges. No adhesive (I have used a glue stick in the past) is required. No cleaning of the print area after a print. A pleasure to use. When I read the reviews before I made the purchase there were some negative ones which I appreciate. I have to say, we all know that 3d printing has many variables. If this product does not work then it is a user issue. One of the many variables has not been addressed therefore a miss print will be inevitable with or without this product.
Superb adhesion. Perfec
I had read all the hype about PEI beds but was so happy using my Glass bed didnt see the need to change.
As my glass bed started to wear from use I decided to bite the bullet and go PEI.
Very easy to fit and no more wrestling to get my prints off the bed.
SUPERB and well worth the money.
Works great, no issues so fa
Printed PETG on it at 70 degrees bed temp, no glue etc and was perfect and easy to remove and a nice texture to the print. Probably get a 2nd one. 100%
easily the best bang-for-buck upgrade for our e3v2 - great quality of life improveme
This spring steel PEI with a matching self adhesive magnetic base has been yet another quality of life improvement that has had one of the biggest bang-for-buck values I’d done so far for any of my FDM printers. I find this surface so much easier to work with than the texture glass build plate – no more glue stick needed for me, and less ring of accidents as my scraper is nowhere to be seen because the gentle flex and bend is enough to separate every print so far. Highly recommended as an easy upgrade on the E3V2 – just remember to re-set the bed height.
Perfec
Using for my ender 3 S1 , original bed that comes with the machine is absolutely unusable.
This product so far absolute unfaultable , doesn’t fit perfectly but prints are coming out and sticking amazingly .
Fully worth the money so fa
PLA sticks to this thing like it's glue!!
I was having some issues with the glass bed that came with my Ender 3 which turns out to be because the coating’s worn from the sheer amount of printing I do on this machine, so I decided to try going with one of these PEI coated flexible print beds… the difference between my clapped out glass bed and this is impressive. Once I got it dialled in with my 1.0mm nozzle (I do a lot of large prints), I’ve not had any peeling or adhesion issues at all so far. I’m gonna keep playing with other materials like PETG, ABS and the reel of TPU that I have and see how these turn out but so far, I’m very happy with the results I’m getting just on PLA.
the first layer texture is pretty
This is a nice replacement/upgrade, you will encounter many first layer issues if you do not keep it squeaky clean with handsoap and isopropyl alcohol, but apart from the insane dust attraction factor this material makes a very fancy first layer texture that looks great on black pla with wide prints.
Consider buying a 1.5mm sheet of G10 F4 Fiberglass laminate Epoxy as a alternative bed material (must be clamped down) and even more superior upgrade, I found mine from a seller on the Bay of E for fifteen quid.
Textured side is grea
The smooth side I’ve been having a few adhesion issues with but the textured side has been perfect for every print so far. I’d definitely recommend this print bed over any glass or other pei sheet bed. Came well packaged with no scratches or bends and it’s easy to install. Just make sure you’ve got everything lined up right before you put the sticky side down first.
Worked perfectly for me
Purchased this with a bit of scepticism based on some of the reviews. So purchased the single sided one. However the first one I received is absolutely brilliant works flawlessly with PLA. It was that good, i purchased another and it’s as good as the first one. I’ve only used them with PLA but it’s best build surface I’ve used. I’m using them on printers with mesh auto bed levelling, so perfect first layers. The prints stay put while printing, then just release when cool with a little touch or flex of the build surface.
Solved my PETG adhesion issues - best mod you can do for your 3D printe
I don’t normally write Amazon reviews but I had to for this product. I was having terrible issues with PETG on my Ender 3 V2 with the glass bed with countless prints ruined after coming unstuck or not being able to get a good first layer down.
After installing this PEI bed, I’m happy to say all those issues have completely gone. I’m kicking myself I didn’t do this sooner if I’m honest as I’ll save more in filament cost in the long term than the initial outlay for the PEI sheet. These should now be the standard for all 3D printers.
If you’re in two minds of whether to invest in one, do it, as you won’t regret it. I’ll never go back to glass for my build surface.
The product comes with very clear step by step installation instructions and I had the PEI sheet installed in about 5 minutes. I was re-trammed, Z offset done, bed mesh probed and was printing again in less than 20 minutes. Fantastic product.
Prints improved immediately
I’ve had this less than a week and I’m so happy with it. So worth the 22 I paid, for the first time ever I’ve been able to start a print and it print without me having to babysit the first couple of layers.
This is the double sided sheet, I’ve only tried the rough side so far as I just want the prints to work and am not bothered by the roughness in the print.
I wish I had stuck the magnetic part to my actual heated bed, I stuck it to my glass bed, not sure why, probably because I thought it would be easier to get rid of if it didn’t work. But now my glass bed won’t clip in properly and I’ve lost a bit of size for printing, but still, my prints are comin gour awesome.
The glue is pretty serious stuff, no chance of pulling it off the glass and putting it back on the bed.I will probably get another one and stick it direct to the bed once I’ve seen how well this one lasts.
UMO+
Formfutura CarbonFil
Why did it take me so long to buy one of these!
Having spent the last year modifying the Creality Ender 3 V2, for some reason I overlooked replacing the Glass bed.
The number of models that have been broken when trying to remove them from the bed with brute force when all along I should have just gone for one of these.
Fitting was easy and although it came with instructions I pretty much just jumped right in and removed the glass bed before giving the metal bed underneath a quick clean with 99% IPA and a
Microfibre.
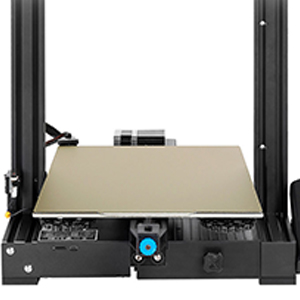
You then just peal back 2 corners of the adhesive from the magnetic sheet and line them up with 2 corners on the metal bed, apply some pressure and then start to peel the rest of the backing paper as you go until the magnet is lined up and stuck down.
Then you just choose which side you want to print on and then line up 2 corners and place the PEI sheet on to the magnet.
If you are replacing a glass bed, don’t forget to recalibrate the z offset to allow for the lower thickness.
Removing prints is now straight forwards with the sheet removed from the printer you can just give it a flex and the prints just pop right off.
Highly recommend this to anyone with a Creality Ender 3
Small mark on my plate
Very good plate IMO, unfortunately, I have a small mark you can feel with your finger (Centre of photo). I do not normally print in this part of the plate so not a massive issue, should have been perfect being a brand new item though. Must have been done at the factory as the packing was exceptional.
Works very well
Trying to get bed adhesion is a dark art for 3D printers. It’s usually a combination of factors involving a flat surface (no bows or curves), a leveled bed and good adhesion.
I found this sheet to work really well for holding down PLA prints and the best part is you can remove the spring steel sheet from the magnetic bed and flex it to pop the prints off. My printer already had a magnetic base for the sheet to stick to so I didn’t use the one supplied but some printers might require sticking down the magnetic bed provided and might have to clean off their heater plate first. As I already have auto bed leveling I didn’t need to do anything to use the sheet without any configuration. Some printers might have to move their z-stop up a bit so the print nozzle doesn’t crash into the bed when reset.
I don’t know if performance will degrade over time but I’ve made about 20 prints so far and it’s worked. I would recommend extending the lifetime of the sheet by not unduly touching it with greasy fingers, and changing the placement of prints so they’re not centred every time.
Best bed I've used
Installs in seconds and works brilliantly. Great adhesion and prints pop off when it’s flexed. I’m about to order a set for all the 3D printers in the DT workshop at school. Highly recommended.
Game changer, No need to chisel the print off anymore.
very easy to install to replace a glass bed on my Ender 3 V2. Please bare in mind that you may have to move your Z stop to a new height. once I levelled the bed and started my print to stuck instantly, no glue stick, no hairspray no constant fiddling to get the first layer stick. worked amazingly. and getting the print off was just so easy, give the bed a flex and its off. I wish i brought one sooner! this would have saved me so many hours having to reprint due to not sticking to the bed….highly recommend.
By far the best ender upgrade
I have been struggling with bed adhesion. This simple upgrade fixed this completely. By far the most noticeable upgrade I’ve made to the printer
I can’t see how your would have issues applying as it was super easy and the magnet is very strong.
No more warping and no need for excessive brims
Best bed upgrade you can make for your Ender 3
The results are amazing! I have generally been very happy with the glass bed on my Ender 3 V2 but the biggest problem for me was too much adhesion with small parts. This bedplate solves that problem.
I was initially skeptical when I first saw the silky smooth print surface, but after an easy installation and quick re-leveling I found that it grips PLA like a vice. The flexibility of the plate means that your prints will pop off with ease, regardless of size and that surface means the underside of your prints are as smooth as glass.
I simply couldn’t recommend this upgrade more.
Essential upgrade
I got this at the same time as my CR Touch. The combination of the 2 together, I have not had a single print fail. Super easy to install and super easy to remove prints from.