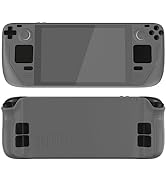
eXtremeRate Purple Custom Faceplate Back Plate Shell
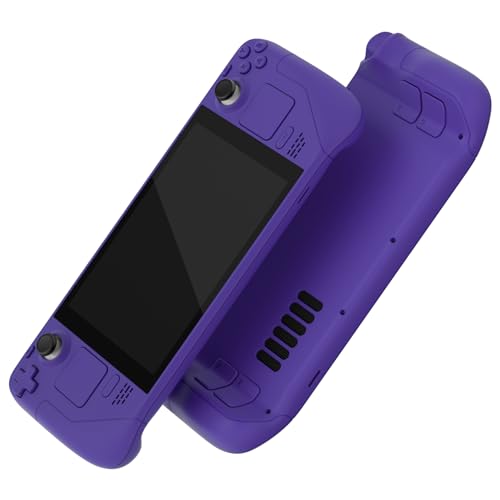
eXtremeRate Purple Custom Faceplate Back Plate Shell for Steam Deck, Handheld Console Replacement Housing Case, DIY Full Set Shell with Buttons for Steam Deck Console – Console Withou
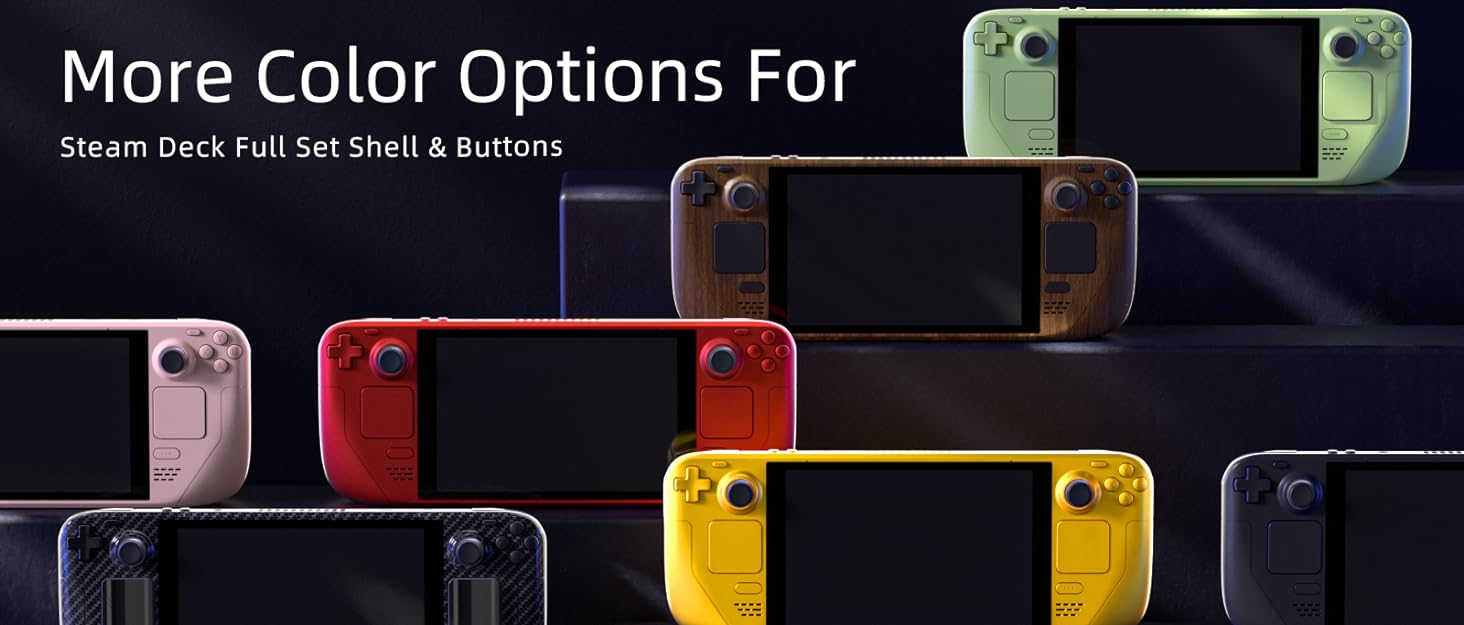
From the brand

eXtremeRate is a gaming accessory development company, focused on quality and innovation. As one of the global leaders in video game accessories, eXtremeRate leads the way in the video gaming entertainment industry with customized, innovative items, and unique one-stop gaming modding solutions since 2010.
The leading brand in the game controller modification industry, eXtremeRate makes the best of the one-stop gaming modding solution after ten years of development. We provide modding solutions to help our partners to deliver a better gaming experience for gamers all over the world.
With a slogan of “PLAY DIFFERENT”, our mission is to keep innovating in the gaming industry and develop innovative and technologically improved gaming products to enhance gaming experiences, as well as fun and excitement. Gaming is our passion.
All projects have has been developed and tested by gamers in gaming.
Nice case
It was not easy… Took around 3 hours for me. Screen detach was terrible procedure. But I did it and it looks and works nice
Good quality, good complication, I can recommend.
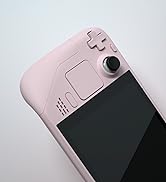
super cute shade of pink, whole shell replacement was actually pretty straightforward! suction cup in the kit did the job, i recommend getting some guitar picks for the screen tho ;-P
super cute shade of pink, whole shell replacement was actually pretty straightforward! suction cup in the kit did the job, i recommend getting some guitar picks for the screen tho ;-P
Tolle optische änderung
Ich dachte erst das dass Produkt nicht meinen Anforderung gerecht wird. Aber ich muss sagen es ist wirklich gut verarbeitet keinerlei strende berstnde oder unsauber gearbeitete kanten.
Was mich aber ein wenig strt sind die Tasten, also das Plastik ist einfach akustisch mir persnlich zu hell und gibt ein strendes Gerusch wieder. Habe da die originalen bernommen bis auf l4/5 r4/5
Worth I
A heat gun or blow dryer is useful for getting the screen out **(imo) and required to change out the touch pads.**
Save your old screws and use them instead of the ones provided.
You need to use the provided screws for changing the paddles.
I fixit has a great tutorial on making the switch, between that and the manufacturers video you are set.
Change out your thumb sticks and SSD while you’ve got it apart.
Have fun.
Quality Item
These looked great in the photos and I’m happy to say they do not dissapoint when you recieve them.
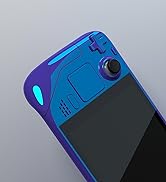
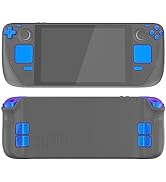
These sheel replacements look and feel great. A fun way to make your steam deck stand out. The plastic feels high quality and the colouring (I order the Chameleon Purple/Blue) looks outstanding. It’s not simply two tones, but actually has a pearlescent quality where the colours appear to shift from Blue to Purple depending on the angle of the light.
Includes several useful tools for making the replacement which is helpful. I would reccomend using plastic guitar pick rather than the metal one include. The metal one should work fine but a plastic one is a bit safer. Everything you need to complete the shell replacement is included in the box.
5.5/5
Sieht top aus und macht mein Steam Deck zum Hingucke
Der Einbau hat wirklich lange gedauert aber selbst ich mir meinen Bauarbeiter Hnden hab es geschafft (ca 40min) ich habe auch gleich die SSD , den Lfter und die Khlpaste getauscht wenn schon mal alles auf ist. Die Anleitung des Herstellers ist wirklich przise und sollte einfach genau nachgemacht werden dann ist das alles kein Hexenwerk. Passt beim Display zum Schluss besonders auf .
Took me 4 1/2 hours. Make sure you have a good heat gun, guitar picks, and patience! Also don’t be dumb and use metal tweezers to peel adhesive off the screen. I have some scratches on my screen now. Otherwise I’d say it was worth the swap. I wouldn’t do it again lol
Changing my review , absolutely Amazing company one button didn't fit and they sent me another set of my choosing. I am going to order more and try to convince my freinds to do the same with there cases.
Changing my review , absolutely Amazing company one button didn’t fit and they sent me another set of my choosing. I am going to order more and try to convince my freinds to do the same with there cases.
Hell to install
Be sure you’re comfortable with disassembling every part of your steam deck. You’ll be breaking glue to remove the screen, detaching 5-10 ribbon cables and prying touch pads apart.
The case itself is as well made as the original.
C’est une coque pour Steam Deck qui vient remplacer celle d’origine, ce n’est pas fait pour tre coll par dessus. C’est clairement pas fait pour les dbutants, si vous n’avez pas l’habitude de rparer des appareils mobiles, je vous dconseille de commencer ce changement.
Vous devez dsassembler l’ensemble de l’appareil, je vous conseille de changer la coque si vous avez l’intention de changer la pte thermique ou autre.
Let me get a few things out of the way. 1: I used to be a computer repair tech, so this is far from the first device I’ve worked on. 2: The screen was already cracked going into this 3: I also had a tool set for this kind of work.
All of that being said…. I was impressed with the quality of the shell. I’ve swapped the shell on a few PSP’s, Switch’s, DS’s, ect…. They don’t normally have an OEM fit and finish, meaning some screws don’t line or some some holes are not in the correct spot. This case was pretty darn close to OEM spec though. I had no fit and finish issues, which was very surprising. The plastic also doesn’t seem cheap. I’m 30, and I remember all the clear plastic devices from 2000-2004 had a very brittle feeling plastic, I don’t get that feeling from this shell. The color is also awesome and a true callback to the Gameboy’s of the 90’s.
For the install, I wanted to have a contrast of purple and the OEM black buttons. That means I did not deal the touch pad color swap. I also had a cracked screen going into this. I removed the screen without a problem, but if I were trying to save the screen, it would have been difficult doing so with the included tools. I’m removing one star for the tools included for that process.
Other than the screen removal tools, I have zero complaints. The install went perfectly and I would recommend this shell, but get a better set of screw drivers and some plastic picks if you’re looking to reuse the stock screen, a fresh tube of thermal paste (upgrade the paste while you’re in the device, I used MX-4).
If I left this in the woods it would probably blend in and be lost forever. The entire process took many hours for me to complete. I think the most difficult part was the screen removal (I damaged mine a little bit) and separating the touchpad from it’s board. You will be fighting adhesive. I had to use multiple spudgers
Excellente qualité !
Excellente qualit !! La coque est trs solide, trs agrable au toucher, une fois referme, pas le moindre jeu !! Ni en haut ni en bas, pas de bruits “plastique contre plastique” type couic couic comme des coques bas de gamme (type coque de GBA aliexpress).
10/10.
On peut utiliser les vis d’origine ou celles fournies avec le kit. J’ai employ un mlange des 2, RAS.
Le changement est un peu long pour un premier. Mais, parfait.
PAR CONTRE : NE PAS UTILISER LES OUTILS FOURNIS.
Avec le mdiator en mtal vous allez dfoncer votre cran, pareil pour l’outil plastique pour sparer les coques.
J’ai un kit d’outil iFixit, et c’est le mieux.
J’ai utilis leurs mdiators bleus ULTRASOUPLES, et leur ventouse. Avec un cran bien chauff ! J’ai achet une compresse micro-ondable 10$ en pharmacie, type entorses ou autres. 45 sec au micro-ondes, sur l’cran 5 min et hop.
Patience is key!
After having a vinyl skin on my deck for a little while, I decided to take the plunge and buy the extremerate shell. I have zero experience with tear downs but I followed the tutorial on YouTube, pausing where necessary, which made the whole process a lot smoother.
The screen removal was the most stubborn element to take out of the original shell but I would strongly advise purchasing the iOpener kit from iFixit. Stick it in the microwave for a minute and then place it on each side for about 5 minutes – I did this whilst watching a 30 minute show on Netflix to pass the time! Using the iFixit suction tool, I was able to prise the screen off without using the pics. Make sure to use isopropyl to safely remove the adhesive left behind. After the screen removal it’s pretty much plain sailing from there.
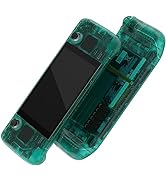
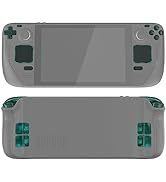
I chose to keep the original buttons as a nice contrast to the translucent green; I will be putting some black extremerate back paddles on the rear too as I think that would look much slicker. The whole process probably took around 2.5 – 3 hoursif you like tinkering and enjoy projects that test your patience, the time will fly by as it did for me.
I’m really pleased with the end result, it feels nice to hold and the quality is fantastic. The fit is absolutely perfect and for the price of the kit, the value for money is second to none. My main problem was actually choosing the shell colour! I would definitely recommend this if you have the patience for such thingsI love a challenge so this was right up my street!
The Purple shell feels a lot less slick than their white shell, likely due to the coloring they used on it. I like the purple, it's a lighter purple than Sony uses on their purple PS5 Controller.
The Purple shell feels a lot less slick than their white shell, likely due to the coloring they used on it. I like the purple, it’s a lighter purple than Sony uses on their purple PS5 Controller.
The aftermarket buttons especially the face buttons move around in their space a lot more than the original, they may be slightly smaller. I recommend using all of the original buttons and just keep the shell. My shell has a nice finish, but in the light i can see small dots of uneven coat. The space that the screen adheres to is ever so slightly larger so when I replaced the screen there’s a gap bigger than on the original.
Looks great but a fiddly job to replace
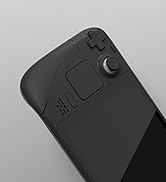
Couldn’t decide on the best colour to go for but went with the white shell in the end.
Looks good but… if you have not stripped down devices before, this may be a little too complex for you.
The online video instructions are good, not sure why the white costs more than some of the other colours but, for the amount of design, effort and effor that has gone inyo the product , it is good value for money
I'll start by saying I absolutely love extremerate's products and have literally never had a problem with anything from them. Only this time the L2 button housing doesn't seem to be big enough so I had to take a Dremel tool to open it up so the L2 button didn't grind against the side of the shell. They still get 4 stars because EVERYTHING else was perfect.
I’ll start by saying I absolutely love extremerate’s products and have literally never had a problem with anything from them. Only this time the L2 button housing doesn’t seem to be big enough so I had to take a Dremel tool to open it up so the L2 button didn’t grind against the side of the shell. They still get 4 stars because EVERYTHING else was perfect.
Just a heads up: be very careful with the display cable. It is VERY susceptible to damage. I would recommend removing it entirely before you remove the screen. You CANNOT get a replacement and repairing it requires specialized tools and skills.
Just a heads up: be very careful with the display cable. It is VERY susceptible to damage. I would recommend removing it entirely before you remove the screen. You CANNOT get a replacement and repairing it requires specialized tools and skills.
Really nice Shell for my steam deck
Was quite easy to for their YouTube along the way and I am really happy with the outcome. 100% on the kit apart from the sharp guitar pick
I did cut myself whilst removing the screen so I’d be careful when you get to that part. The kit has everything you need to get you through it for a stylish steam deck and it looks fantastic
Took about 4 hours to swap this and the buttons as well (got the red button set separately, also from extremeRate). It definitely is not easy to do the install. However, its totally worth it. It looks amazing. And the pink shell in particular has a better grip and feel than the stock shell.
Depending on how much care you put onto assembling this, it could be better than the stock shell in my opinion. I was very pleased with the results. A little jealous that the switch got more color variances, but still happy. I was looking for an aqua color. I went with purple because I couldn't decide and it has a nice tint to it. D-pad feels a little better than stock, slightly more precise and not a polished texture. abxy buttons look and feel amazing. The l4, l5, r4, r5 feel janky compared to jsaux with threaded inserts and screws and good instructions (I used their detailed write-up perfectly but It wouldn't even load on a tablet screen so I had to get an old 2n1 in my work area). they are a new player in the shells game and trying, but not the master craftsmen yet. extremerate makes really good fitting shells with extra screws in a single bag but its best to organize the originals in resealable bags seperatedly along with parts and label everything. Requires a lot of tools so prep your work area and it takes all day, pick a slow weekend day to do it. Recommended.
Depending on how much care you put onto assembling this, it could be better than the stock shell in my opinion. I was very pleased with the results. A little jealous that the switch got more color variances, but still happy. I was looking for an aqua color. I went with purple because I couldn’t decide and it has a nice tint to it. D-pad feels a little better than stock, slightly more precise and not a polished texture. abxy buttons look and feel amazing. The l4, l5, r4, r5 feel janky compared to jsaux with threaded inserts and screws and good instructions (I used their detailed write-up perfectly but It wouldn’t even load on a tablet screen so I had to get an old 2n1 in my work area). they are a new player in the shells game and trying, but not the master craftsmen yet. extremerate makes really good fitting shells with extra screws in a single bag but its best to organize the originals in resealable bags seperatedly along with parts and label everything. Requires a lot of tools so prep your work area and it takes all day, pick a slow weekend day to do it. Recommended.
Overall, I’ve used ExtremeRate kits before to mod some controllers and found them to be extremely high quality. Finding out they had a clear blue shell for my Steam deck was an instant buy for me, especially on sale on Prime Days!
The whole process took me just ender 3 hours and looks awesome. However, I do have some gripes.
#1. There needs to be some kind of legend showing how many of each type of screw there is. They come in two baggies all mixed together, and while the pictures in the video tutorial show differences between some of them (flat vs rounded head), actually telling them apart was frustrating. In the end, I used a bunch of the original screws that came out of the stock case as there didn’t seem to be enough of the midsize black ones.
#2 The paddle buttons. The buttons themselves aren’t the issue, their screws are. The lower three screws on each paddle assembly work perfectly fine, but at the top screw the shell is much narrower. This resulted is white stress marks at each one, despite not being tightened right up. (Pictures 3 and 4 on my review.). This is not the end of the world by any means, but I feel these screws should probably be about 1 mm shorter to avoid this.
Overall, I feel the case is fantastic, and maybe it’s wishful thinking, but it does seem more sturdy than the stock shell. I opted to use the original track pads and buttons in lieu of the included transparent ones, but to each their own. As other review have mentioned, use a plastic guitar pick to loosen up the screen when you get to that step. Do NOT use the metal one unless you are very careful about how far under you put it, especially on the right side of the screen where there is a lot less clearance between you and the fragile bits. Just a few improvements to make the process smoother for customers would be appreciated, and you’ve got a killer piece of kit!
Steam Deck un dispositivo altamente personalizzabile e metterci una scocca custom sicuramente il metodo migliore per farlo. eXtremeRate ci propone una scocca apparentemente stupenda. Vediamola in dettaglio.
Pro:
Materiali e design eccellenti
Kit che sostituisce ogni pezzo
Video guida fatta molto bene
Tantissimi colori e motivi disponibili
Ottimo prezzo
Contro:
Installarla difficilissimo
Le viti non sono ordinate nei sacchetti, sono buttate a caso
Il kit non include tutti gli strumenti necessari
Da sapere
Parto subito col dire che ne sconsiglio l’acquisto a chiunque non abbia una buona esperienza con l’assemblaggio di dispositivi elettronici. Steam Deck una console “accessibile”, ma questo non toglie che sia molto complesso, essendoci molti pezzi e molto piccoli.
eXtremeRate mette a disposizione una guida su YouTube davvero accurata, in cui mostra passo-passo come rimuovere ogni singola vite. Il video dura circa un’ora e venti, ma io credo di averci impiegato almeno otto ore a completare il tutto. E non senza fare danni: nel rimuovere la colla dello schermo, ho lasciato qualche graffio sul retro, che per si vede benissimo dal lato frontale.
Bench l’accuratezza del video, nel kit non sono inclusi tutti gli strumenti necessari. Troviamo due cacciaviti e un opening tool, tuttavia sono necessari anche una pinzetta, uno spudger e, soprattutto, un iOpener per sciogliere l’adesivo dello schermo. Con i soli strumenti del kit, non riuscirete a completare il processo.
Non ho per niente apprezzato il modo in cui le viti sono raggruppate, cio completamente a caso. Ci sono tante viti di forme e lunghezze diverse, che nel video vengono mostrate, ma bisogna sforzarsi a riconoscerle ad occhio perch sono distribuite nei sacchetti in maniera disordinata.
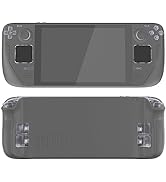
Il risultato finale discretamente buono. Le scocche sono bellissime (ammetto di avere un debole per il design crystal), ma stonano quei graffi che ho fatto. Inoltre, si vedono le bolle sotto i trackpad, causate dall’adesivo messo durante l’assemblaggio (a proposito: mettere le scocche nuove ai trackpad probabilmente la parte pi complessa).
Tirando le somme, non mi pento di aver messo questa scocca ma, forse, non lo rifarei. L’installazione un vero incubo, anche per chi smonta computer di professione, e francamente non lo augurerei neanche al mio peggior nemico. Ma se volete davvero personalizzare Steam Deck e ne siete altamente convinti, allora potrebbe uscirvi un bel lavoro.
This was not easy to do. Took me 3 hours but I love the results! I ended up watching Jsaux tutorials along with extreme rates one as well. Taking the entire system apart is not necessary. Jsaux tutorial was less hectic and I didn’t have to remove the heat sink to apply thermal paste. I also ended up with one screw left that I couldn’t figure out where it came from. I’m very very pleased with the results. Probably won’t do it again though lol
Super Awesome Highly Recommend
Honestly the only reason I gave it 4 stars is because of the packaging. It was delayed a week and came in an already opened box with no security tape or anything like that. All of the parts, screws and tools were there but it was a little concerning. But nothing to keep the box closed.
The tools supplied are useable for mostly everything except the trackpad replacement. The youtube video they provide was probably the most straight forward how to video I have seen on a hardware swap in a long time. One thing to note is that the video does seem to have either a 1st Gen steam deck or has had cables modified as the tape holding down the cables are in different spots. But the shell and the buttons give the same solid feel and the OG parts for the steam deck.
Vraiment bie
La coque spciale console portable Steam est parfaite, elle protge totalement bien la console. Sa qualit est vraiment bonne et vite vraiment bien d’abmer la console surtout si elle tombait par mgarde
Spices up handheld console
Taking a DIY plunge with my handheld console was an experience in itself. The replacement faceplate and backplate lent a vibrant persona to the device. Although the installation called for a fair bit of know-how, the end result was pleasing. And that clear atomic purple look, simply loved it.
Honestly this is one of the best shells I’ve come across, let alone for the Steam Deck.
It feels great, looks fantastic and fit together arguably better than the stock shell. Mine creaked when the shell was pressed below the screen and this one didn’t, so clearly done something better than Valve to sort that out!
I did keep the original buttons though as it looks quite cheap going with all purple – but that’s just me.
The kit had everything you need to swap and Extreme Rate have a YouTube video that was really well done and easy to follow, so I’d recommend watching that like I did.
I can’t fault it and whilst this isn’t a reflection on the shell, it’s definitely not for the feint of heart. You take everything apart, including the screen (which I’d never done before) so I wouldnt do it as your first ever shell swap. If you do though, watch their video, take it slow and keep track of which screws go where so you don’t ruin any of the posts with the wrong screws.
My tip: I used several egg pots and scrap paper to say what they were – worked well!
Die Qualitt der Plastikteile ist wirklich gut, alles passt perfekt zusammen. Der Hersteller hat auf der Webseite eine sehr gute Videoanleitung verlinkt, mit der alle Schritte erklrt sind. Das Ergebnis sieht wahnsinnig gut aus und erfllt alle Erwartungen meiner 2000er-Nostalgie 🙂
Der Umbau ist jedoch nichts fr schwache Nerven – ich schraube viel, entwerfe selbst Platinen usw. Man darf sich auf ca. 4 Stunden Schrauberei einstellen. Das Steam Deck ist eine wirklich komplexe Konsole (hut ab an die Produktdesigner von Valve!) und man muss verdammt viele kleine Teile ausbauen – man zerlegt die Konsole hier 100% in die Einzelteile, da bleibt nichts mehr beisammen.
Meine Empfehlung: Man sollte neben den gelieferten Materialien noch einen einstellbaren Fhn oder besser eine Heiluft-Ltstation mit Temperaturregelung haben, um das Display und ein paar weitere verklebte Komponenten zu entfernen. Zudem ist etwas Reinigungsalkohol (IPA o..) fr die Klebereste am Display hilfreich. Eine Handvoll Gitarrenplektren machen das entfernen vom Display auch nochmal einfacher als nur das einzelne mitgelieferte Metallblttchen.
Unbedingt beachten: Ihr entfernt den Khler vom SoC des Steam Deck. Ihr solltet auch ein wenig neue Wrmeleitpaste haben um diese neu aufzutragen. Meine war schon arg zerbrselt und konnte nicht wiederverwendet werden, habe aber mein Steam Deck auch schon seit Launch. Mit sehr neuen Steam Decks ist die WLP evtl. noch flssig genug um neu verwendet zu werden.
Ich bin sehr zufrieden. 🙂