LFS Car Reversing Camera AHD 720P with Night Vision, Rear
LFS Car Reversing Camera AHD 720P with Night Vision, Rear View Camera 12V-24V 170 Degree Wide Angle IP69K Waterproof, Reverse Camera for Car, Van, SUV, Pickup Truck


LFS Car Reversing Camera AHD 720P with Night Vision, Rear View Camera 12V-24V 170 Degree Wide Angle IP69K Waterproof, Reverse Camera for Car, Van, SUV, Pickup Truck
A little pricey but a good picture
Installing is pretty straight forward, the main difference to ones I e done in the past is the use of the three wires which you either cut or leave to activate a feature. There is green, yellow and white, I cut the green and yellow which enabled the grid lines on the picture and also enables HD over standard image. It did feel like I was diffusing a bomb.
I mounted the camera above the number plate externally on the van. The tricky bits are getting into the vehicle to run the wiring and set the camera. I’ve got it connected to an Xtrons android head unit and it works fine, I needed to connect the wire to the head unit wire marked reverse and also back at the camera I connected the power into the reversing light wire so when it’s in reverse it triggers the picture. My van is an automatic so I have to go past the reverse gear to get to drive, unless this is done quickly it triggers the video every time so I wired in a switch to isolate the power from the camera.
It’s not cheap and the quality of the picture is very good, this camera at full price is about the same price as an official one from Xtrons but this one had the option for the grid lines on the camera.
I’m not convinced it’s worth the same money but I’m happy with it.
Used a professional to install
I’m not the most confident person when it comes to eclectics and in this case there was more work needed for my vehicle to have the rear camera installed compared to a simple plug and play experience.
I mounted my camera using a 3M stick pad, pushed the wiring into the plastic slots of the car to hide them and into the roofing material. Once at the front of the car I had to get a professional to the rest as my screen is mounted into the dash rest and I wasn’t comfortable installing the electric wires.
Once installed I now had the option to use the rear camera. The picture quality is impressive and being able to see the rear of your vehicle through a camera is a whole new experience and I can understand why rear cameras are so popular.
What’s also impressive is how small this camera is! You can notice it but it’s hardly noticeable.
Added Full Functionality to Existing Monito
This reversing camera arrived in a simple cardboard box.
The box contains:
* The camera.
* RCA male to RCA male cable with reverse trigger wire and power connection wires (7m).
* Metal mount.
* Double sided sticky pads and screws for mount.
* Instructions.
I ordered a dashcam/hands free/media player from Amazon that has a reversing camera monitor built in but no camera is supplied with it. This one works perfectly but I had to get the correct adaptor cable (https://amzn.eu/d/8tacfKg) that has a 2.5mm jack plug to RCA Female lead and a reverse trigger wire.
I have an old Volvo estate that I use as a workhorse but when I drive it I miss the reversing camera we have in the other car, especially when the cargo area is full.
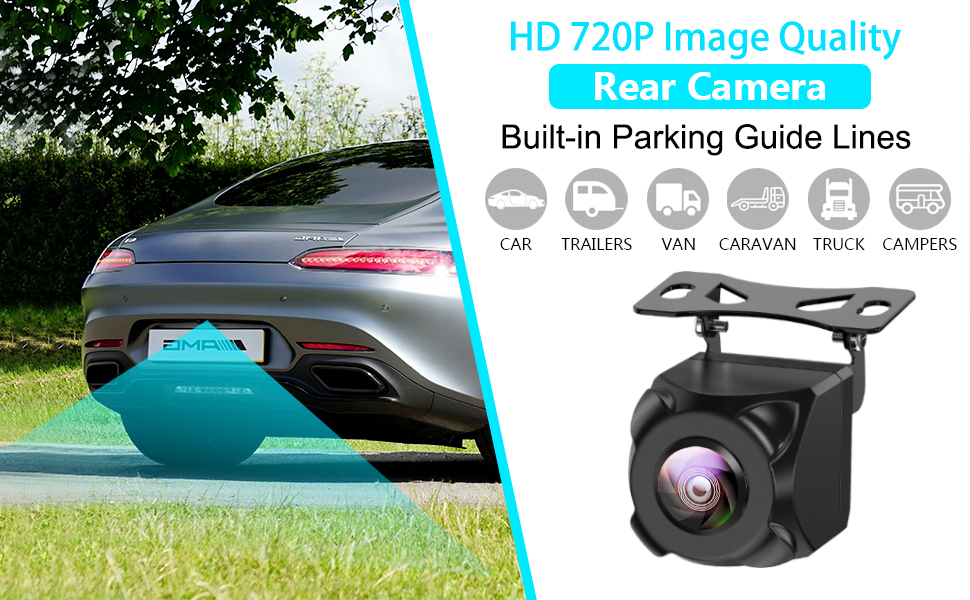
There are three thin wire loops on the camera cable (white, yellow and green). By cutting these or leaving them intact you can add/remove guide lines, mirror the image and change video signal from CVBS to AHD. My monitor requires AHD so I had to cut the yellow wire.
Although the camera is weatherproof I decided to mount it inside the tailgate. Because it doesn’t have IR lights there is no problem with glare on the glass at night. I chose to screw it in place because (in my experience) adhesive pads never stay attached.
If you want to keep things neat the main work is involved in hiding the cable. Be prepared to remove panels and trim to do this! I have a full set of trim removal tools so it wasn’t too difficult but it took a few hours.
I wired the camera’s power cables into the supply for the car’s running lights that are always on when the ignition is on. I wired the reverse trigger wire to the reversing lights’ positive wire.
Picture quality is good but there is some fisheye effect due to the wide viewing angle. I have attached day and night pictures of the image I get on the monitor but please note I do have extra reversing lights and the guide lines are those of the monitor and not the camera’s own.
I’m very pleased with this little camera as it has given full reverse camera functionality to my existing monitor but I did have to get the correct adaptor cable. I found it easy to install and for 24.99 it does its job well so it gets 5 stars.
Exact replacement for old reversing camera
The camera is supplied with a decent length signal and power supply cable extension which as I was replacing an existing camera I did not need, the lead has RCA connectors on one end only. The camera also comes fitted with RCA connectors for power and signal output. My old camera was identical in respect of connections so that bit was easy once I had removed the rear door liner to gain access. The camera mounts in the number plate light plate and the mounting screws matched exactly. The image is good with a nice wide field of vision, the camera can also be configured by cutting small link cables on the output wire, cutting the white loop changes the image from mirror image to normal, this is in case you are using it as a front facing camera. The green loop being cut adds guidelines to the image, and the yellow one changes the image signal from CVBS to AHD. if you cut one in error they are long enough to be able to reconnect them I guess. My original camera did have LED lighting but this one works fine with the light from the reversing and taillights.
Good if you have a screen you can use it with!
Construction
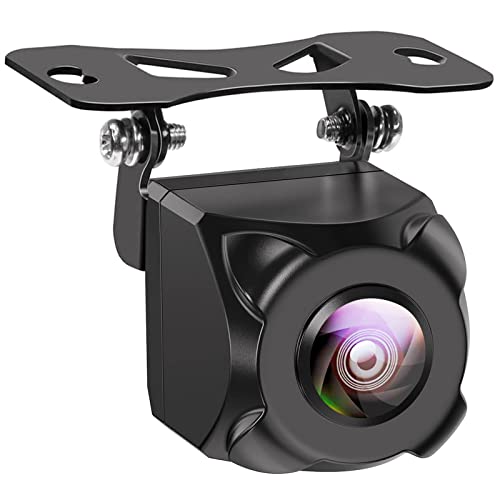
This is quite a small device, sealed in plastic, so you could mount it on the outside of the car if you want to drill holes in the bumper, tailgate etc. It comes with a small thin flimsy bracket to mount it via screws which are supplied.
Fitting
I decided to install it on the inside of my tailgate, so had to make up a special bracket to hold it in the right position to get a good view through the glass, this was quite a bit of messing about so I don’t recommend it! I suppose you could just screw it to the plastic surround using the supplied bracket, but my car has that piece missing! There is a long cable supplied which is long enough to hide under trim all the way to the front of the car in order to attach to a screen. This cable has a moulded plug fitted which makes it a bit harder to thread the cable through, but it is possible.
There are also power cables fitted to attach into the reversing light wiring but these proved to not be long enough for my application, although they’d probably be OK if you were installing it in the bumper. There is no power cable supplied for the screen, so this would have to be wired into the ignition circuit presumably. I bought a small screen for this purpose for around 20 which proved to work ok with the camera.
Conclusion
I am still involved in fitting this, I certainly wouldn’t suggest you try fitting this unless you are happy pulling bits of trim off all over your car (I managed to break the rear defrost screen connection on my car) It does take a fair bit of time and effort to install it, so not for the fainthearted! Probably fine if you are replacing an existing camera. Picture is OK for the application.
Works well.
This rear-view camera seems to be an upgrade compared to the similar-looking model on the car. I was concerned that it lacks the LED lights of the older one (see photos), but the listing says it has night vision, so I assume it doesn’t need additional lighting. Unless it is being used for surveillance, there would be lighting from the car’s lights in any event.
As the main wiring is similar to the existing camera’s, and the connectors the same, I replaced only the actual camera. leaving the old wiring in place. I used the double-sided foam pad provided to fix the bracket to the underside of the car’s number-plate light housing (screws are also provided). The following day, the camera had fallen off. The pad had lost adhesion to the plastic. I’m not sue why – the old camera had stayed in place for more than a year. It’s possible the plastic was dirty or contaminated, although I did use meths on it prior to fixing. Three coloured wires can be cut to select mirroring, guide lines, and CVBS or AHD output for HD.
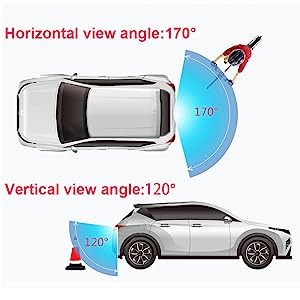
I have just installed the camera, and will update the review after some more testing, but first impressions are good. The image looks at least as clear as the old camera’s, and the field of view is a little wider (170 as opposed to 140 degrees). I can see the bumper and tow-ball (albeit rather distorted), which is the main objective, to help parking in tight spaces. So far, so good.