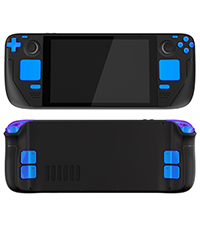
eXtremeRate Chrome Gold Custom Glossy Faceplate Back Plate
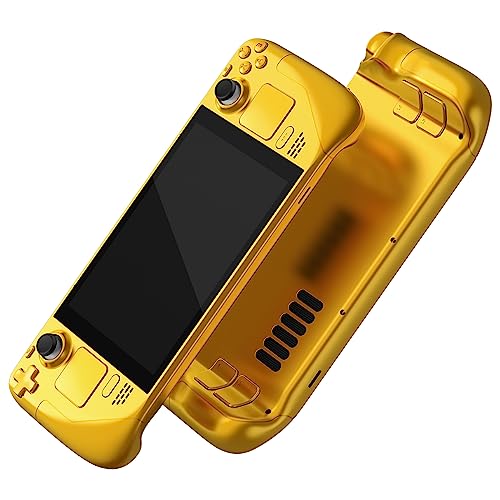
eXtremeRate Chrome Gold Custom Glossy Faceplate Back Plate Shell for Steam Deck, Handheld Console Replacement Housing Case, DIY Full Set Shell w/Buttons for Steam Deck Console – Console NOT Included
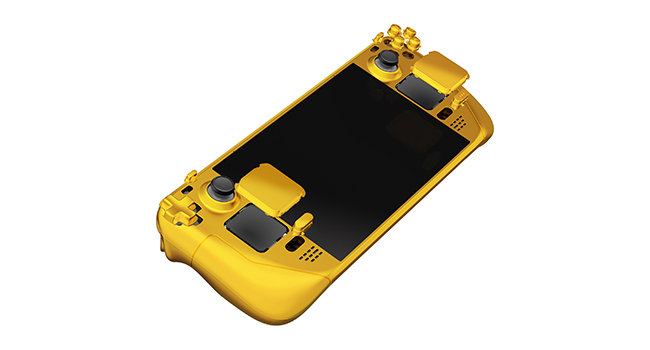
Custom Replacement Shell Case for Steam Deck
- Want to make your handheld console stand out from the crowd?
- This is the way to go!
- Great customization option for DIY enthusiasts with a handheld console for Steam Deck.
- A unique gift option for your loved ones and friends.
Product Feature

How difficult is it to install to full set shells for Steam Deck?
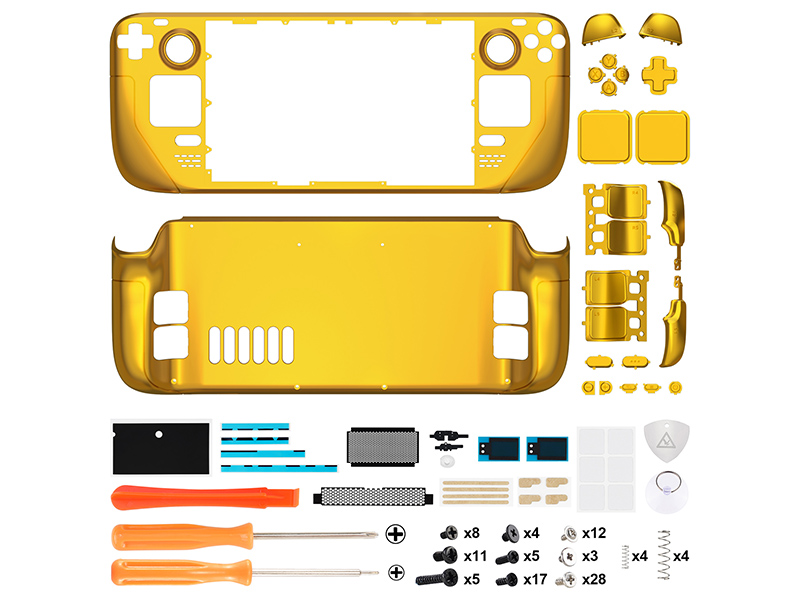
Installation can be challenging, so we highly recommend watching our installation video. Get the video on YouTube by searching “eXtremeRate Full Set Shell for Steam Deck”.
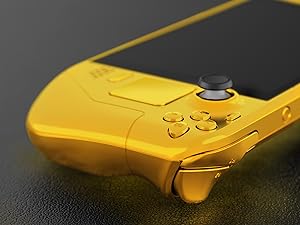
Is your chrome gold shell in Bright UV coating?
Yes, it is in Bright UV coating.
What should we pay special attention to when installing replacement shells for the Steam Deck?
Please note that the screen needs to be disassembled to install the faceplate.
Don’t over heating and too long when heating the screen during disassembly.
Will there be any gaps between your backplate and the console? Will the trigger buttons get stuck?
No need to worry, our replacement backplates and trigger buttons are exactly like the originals. As long as they are installed correctly, you won’t encounter any of the issues mentioned above.
How do I clean my new console for steam deck after installing these replacement shells?
It is recommended to clean with a wipe with water. Do not spray water or al-cohol directly on the product surface. Do not use any other organic solvents for cleaning.
Find More Accessories
 Replacement Button | 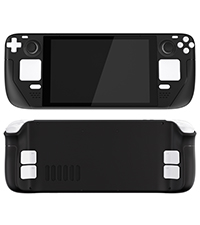 Replacement Button | 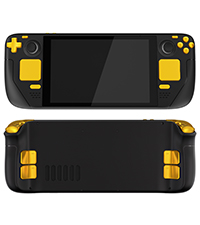 Replacement Button | 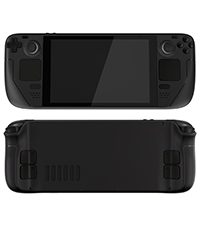 Replacement Button | 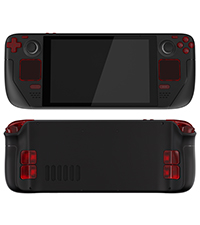 Replacement Button |  Replacement Button | |
| For eXtremeRate Steam Shell | ✔ | ✔ | ✔ | ✔ | ✔ | ✔ |
| Color | Chameleon Purple Blue | White | Chrome Gold | Black | Clear red | Clear |
| — | — | — | — | — | — | |
| — | — | — | — | — | — | |
| — | — | — | — | — | — |
Nice case
It was not easy… Took around 3 hours for me. Screen detach was terrible procedure. But I did it and it looks and works nice
Good quality, good complication, I can recommend.
It was definitely a process but the instruction video was great. Plastic feels high quality and everything lined up and closed up perfectly. I used the original black buttons for cosmetic reasons but I did change the pads and triggers and they feel good.
It was definitely a process but the instruction video was great. Plastic feels high quality and everything lined up and closed up perfectly. I used the original black buttons for cosmetic reasons but I did change the pads and triggers and they feel good.
Amazing Results
Firstly, don’t be put off having a go! I don’t think it is hard as people say, as long as you give yourself time. Mine turned out fantastic, I am very happy. I recommend the following considerations before you buy 1. Get yourself your own toolkit. The suction cup is rubbish and the metal pick should not be used, use plastic instead. 2. Use a heat gun and keep moving, medium heat, for around 2 minutes. 3. Use isopropyl rubbing alcohol to get rid of remaining residue. Important to get rid of all glue!.
My only complaint is the screws are confusing, should be labelled up.
Really happy with results.
This thing was a pain to install, but that’s not the manufacturer’s fault. Steam put so many screws into this thing, but at least I know this will last. Excellent fit, finish, texture, and quality. The only part I did not use was the touch pad covers, I wanted the texture and contrast of the original pads. Just be sure to take your time, never force anything, and bring a heat gun or hair dryer.
Hell to install
Be sure you’re comfortable with disassembling every part of your steam deck. You’ll be breaking glue to remove the screen, detaching 5-10 ribbon cables and prying touch pads apart.
The case itself is as well made as the original.
Great looking case swap!
I am not a total novice to to tinkering with electronics, but this was a little more involved than usual.
I had my own tools already to make it easier, and my own plastic picks. The YouTube videos were spot on, but some parts gave me more fuss than they seemed in the video (removing the thumbpad boards from the square button/pad for example, uses another person’s suggestion and warmed it a bit with a hair dryer).
The screen part gave me some pucker factor, but I just went slow and got it really warm and worked the edge of the screen like the video. I had better suction cups, but to be honest I thought they put *too* much pulling force which made me nervous, so I used the “crappier” one and it worked fine.
All in all, it came out great. I may/may not have to reopen it a few times for things I might have missed (oops) or it didn’t fit together right, but I learned a lot about taking it apart several times. Super modular!
Took me about 4 or so hours. Just label everything to help keep track of you get confused.
I wish the “new” screws were labeled in bags to make for quicker swap outs instead of comparing a bunch of loose screws to the original ones to know what to use (you can also always use the original ones as well if you get frustrated/confused).
Love the look and it has a quality/solid feet to it.
Patience is key!
After having a vinyl skin on my deck for a little while, I decided to take the plunge and buy the extremerate shell. I have zero experience with tear downs but I followed the tutorial on YouTube, pausing where necessary, which made the whole process a lot smoother.
The screen removal was the most stubborn element to take out of the original shell but I would strongly advise purchasing the iOpener kit from iFixit. Stick it in the microwave for a minute and then place it on each side for about 5 minutes – I did this whilst watching a 30 minute show on Netflix to pass the time! Using the iFixit suction tool, I was able to prise the screen off without using the pics. Make sure to use isopropyl to safely remove the adhesive left behind. After the screen removal it’s pretty much plain sailing from there.
I chose to keep the original buttons as a nice contrast to the translucent green; I will be putting some black extremerate back paddles on the rear too as I think that would look much slicker. The whole process probably took around 2.5 – 3 hoursif you like tinkering and enjoy projects that test your patience, the time will fly by as it did for me.
I’m really pleased with the end result, it feels nice to hold and the quality is fantastic. The fit is absolutely perfect and for the price of the kit, the value for money is second to none. My main problem was actually choosing the shell colour! I would definitely recommend this if you have the patience for such thingsI love a challenge so this was right up my street!
This takes time to do.
Good bang for your buck and Looks really cool
Cons:
1. Four hour install time.
2. Can easily break screen so be extra careful.
Pros:
1. It looks so cool after the shell is replaced.
2. No cracks, scuffs ,or scratches.
3. Easy to follow instructions
The aftermarket buttons especially the face buttons move around in their space a lot more than the original, they may be slightly smaller. I recommend using all of the original buttons and just keep the shell. My shell has a nice finish, but in the light i can see small dots of uneven coat. The space that the screen adheres to is ever so slightly larger so when I replaced the screen there’s a gap bigger than on the original.
Couldn’t decide on the best colour to go for but went with the white shell in the end.
Looks good but… if you have not stripped down devices before, this may be a little too complex for you.
The online video instructions are good, not sure why the white costs more than some of the other colours but, for the amount of design, effort and effor that has gone inyo the product , it is good value for money
Very time consuming but worth it at the end
At first was hesitant to order. Once pulled out of box I felt the texture of the shell, felt very sturdy. Wasn’t cheap plastic. After completed I was very pleased by the look. I stuck with original SD buttons and dpad. The clear just didn’t seem right to me but overall 8/10
Definitely recommend to other SD users!
Really nice Shell for my steam deck
Was quite easy to for their YouTube along the way and I am really happy with the outcome. 100% on the kit apart from the sharp guitar pick
I did cut myself whilst removing the screen so I’d be careful when you get to that part. The kit has everything you need to get you through it for a stylish steam deck and it looks fantastic
Steam Deck un dispositivo altamente personalizzabile e metterci una scocca custom sicuramente il metodo migliore per farlo. eXtremeRate ci propone una scocca apparentemente stupenda. Vediamola in dettaglio.
Pro:
Materiali e design eccellenti
Kit che sostituisce ogni pezzo
Video guida fatta molto bene
Tantissimi colori e motivi disponibili
Ottimo prezzo
Contro:
Installarla difficilissimo
Le viti non sono ordinate nei sacchetti, sono buttate a caso
Il kit non include tutti gli strumenti necessari
Da sapere
Parto subito col dire che ne sconsiglio l’acquisto a chiunque non abbia una buona esperienza con l’assemblaggio di dispositivi elettronici. Steam Deck una console “accessibile”, ma questo non toglie che sia molto complesso, essendoci molti pezzi e molto piccoli.
eXtremeRate mette a disposizione una guida su YouTube davvero accurata, in cui mostra passo-passo come rimuovere ogni singola vite. Il video dura circa un’ora e venti, ma io credo di averci impiegato almeno otto ore a completare il tutto. E non senza fare danni: nel rimuovere la colla dello schermo, ho lasciato qualche graffio sul retro, che per si vede benissimo dal lato frontale.
Bench l’accuratezza del video, nel kit non sono inclusi tutti gli strumenti necessari. Troviamo due cacciaviti e un opening tool, tuttavia sono necessari anche una pinzetta, uno spudger e, soprattutto, un iOpener per sciogliere l’adesivo dello schermo. Con i soli strumenti del kit, non riuscirete a completare il processo.
Non ho per niente apprezzato il modo in cui le viti sono raggruppate, cio completamente a caso. Ci sono tante viti di forme e lunghezze diverse, che nel video vengono mostrate, ma bisogna sforzarsi a riconoscerle ad occhio perch sono distribuite nei sacchetti in maniera disordinata.
Il risultato finale discretamente buono. Le scocche sono bellissime (ammetto di avere un debole per il design crystal), ma stonano quei graffi che ho fatto. Inoltre, si vedono le bolle sotto i trackpad, causate dall’adesivo messo durante l’assemblaggio (a proposito: mettere le scocche nuove ai trackpad probabilmente la parte pi complessa).
Tirando le somme, non mi pento di aver messo questa scocca ma, forse, non lo rifarei. L’installazione un vero incubo, anche per chi smonta computer di professione, e francamente non lo augurerei neanche al mio peggior nemico. Ma se volete davvero personalizzare Steam Deck e ne siete altamente convinti, allora potrebbe uscirvi un bel lavoro.
Vraiment bie
La coque spciale console portable Steam est parfaite, elle protge totalement bien la console. Sa qualit est vraiment bonne et vite vraiment bien d’abmer la console surtout si elle tombait par mgarde
Honestly this is one of the best shells I’ve come across, let alone for the Steam Deck.
It feels great, looks fantastic and fit together arguably better than the stock shell. Mine creaked when the shell was pressed below the screen and this one didn’t, so clearly done something better than Valve to sort that out!
I did keep the original buttons though as it looks quite cheap going with all purple – but that’s just me.
The kit had everything you need to swap and Extreme Rate have a YouTube video that was really well done and easy to follow, so I’d recommend watching that like I did.
I can’t fault it and whilst this isn’t a reflection on the shell, it’s definitely not for the feint of heart. You take everything apart, including the screen (which I’d never done before) so I wouldnt do it as your first ever shell swap. If you do though, watch their video, take it slow and keep track of which screws go where so you don’t ruin any of the posts with the wrong screws.
My tip: I used several egg pots and scrap paper to say what they were – worked well!