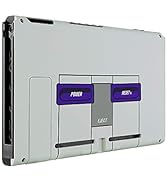
eXtremeRate DIY Replacement Shell Buttons for Nintendo
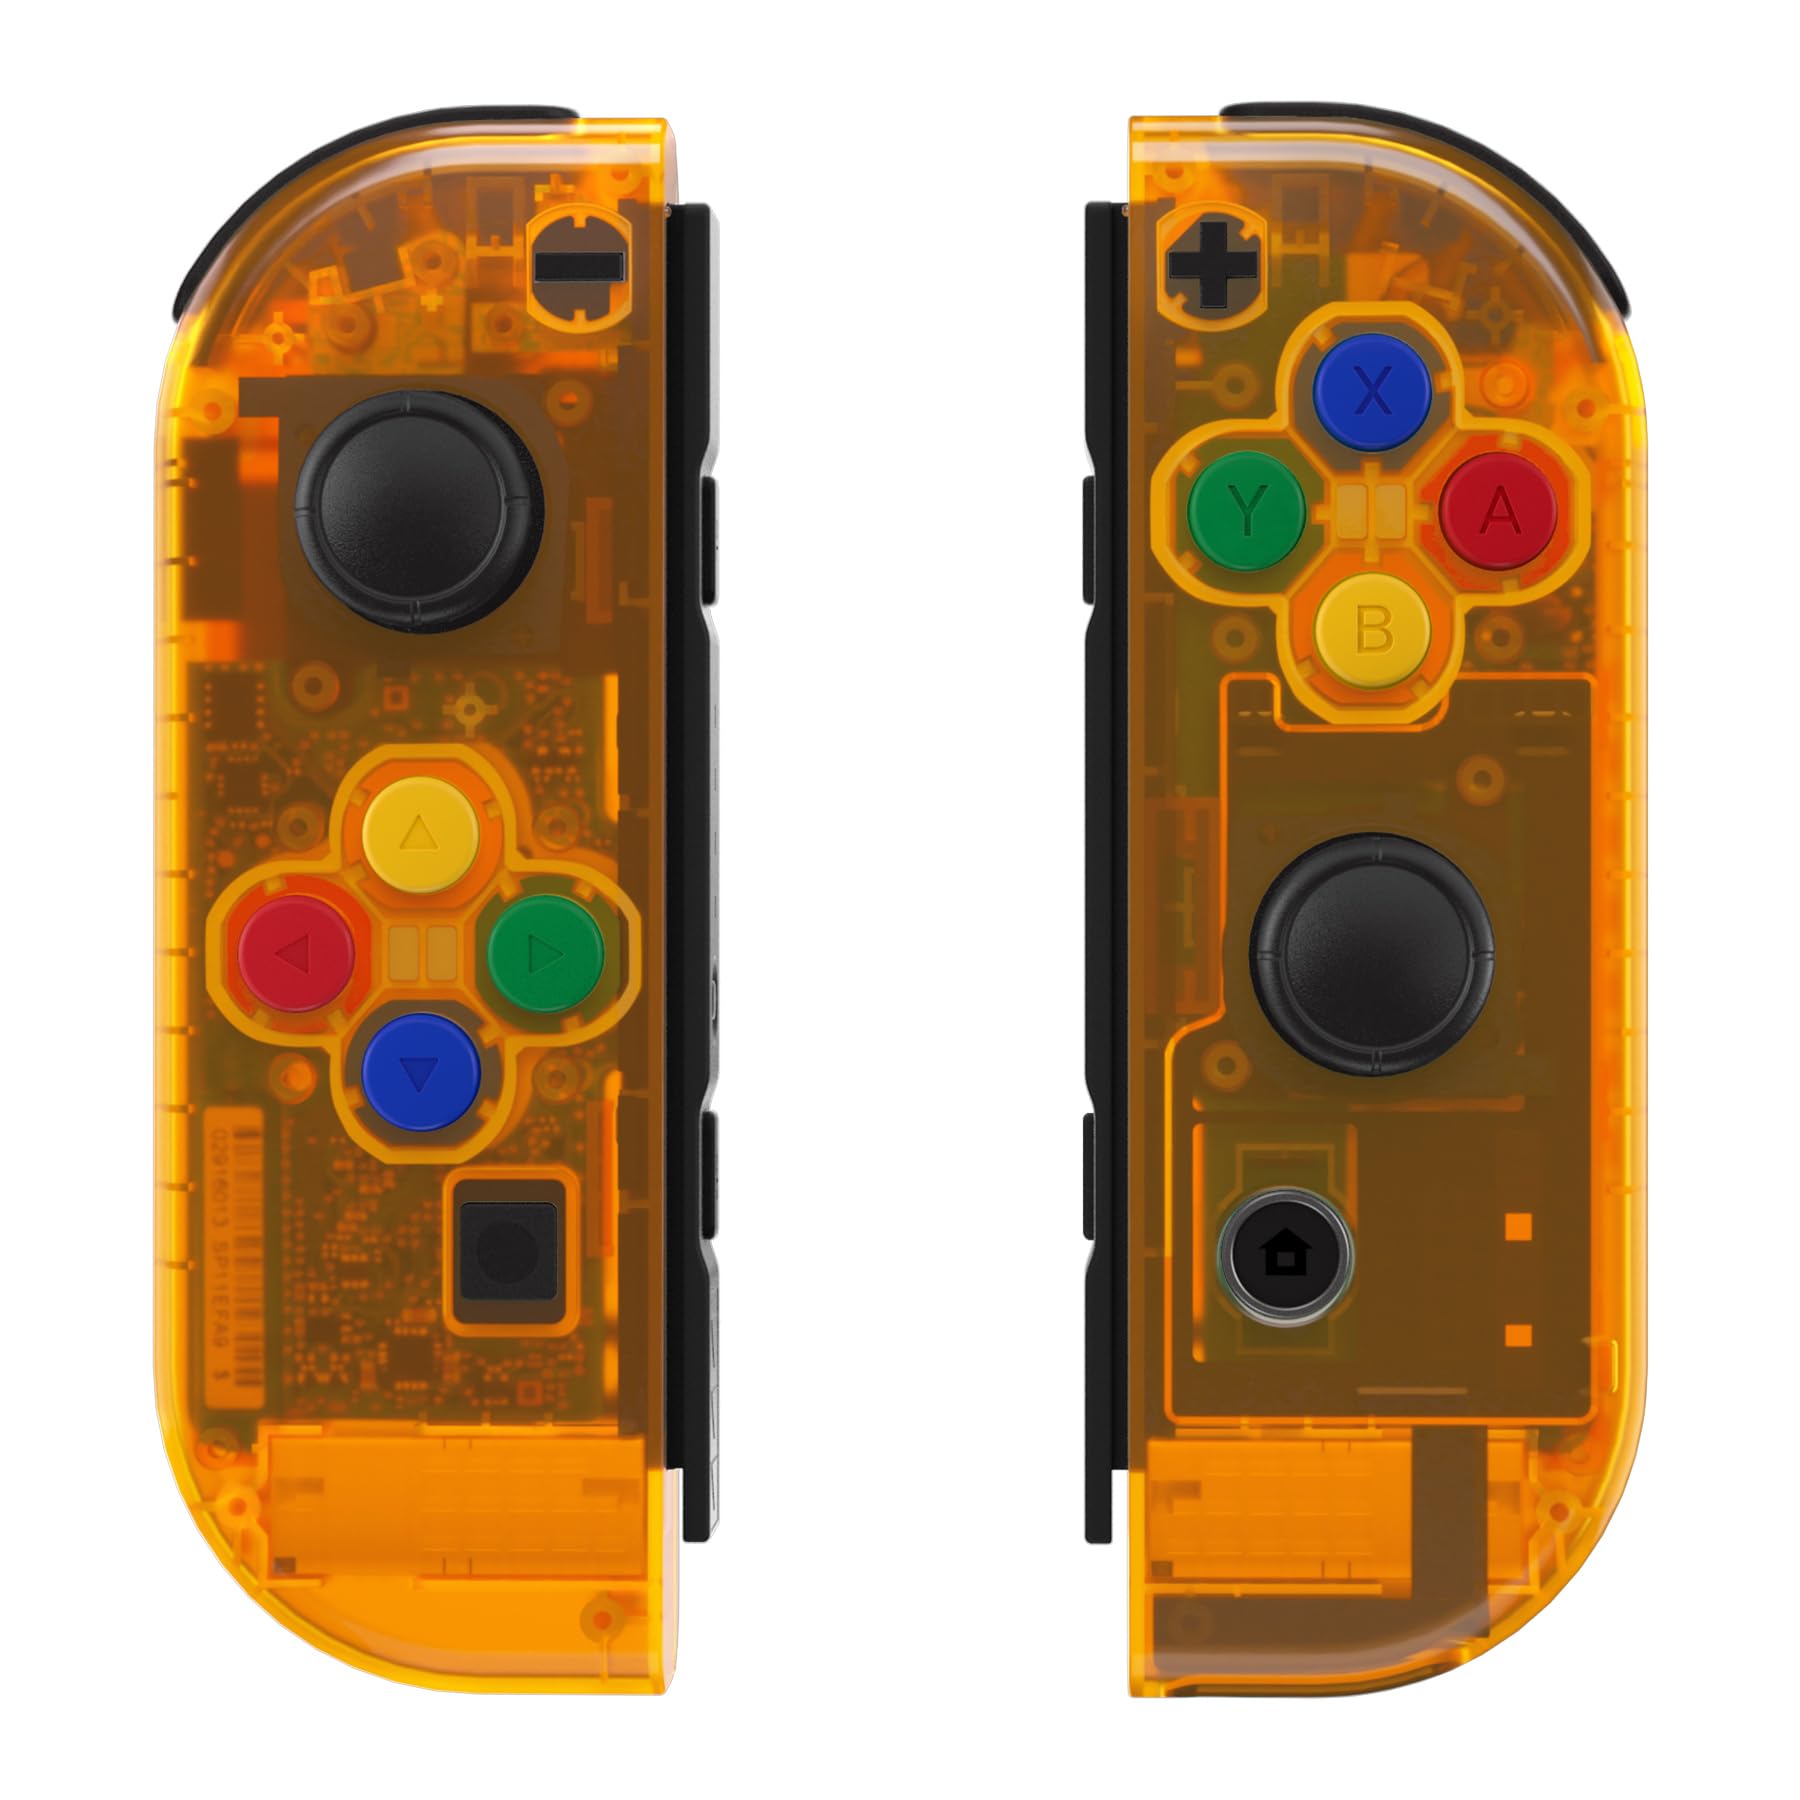
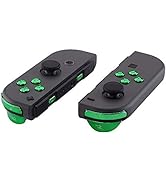
eXtremeRate DIY Replacement Shell Buttons for Nintendo Switch & Switch OLED, Clear Orange Custom Housing Case with Corlorful Button for Joycon Handheld Controller – Console Shell NOT Included
From the brand


eXtremeRate is a gaming accessory development company, focused on quality and innovation. As one of the global leaders in video game accessories, eXtremeRate leads the way in the video gaming entertainment industry with customized, innovative items, and unique one-stop gaming modding solutions since 2010.
High quality and fit together nicely
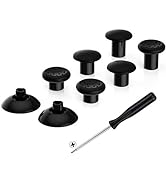
These are really good quality and the kit includes a fell set of screws and springs aswell as a small (but useful) metal driver.
It also replaces the Tri wing y screws with PH0 ones so you can properly secure them back together.
Ace.
Great, but holes a bit too tight for screws
I was able to change the my joycons to use this skins. The only part that I have found really annoying is with the four screws that seal everything: in my case they were a bit too large for the provided holes, and thus difficult to screw in (almost broke provided screw driver).
Also, I think that in the kit there should be added a plastic pick and tweezers to make the process easier (fortunately I had these at home)
Great quality, Good value, but fiddly
Love this style of shell, really adds the retro touch, it’s a very fiddly job so don’t buy it on a whim if your not experienced working with small electronics, but if you are able to, this will bring your switch to life! Great quality, the only complaint I have is the battery sits ever so slightly loose so I would advise some double sided tape to hold it in place.
Overall great value & good quality product, looks great in atomic purple. Highly recommended if you have the skills to fit or someone to fit for you.
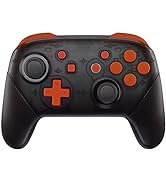
A Nostalgic Alternative to Solid Coloured NS Joy-Cons
Bought to replaced the damaged Joy-Cons for my Switch. The original ones were third-party clear transparent but due to the previous owner causing liquid damage to one of the joy-cons and subsequent failed repair work to rectify their given condition and subsequent damage thereafter, so they were sold to me as is (in fully working order however) only described as “needing a clean due to being gunked”
These replacements shells are of a better quality in comparison and added with the slight blue tint in colour are more eye catching. Slowly going through the long process of replacement (like for like) and changing the old shells for the new, I kept the screws that were not damaged by the previous owners repair and the stripped head screws were just replaced with the same sized screws supplied with this product. The only main difference is that the four largest black screws that hold the front and back shells together are now Philips head screws (supplied with this product) not the original nintendo tri-wing type screws.
A few reviewer have complained about this products being of subpar build quality and easily damaged, this is not the case (in my instance), if you take your time and use the right amount of force to secure the new screws into place (you will have to apply a little more force than usual) I had no issues with damage to the screws nor the plastic parts, the new screws with have to tap into their new respective placements needing slightly more torque in their fixings. Due to how delicate the ribbon cables and subsequent wires for the rumble motor and battery packs within the Nintendo Joy-Cons it is advised to watch as many YouTube Videos of how to dismantle and (of course) reassemble each respective Joy-Con safely, I also used IFixIt’s website as a visual cue for the step-by-step process on confidently taking the parts out without damaging them.
Each Joy-Con replacement took about forty-five minutes to exchange the set over and in most cases wasn’t too difficult to achieve barring one or two annoying ribbon cable mounting points that are hard to access, overall I really enjoying the process of shedding the old parts for the new, also how the colours of the buttons are very reminiscent of the Nintendo SNES era button colour layout too
Well! What can I say haha
So, the kid asked me to get him these, neither of us read the title properly haha
He found a very good tutorial on YouTube, very precise. With a lot of pausing and 2 hours later, I’d done one, right one I think. The left one didn’t seem as complicated, although that could be because I had a tiny bit of knowledge by then! The hardest part was installing the 2 springs for the lz or rz buttons. No one is more stunned than me that they work!!! But, I’m rather chuffed with myself. First time I’ve ever attempted something like this 🙂 my only grumble would be the screwdriver wasn’t magnetic, so tweezers were needed.
Fiddly, but worth i
The casings themselves feel very sturdy and OEM-like, the packaging was strong and supportive, and the supplied screwdriver is a useful addition to any tool collection.
I’d recommend following ifixit’s guide on replacing the joycon shells. It took me about an hour and a half all in to change the shells and the difficulty was moderate, but don’t let that scare you, I think anyone can do this with a steady hand and some care
Quality Plastic and perfect fi
So much better than cheaper alternatives which flex and don’t line up correctly.
The material is feels sold and the colour is great for showing off the insides. Nintendo should’ve designed options like this!
Can be tricky to swap all the parts over so watch a video or iFixit guide so you don’t forget anything.
Don’t bother with the cheaper ones as you’ll regret buying them and won’t get your money back.
Avoid! CRACKED IN HAND
I’ll leave my old review below but be advised, OK me joycon cracked in my hand without pressure. Just heat I guess?
The screwdriver mentioned in previous reviews is gone. In is a robust, magnetized, bit swappable driver.
The kit is great. Near OEM quality. Joycons are a PITA to dissemble. This kit takes some of the stress way, with spares for everything.
I recommend swapping out the springs for the shoulder buttons and ribbon cables for SR SL supplied by Nintendo. The ribbon cables will eventually break on all Joycons due to the way they were manufactured and assembled with a harsh crease. The springs are fine, but fresh ones will bring some extra tension back to the shoulder buttons. Those are included in this kit. The ribbon cable is also available on Amazon.
Drop of 99% ISO in the thumbstick should clear out any debris to avoid drift. Nintendo really messed up with these Joycons charging premium price for a sub standard product. But that’s for another review.
Bought 2 sets, one seems really good, the other not so much.
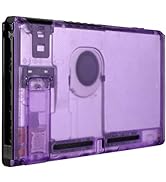
I bought two sets of the atomic purple shells a month apart for two sets of joycons, the first set is and continues to be fine and look great, however the second set which has only been installed for a couple of weeks seems to have cracked in various places, unsure why as it’s not been dropped or man handled. Maybe a bad batch??
Anyway can’t fault the first set and they look and feel great.
Feel like I'm back in the 90s
The Atomic Purple is pretty much identical to the distinctive purple that the Gameboy colour came in.
It was a little bit of a challenge to do the replacement. My advice is to take the battery out as soon as you can (it has a small piece of sticky tape so don’t be afraid to use a little bit of force, being careful to not break the wires going into it). Also on the left joycon, there’s a screw that’s particularly difficult to put in place, due to the magnetism of the module at the bottom of the joycon. I would recommend the appropriate screwdrivers in a magnetic format if I were to repeat the exercise.
Otherwise, I didn’t read any instructions or watch any videos, and my experience with similar practises is novice at best. It just took time due to the amount of care required to deconstruct everything in an orderly fashion and then reconstruct with the new casing.
Once you’ve successfully completed, you’ll likely find a sense of satisfaction for having done so, but far better is the feeling of having your very own “unique” joycons. Will consider buying again for future sets.
Fantastic if you have patience
Had a left and right joy cons from 2 separate switchs mangled by my kids so decided to try and save them.(and some money.)
Watched videos on youtube to get an idea what to do.
one where a guy did both in 10 minutes and didn’t mess around with ribbons was the best imo so look out for that one. Please note there are three types of screw and they are not interchangeable so make note of gold and silver ones. The scewdrives in kit worked well for me (rubbed them on a magnet to help with tiny screws).I
did the left in 30 mins (did have to try solder a bit back on) but broke a ribbon just as I placed last screw.
Second one took about an hour but also had to try solder the same bit on this one, a tiny bit that is a internal button for shoulder button.
Both were broken before my diy so not taking the blame for that
Both worked fine after i finished, apart from the not my fault shoulder buttons (guess need to work on my soldering skills ).
The ribbon i snapped only affects when you use it sideways so still both usable to a certain degree but guess i will need to purchase new ones after all
In summery good kit,do your research, take care with the ribbons and if you open it and a little button from the shoulder is already broke you’ve wasted your time
The best shells you can buy!
Just like the original thing!
This was the second pair of joycons I had changed, but the first time I had used eXtremeRate and now I wouldn’t use anything else. These joycon shells come with all the interchangeable buttons, screws and screwdrivers, which makes the whole process so much easier.
They’re a quality product that look and feel expensive! They feel just like the original set.
I love them! Got my husband to install them but the process was easy if you know what you’re doing with electronics, keep things organised and have a guide. I would try the next myself after watching him and a few YouTube videos- but watch out for the parts being tiny and hard to find on carpet if it drops- think Lego.
Love them though
Bring decent tweezers
Decent quality, took a long time to do the first one with very poor quality tweezers, so buy a decent set as that’s the main limitation.
Replacement case screws are Phillips instead of triheaded screws, which isn’t an issue (and need to fix the inevitable drifting stick makes it a bit easier since you’ll only need the one screwdriver).
The cherry pink shell and the white buttons are perfect together!
I had bought a pink joycon shell set from ExtremeRate before and was really happy with it, but wanted to change it up a bit. That’s when I chose to buy the translucent pink (“cherry pink”) shell with white buttons.
Both products were of extremely high quality and were a really good fit; both the main shell and buttons were really well produced, making the shell swap that bit easier! The extra springs that came with shell were also a very welcome addition…
Super happy with how they’ve turned out (they give me GBA vibes), will definitely purchase from ExtremeRate again!
Missing button but otherwise brillia
The product is very good and fits perfectly as advertised however one of the small shoulder buttons (sl & sr) were missing and must have fallen out in the packing process. Other than that, it’s all good and the replacement screws are pretty decent.
Money well spent!
The shells actually fit unlike others I’ve had in the past so providing your some what experienced at reassembily these are Pretty decent. Definitely need a your own screw driver as the switch screws are terrible for being stripped but you can’t expect the included one to be too good at this low a price. Also amazing that you can swap them for Philips head screws that are included.
Quite funny how people are not reading the title and buying these thinking they are actually Joncon’s no idea why with their stupidity they then leave a bad review?
Be Patient and watch the tutorial video, My Switch has never looked better!
I own one of the Splatoon Neon Green Joy-Cons (it’s my favourite colour) and I have become obsessed with getting a matching Neon Green Joy-Con for the Right side of my switch. I decided rather than importing one with exorbitant Shipping fees I’d give this a go with the Red/Blue Joy-cons that came with my console. I read the reviews and prepared myself to except the risk I was about to ruin two controllers. I sat down and watched the YouTube tutorial linked in the description and slowly started following along (I do recommend playing the video at 75% speed as it’s a bit fast) once I had the controller apart I did start to fee quite intimidated by the task ahead of me but I took my time and re-watched many parts of the tutorial as I went along, with the left Joy-Con completed I moved onto the right, I had heard that it was the harder of the two and boy was it! the right Joy-Con has a much shorter ribbon for the right ZR button and it was very fiddly (I also managed to put it back in upside down so the contacts weren’t touching and it didn’t work) finally I was able to put it all back together correctly and it works perfectly. I love how it looks and although time consuming (about 2 1/2 hours in total) I would definitely do it again.
Difficult to install but worth the effo
Be warned these joycon shell are difficult to install however get some good tools, take your time and be patient installing them and you’ll be happy you made the effort!
Great cases, bad screwdrivers
The actual casings are great and look exactly as I’d hoped. The screws of the actual case which come with the kit and the screwdrivers are very poor though and I had to buy replacements separately. The seller reimbursed me partially for these.