Flymo EasiLife 800 Robotic Lawn Mower – Cuts Up to 800 sq m Ultra Quiet Mowing, Manicured Lawn, Bluetooth Application Control, Safety Sensors, Hose Washable, Lifestyle Functions, Frost Sensor

Flymo – The Lawn Care Experts
Flymo EasiLife 800 Robotic Lawn Mower
Day or night, rain or shine, the Flymo EasiLife 800 robotic lawnmower automatically cuts the grass for you so you don’t have to. It independently mows a lawn of up to 800m², cuts any garden shape and tackles slope gradients of up to 35%. Designed with quick installation in mind – simply install the hidden boundary wire to define the cutting area and off it goes.
- Pin Protection for your security.
- Tilt, Lift and Collision sensors for your safety.
- Hose washable for your convenience.
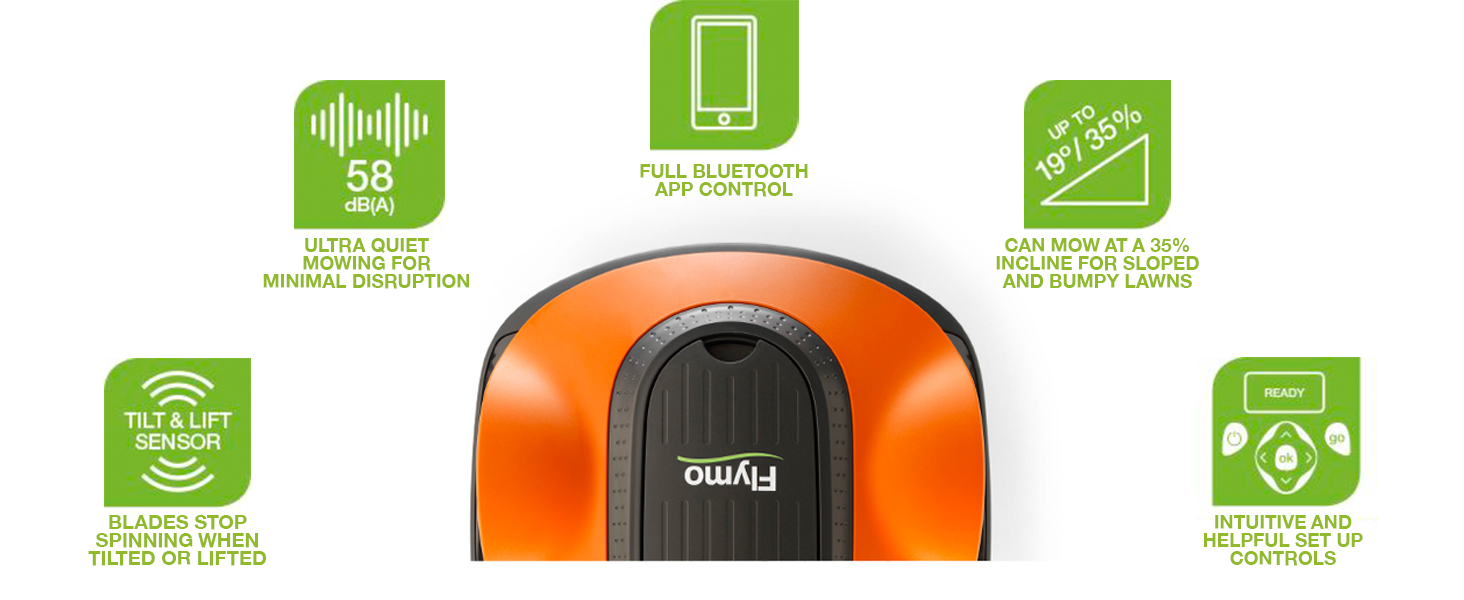
Features intuitive Assist-U interface for easy scheduling, monitoring and communication with the mower from the onboard keypad & LCD display or via the smartphone app. It also comes with LawnSense and FrostSense to automatically adapt cutting schedule based on weather and lawn growth conditions.
-
Where do the grass clippings go?
A Healthier, Greener Lawn
No need to empty a grassbox or dispose of grass clippings, its regular cutting technique returns fine grass clippings back into the lawn which acts as a natural fertilizer and improves grass quality.
-
Does it have extra functions?
Extra Mowing Flexibility
It’s functions are designed to fit around your life: Spot Cut, Override, Park or Second Area.
-
Can it mow in the rain?
Adaptive mowing whatever the weather
Detecting grass growth, it automatically adjusts the schedule to suit conditions, ensuring an even cut and protects the lawn.
-
Can it mow my irregular shaped lawn?
Mows every corner of the lawn
Perfect for imperfect lawns, the EasiLife robotic mower can navigate across lumps, bumps and inclines of up to 35% so you can have a perfect finish.
-
How easy is it to install and program?
Intuitive controls and quick scheduling
Install the boundary wire to define the cutting area and program the mower in 3 easy steps.
Why Choose a Robotic Lawn Mower?
Why Flymo?
Finding the right robotic mower for your lawn can be daunting, and it’s important for you to find a lawn mower that fits your lifestyle. Robotic lawn mowers are ideal for those of us that want to spend less time mowing our lawn, and more time relaxing and doing the things you love…


What robot best suits me?
Assist-U LCD Screen | Interface | Push & GO |
35% | Slope Performance | 25% |
800m2 | Working Area | 150m2 |
16cm | Cutting Width | 16cm |
20-50mm | Cutting Height | 20-50mm |
| | Smartphone App | |
| | Lifestyle Features | |
Assist-U LCD Screen | Interface | Push & GO |
35% | Slope Performance | 25% |
800m2 | Working Area | 500m2 |
16cm | Cutting Width | 16cm |
20-50mm | Cutting Height | 20-50mm |
| | Smartphone App | |
| | Lifestyle Features | |
- Flymo Easilife GO 150

- Flymo Easilife GO 500

| Weight: | 11.4 kg |
| Size: | 800 m² Cutting Area |
| Dimensions: | 55 x 38 x 23 cm; 11.44 Kilograms |
| Model: | 9705132-01 |
| Colour: | Orange and Grey |
| Manufacture: | Husqvarna UK |
| Colour: | Orange and Grey |
| Size: | 800 m² Cutting Area |
A lovely small robo
It wasn’t the easiest thing I’ve done. It took me nearly one day to wire the whole garden that I have. My garden is divided in three distinct sections and there are walls dividing it to these areas. After a careful plan and one day of hard work I managed to place the wire around all three areas. It took a bit of trial and error to get the robot to find its way back to the charger as well but after the setup was complete it now works perfectly fine and everyday the robot starts munching on the lawn like there’s no tomorrow. I was worried that it cannot climb some hills that I have. I was worried before purchasing it and measured the slope and I have some slope above 30deg and the product specifications stated that it can do 25deg. I’ve noticed that when the grass is short enough it can even climb the areas with 30 degrees angle easily.
The battery lasts around an hour to 90 minutes depending how tall the grass is.
The remaining of the grass that it cuts remains in and becomes a natural fertilizer which is handy. I thought it might turn the grass to yellow but because this robot cuts the grass too fine it’s not even visible and the lawn looks fluffy after a few days that the robot runs over it.
It has definitely made my life easier and one less ting to worry about and to work on when I’m at home.
Hard work installing the boundary wire but worth the effo
This is surprisingly good.
You have to install a boundary wire around your lawn to stop it wandering off or mowing your flowerbeds.
This can either be buried or pegged down.
To reduce the risk of the wire being cut I buried the wire.
As I have a reasonable sized lawn this took most of a day.
Once the boundary wire is laid and connected to the base you just need to charge the mower, program the cutting times and away it goes.
This season the grass was quite long before I set it going so it took it a couple of days to get it looking trim but no effort on my part so …
Great time save but a few bugs
We bought this 2 years ago so seems like a good stretch to review it!
So the first task, but you have to do this with all robo-mowers, is setting out the guide wire. The instructions were clear, there was more than enough wire and more than enough stakes. We didn’t bury our wire and it’s never been cut or caught. After 2 years, its mostly covered.
Positive: I haven’t cut the grass in two years! It does a great job. No patches and the grass looks great presumably due to the fact the cuttings mean its feeding itself.
Negative: the guide wire connectors at the back are a little temperamental. I have spent more than a few days heading into the garden to wiggle them.
Negative: current issue is that the unit stops and just says “lifted”. Did it last year and seemed to clear. Doing it right now and refused to clear. Waiting to hear from Husqvarna.
Other: Husgvarna sell a box which you can store the connector ends in for protection over winter. Should really come with the unit and not sold separately as its a necessity.
Overall: this is a great, labour saving purchase which i’d recommend. I don’t know whats causing the latest issue but hopefully will be resolved. A little bit of effort to lay out the cables but it’s not that troublesome if you stake them down. Instructions are great and very clear. The user interface is easy to navigate and use. It’s very intuitive so I rarely have to get the instructions out.
Hopes and Dreams: One day GPS will be more accurate so you don’t need guide wire. A Smart version that allows you to control the schedule on your phone and will text/notify you if the unit isn’t working.
Got to stop watching it !!
I bought mine one when it was reduced in price after wanting one for a while bought it Jan 2020 and have now just taken it out of box to set up, Setting up was relatively easy, I had already fitted a outdoor socket for it in advance and planned where I wanted to put docking station which was not on grass cause apart from killing the patch of grass I wanted it to come over patio to dock next to house, so I fed boundary and guide wires along paving joints after running a angle grinder along joints to open up for wire which was easy to do see my pic which shows guide wire coming down centre and boundary wires in paving joints either side, will fill joints later for tidiness, I buried wire instead of pegging down as the thought of taking all that pegs back out to bury wire later was not something I fancied doing, after that was done pressed home , start, nothing oops, turns out I had to set to auto 1st thankfully that was all it was and away it went, on 1st day ended up switching off power socket at 9.40 pm as it was still mowing and after reading manual properly see that default auto is 7am to 10pm so have now set to 7 days from 7am to 3.30 pm as my grass are is approx. 180 sqmtrs , so far no problems but will keep petrol mower for a little longer to be sure
6 month review
Finally got round to reviewing this.
I purchased this on Prime day as it was listed on Deal of the day and got an absoulte bargain for it. Well worth waiting for when its on promotion if you can.
My experience as follows:
I read the instructions in detail to get to grips with the boundary wire. So basically this is just a green wire that you put around the area you want cut. I used the pegs to start with and thought why not give it a go and see what happens. Really interesting to see one work if are new to this type of tech. Within 2 minutes it had cut through the boundary wire so I did a proper job and sunk the boundary wire deep into the grass. This takes times but is well worth it.
So I have used the device now from July right up to around October. Overall it is great. My application is one area of grass that is a hassle to cut with a normal lawnmower. I set it to cut three times a week and it does the job. I come home to see it moving around and cutting the grass.
No problems with the clippings, they are so small you don’t notice them.
It always go backs to the charging station and it is quiet in its operation.
Negative points:
If the lawn is slightly wet it really struggles and just stops which can be a pain. I think it would be good if it had a rain sensor to tell it to revert back to the charging station when it rains.
It needs more traction, slight gradients are ok but again if the grass is slightly wet it gets stuck.
Conclusion
Overall – great. Yes it could do with some improvements but I love it. This is my first Robot device and I am sure it will not be the last. For much larger areas of lawn I would go for a different brand but for smaller areas this is both on budget and will do the job.
Deal of the day
Bought this after being tempted by an end of season deal despite some scepticism.
Product arrived next day, and the following weekend I set about placing the boundary wire, guide wire and recharging station. Picked an absolutely foul weekend to do this, heavy rain etc, but I was excited!
Having read other reviews and advice, I decided to go straight for burying the cables, rather than pegging them to the surface. I used an edging tool to cut a slot and then pushed the cable into that, to about 1-2 inch depth. Took quite a while due to the miserable weather conditions, and the fact that our garden size is at the upper end of the range for this mower, with various ‘island’ trees to consider.
Got it done eventually and had the mower on charge as suggested while I was doing this. Once set up, and after a final cut with our old mower as the lawn was quite shaggy, I set the robot to work.
Now, the nominal cutting width of the blades is 175mm so very narrow and our garden is quite large and an odd shape. I had been worried due to the random cutting pattern used by this mower, that there would be odd little triangles of tufty uncut grass all over the place. I neednt have worried however, this mower is fantastic. I set it to cut between 7am and 7pm every day initially – which it does by cutting for about an hour, then returning to base for an hour or so to recharge, then cutting for another hour and so on, until 7pm. So approximately half the time in fact is spent cutting.
Initially there was the odd high spot where it might go aground (tree stumps that I’d cut close to the ground but not close enough to pass over or high enough to bump into and turn round, but I then removed these altogether. So the first week or so was really fine tuning. I started with the mower on the highest cut setting (50mm) and then gradually wound it down to about 30mm as the days passed. I have never known my lawn to look anywhere near as good. It is short, uniform, and looks a beautiful healthy green. There is no trace of any clippings. Because the mower cuts every day, the amount cut is only a few mm at a time so the clippings are tiny and just mulch straight back into the lawn. And after the preliminary set up, it really did just get on with it with no intervention from me. Kept it going until the first frosts came in early november, which is much later than I’d normally cut the grass if I were having to get the old mower out and cut it myself – but this one just trundles out as programmed come rain or shine and does a fantastic job. It has now been put away in the shed along with its base for the winter. The wires mercifully can stay put all year round.
There are slight long patches right around the perimeter where it doesn’t cut, but if you set the boundary wire up correctly, these should be minimal and can easily be taken care of with 10 mins of strimming every couple of weeks.
It does require a bit of thought and planning before setting up and I would urge you to do this and read the manual carefully as it will pay dividends.
But really this has become one of the best purchases I have ever made.
Not sure how the longevity the battery will be, but if that ends up being 100 quid every couple of years for a new one, it will more than be paid for by personal time freed up and petrol saved.
Do it!
Key points from my experience
– This mower does my 700 m2 metres meters square lawn quite easily. It cut all the fairly high grass down to a low height in only 2.5 days. In my opinion this mower would easily cut 1,000 m2 meters square plus as it can be set to run all 7 days of the week. One review on here suggests this mower will cut 4,000 m2. I can quite believe that because much larger areas offer long clean runs without continual stopping and turning, where as smaller lawns mean the mower is spending lots of time inefficiently stopping and turning.
– I paid 400 for the mower delivered from Amazon and bought an extra kit on ebay containing 150 metres perimeter wire, 300 pegs & connectors for the larger lawn. This extra kit cost 33. So total cost all in was 433 delivered.
– The total length of the supplied perimeter wire (150 metres) plus the additional perimeter wire I added on for the larger 700 m2 meters square lawn is 210 metres.
– The join in the perimeter wire for the return to base wire and the join for the extra perimeter wire do not affect the performance of the mower detecting the edge of the lawn. Edge detection works flawlessly on all of the perimeter.
– I installed this on Friday morning. It took the whole morning to install. It did 3 cuts and charge cycles on Friday before I realised that I had to press AUTO to get it working as much as it will (it will only cut 12 hrs a day because of Flymo imposed firmware limitations).
– After I had installed the RTB wire I did the initial “can it follow the RTB wire” test. On the menu it’s called the “Calibration”. This checks that it can follow the RTB wire all the way to the end. It does this then starts cutting. I thought that the mower was all automatic after that. It’s not. It does return to base, after this initial test then when it gets back you must press AUTO and start while it is charging. It will then cut automatically on the timer. You must also set the timers for the amount of cutting time & respective days you desire.
– This mower is a wholly HUSQVARNA mower. Husqvarna bought Flymo. The mower is badged Husqvarna all over. This is a quality mower. Husqvarna are the market leader and were building auto mowers decades(?) (a long time in any case) before anyone else.
Limitations / to do list :
– This mower is limited by the firmware on board to only cutting 12 hrs per day. Even if you set it to cut from 00:00 to 23:59 it will only cut for 12 hours in each day. You can set it to cut every day if you want. The literature does not list how many hours it will actually cut as a maximum per day if you set it to cut 00:00 to 23-59, only lists maximum operating time, which is charging time plus mowing time.
– The danger of power cuts. The mower uses the powered edge wire to know where the grass boundary is.
If like me you have a grass boundary which is a flat surface, and which is connected without barrier to another property owners land and the public highway then a potential power cut is a problem. Because in the eventuality of a power cut the mower would not be able to detect the edge wire – because the edge wire would no longer be powered – and the mower would potentially go off off my land into someone else’s. This obviously could bring mower into contact with children or animals and be a dangerous situation. For this reason I only operate the mower while I am in the house so I can be here in the event there is a power cut.
this problem can be resolved with a battery operated current detection system that will send a radio signal to the mower in the event it detects a lack of current in the edge wire, the more I would have a similar simple radio connected to a battery that would then activate the stop switch. this is actually a simple circuit to implement, but it is a question of when I get the time to do it.
– The mower is currently limited by it’s own firmware to being able to charge and cut for only 12 hours per day. This limitation can be circumvented through some combination of resetting the mower and reprogramming it on the fly while it is mowing (avoid on the fly reset while it is charging). This could be done through use of an additional pre-programmed chip, placed on top of or inside the mower, connected to the mower internal chip pin out. Or for more convenient control – even more work – through the use of simple radios as mentioned previously (NRF24 or RFM69C).
– additionally, the use of a GPS with an internal map would alleviate the problem that can potentially be caused by a power outage on the boundary wire, and a rogue mower going off to where it should not, and would also allow the mower to be directed to spend equal amounts of time in all areas. This is future work which I could do but simply have not the time to implement.
– Once an open source project is developed that provides a board with on board (i) control chip, (ii) firmware ie re-programmable software that is baked into a chip (iii) gps (iv) wi-fi (v) remote sophisticated app for our phones all we will need to do is disconnect the current control board and place in a new one. This cannot come fast enough. I am sure the Ardumower project will develop into this.
I will update this review after a few months
Its Pretty Good
Works ok for me, the only drawback is you have to get the strimmer out to cut the perimeter of the lawn where the robot can’t get too. Its a small penalty to pay as it does a cracking job of the rest of the lawn. Just be conscientious with setting the boundary wire up and making the connections.
EDIT April 2021. Put the machine out early April.
It worked on one occasion and then lost all power, technically its still in warranty, Flymo tech support extremely difficult to contact. Its only worked for two seasons.
Edit June 2021, An electrician resolved the earlier problem above. It worked for a few weeks but has broken down again. As usual customer support not contactable, I have only a few days left on the warranty, I will be buying all future big purchases on the high street where I can take them back to the seller. No more big stuff off Amazon, go to B&Q you know where they are
I have had the 1200R for over a year now – I was really ashamed to buy it – I am young, fit and healthy and there should be no excuse for getting out and mowing the lawn myself. I even hid it the first time my parents came to visit our new house…but now I introduce every visitor to Larry the Lawnmower – sometimes just passers by on the road get dragged in to see him. He is surprisingly capable – we have a number of large ridges in the lawn from previous landscaping and whilst he may occasionally not make it up at a right angle, he gets excellent coverage overall by maintaining his random angles and approaches.
The wire placement is a faff, but I actually enjoyed adjusting the placement after a few months so that I could fine tune the perimeter and now take great satisfaction at the mm-perfect approach to the wall.
I have lost the odd day of mowing a fair few times where he has managed to get lost or stuck or fallen down a hole, but to be honest, most of those are explicable by the challenging terrain (the massive hole for example).
The lawn looks fantastic.
Do I feel guilty about spending so much on a lawnmower – still yes. Would I buy a new one tomorrow if it broke, even after only 14 months – still yes!
Get the wiring right - when you bury it otherwise your chop the lawn to bits.
Nothing to dislike – he is marvellous – we have a difficult garden – large pond in the middle but he gets round it and keeps the grass looking O.K. it gives our gardener the extra time to actually garden for us. I think it would be a good idea for the wiring from plug to robot (the black and white wiring) to be longer as it limits where one can site it and we have to have the shed in sight because our outside plug is on the house wall. However, not much of a sacrifice.
Life changing, time saving.
This mower has been life changing. Took a whole weekend to set up but well worth it. Top tip – watch the videos on You Tube to help with the boundary wire set up. It’s saved us so much time this summer, cutting the lawn and trips to the tip with cuttings as this product does all that for you. I haven’t set timers on mine. I put it out when I’m home and just leave it run all day so I can keep an eye on it as it had a tendency to get stuck in places at the start. I’ve remedied that now. Wished I’d got one ages ago.
Super quiet, and does the job, but with caveats
Calling this a ‘smart’ device is stretching the term smart to near breaking point. It has practically no sensors apart from collision detection, meaning it goes in a straight line until it hits something big enough to stop it (which does not included small dogs) then turns randomly and goes off again. You have to install boundary wire (provided) around each section of lawn you want to mow, to prevent it from going into flower beds, or over terrace edges. No drop sensors? Also, the detection of the boundary wire happens at the center of the mower, meaning if you haven’t spent a lot of effort partly burying the wire it’s liable to be cut by the mower before it’s detected. Also, it does handle gradients, but it doesn’t handle uneven ground very well. We had to fill in several minor depressions and level a few bumps before it could operate fully automatically. That’s the cons
Now for the pros – it actually does the job. You may have to monitor it the first few runs, but otherwise random straight lines actually do the job. I should also mention that it is perfectly safe. It’s bumped into my small dogs (dachshunds) and while it startled them, and didn’t stop, they weren’t hurt at all. It’s also bumped into me but I’m large enough to make it turn around. The other thing is that is *quiet*. We’ve set it to run early mornings and late evenings and it’s never woken us, nor after several weeks of automatic operation have the neighbours complained.
Looking for a mower and this came up on a deal offer, cheaper than the cordless we were considering.
Takes a while to lay the wires, we buried ours.
Had to lay extra armoured cable, but that was on the ‘to do’ list anyway.
Built a mower garage.
Once it’s all set up Morris the mower trundles around quietly at the programmed schedule and then returns to his garage.
The grass is looking better than it ever has.
Only minor negative – can’t read the display through the opaque cover.
Cuts well but needs to be ofte
Great mower but need to place perimeter wire closer to edge otherwise you will need flat blade edge trimmers!! I have managed to put docking station on patio not on lawn, much neater although mower does play pin ball from time to time but finds its way back onto grass. Have to cut every two days or cuttings collect on lawn and looks a mess!!
On the whole i am really happy with this and would have given 5 stars except for one small design flaw. The fixing point at the back of the docking station where the boundary and guide wires are secured is not overly secure. It’s far too easy for inquisitive cats to remove the clips. I have fixed this by placing an edging brick behind the docking station to make the area inaccessible to them.
If you are using with cats I would recommend making your own carport as the ones you buy have too much space at the side and cats will easily be able to get in there – mine was being used as a litter tray!!! Another reviewer suggested using a Samla box from ikea and it’s perfect. I covered mine with ivy fence roll and camo gorilla tape to make it look a little less intrusive (both available on amazon).
The instructions say don’t put the docking station in a corner – but I found that with a bit of trial and error I was able to find a set-up that works perfectly in the corner.
I can honestly say my lawn has never looked this good – and the trimmings truly are invisible. (I was skeptic al about this).
Would I buy one of these again? Absolutely YES.
Took a while getting this installed as I was having a new lawn installed.
The process is fairly straightforward, you have a single loop of wire that is installed around the edge of the lawn (boundary wire), the spacing from the wire to the edge depends on what the lawn finishes against so read the manual carefully). The loop starts and finishes at the charging station. Then the guide wire is installed, this runs from the charging station to the most remote edge of the boundary wire were it is connected to the boundary wire using one of the included connectors. Make sure you follow the guidance on which wires connect to which terminal on the charging station as the layout wasn’t what I would have considered logical!
Once all my wires were installed I added topsoil to provide a flat smooth surface for fresh new turf. This meant that my wires were buried and protected. After 2 weeks of growing the turf was ready for cutting (ahead of schedule). My initial attempts to initialise the robot ran into issues which i realised was due to the grass being too long (80mm)!!! So a quick final cut with the traditional mower got it back to manageable lengths. The robot is now fully initialised and starts cutting at midday everyday to the fascination of visiting children 🙂
Whilst i appreciate its brand new turf which helps, I’ve never had such a healthy looking lawn! Long may it continue.
Excellent Mowe
Hi,
Well, I’ve been watching this on amazon (camel camel camel uk) for about 1 year. The price varies quite a bit, usually hovering around 550 – 600, but I got it for 399 on Prime Day, 2019.
I’m delighted with it. My garden is about 550sqm, and the flymo suggested limit is 400sqm, so I knew I would be pushing the limit with it.
It manages to get to all parts of the garden in about 5 days, so even at the moment (end of July in Ireland) when growth is at its maximum, it still manages to keep the grass nice and trimmed.
The lawn had about 4 weeks of summer growth on it when I got it setup, but it wasn’t a problem.
It comes with 150 meters of wire, but I needed to buy another 150m, which cost about 70. Other than that, I built it a little wooden house and it all works fine.
Setting up the boundary wire is a lot of work, took about 8-9 hours in total over a few days as I needed to wait for the extra boundary wire to be delivered, but once it was installed, it works great. Read the instructions, and other reviews for tips, as this will save you time when installing it.
A large part of my garden has a fence, so I just ran the wire along the top of the fence rather than pin it down or bury it. The mower just detects the fence, and chooses a different direction. I also ran the wire along the back of my trees around the edge of the garden, again along a fence. It just bounces off the tree and goes on its merry way. My kids have named it Wall-e.
I also put the boundary wire underneath my cobble at a few places and it still detects it.
Mine is set to the default time, 7am to 10pm. It doesn’t run this whole time. Its cuts for 45-50 mins, and then starts searching for the guide wire to bring it back to its docking station to recharge. It will cut for a max of 6 cycles per day, and 6 recharges per day, and then wont work again until 7am the following morning. 6 x 45 mins is a lot of cutting, 7 days a week. This is the max allowed by the mower. The manual says the battery life is 2 — 4 years. I assume running it to the max like this, 7 days a week with quicken the battery’s demise. You can buy a replacement battery when needed. I’m going to keep mine on max like this until the autumn.
Overall I am very happy and would highly recommend this. I purchased it, as due to my large garden, I takes about 90mins to cut the grass most weekends. Aa a result, I wouldn’t have the time or inclination to take on other garden/household tasks eg, painting, weeding, cleaning gutters, planting flowers, playing with the kids. Cutting the lawn just became a inefficient use of my time, when I can get a machine to do it instead.
Just like washing machines or a dishwashers, at some stage, they become cheap enough to justify their purchase.
I couldn’t register it with flymo, as they don’t have the facility to register mowers in Ireland.
Other than that, I love it.
Wish I'd got this years ago!
OMG This machine has changed my life. If I’d known how fantastic it was I’d have bought it years ago. It’s changed my life literally!
Take a while to bury the boundary and guide wire in the garden but well worth it. As once its in its in and you can foreget about it. Then just wire up the base charging station and program the little monkey and off he goes. Larry, the lawnmower, was programmed to mow every day 7 days a week, for 10hrs. He had the lawn looking great in a week, and after a month to five weeks he’s had his work hours cut to just 4 days a week. Had no problems at all. He’s easy to programme and just gets on with his work. Only had one collision but that was my fault, as I put the ends of the boundary wire behind his house so it went in thru the back, and he got stuck trying to mount himself on the charging station, but he’s not done it again since. I’m going to buy him a proper little wooden house for the winter as the one I have I made from semi rigid clear polycarbonate and although it shelters him from most of the weather, it’s not ideal. It’s like a big cloche. Once I get a proper house for him it should eliminate the risk of another collision.
He cuts the grass perfectly I set it on the highest cut to begin with and now it’s on no.3 mid setting. My ground is very lumpy and bumpy so any shorter and it would be skimmed on the lumps. Everyone says how good the lawn looks, like a bowling green (with weeds). But the weeds are getting fewer as Larry cuts the tops off before they can bloom and seed themselves. I reckon come autumn I’ll have a perfect lawn. I have to do the edges with either the strimmer or the electric mower once every few weeks but thats no hardship. It only takes half an hour.
Anyone can install one of these, just read the manual, get to know the machine and what you can and can’t do, follow the instructions and watch a few vids on youTube cos there’s a few on there, and Bobs your uncle.
I don’t know what I’d do without Larry. I’ve got quite attached to him, and seriously considering getting him a twin for the front lawns or another base station.
If you are unable to mow your grass due to health issues, or you just hate mowing, get one of these. It’s money well spent. Best thing I’ve ever bought.
Just do it...even if it takes a while
I bought this 2 years ago through Amazon prime sale as we had just moved house and had a big back garden. I figured I could think of better things to do than mow the lawn. That summer I didn’t even get it out of the box but looked at the instructions with determination. Following spring after a strimmer of my lawn , started to lay the guide wire….disaster, ground dry and got drier last summer…wire kicked out by party revelers and kids in that glorious weather. Decided leave it it until ground easier…. finally this spring got round to it and despite my bf saying it would never work on my bumpy field type lawn …..it does !!!! Nowhere near as bad set up as the instructions make out. Watch a u tube video first . Lawn gas never looked so good. I keep it on long cut setting and run it every few weeks for a day ( it rests/ recharges alternate hours. Dog has stopped barking at it , my bf had to admit he was wrong . Just don’t worry ….worst bit is laying the wire, make sure ground properly soaked before pushing in all those pegs. Now, back to relaxing…
Fantastic product, cannot recommend enough
I have finally got around to using this after waiting for my garden work to be completed.
The wiring was pretty straight forward, the cable is hammered into the grass approx 5cm from the edging and away it goes! It is able to handle various garden ornaments without any hassle, just bumps and moves on, and handle our path without issues. I am also happy to report that is does not have any issues with dogs mess if it goes out before I have scooped the poop. It shreds it and mulches for fertiliser.
The programming for timings was pretty straight forward and it is fully customisable for timings and days.
Once again, cannot recommend enough.
Can’t say enough good things about this. The first cut took it a while due to my lawn being so thick and overgrown but it cracked on and managed it well. Set it on a higher blade length for the first go so it doesn’t get stuck so often. Then let it go over again at your preferred height.
I set mine to cut Monday and Friday mornings 9-12 and it does the job fantastically. Rain or shine. It will do a lovely job of cutting the snow if you leave it and forget to turn it off during the harsh weather!
You will need to strim your edges if you set the boundaries too far back or have lawn that goes right up to a fence/tree etc but that’s so little hassle compared to the time it saves you.
Install hint. When linking the guild wire make sure that the linking plug is pressed all the way down hard. Use pliers and a lot of force!
Other than that Rupert is a great addition to the home and the dog certainly enjoys running around with him! Fully recommend for a hassle free evenly cut lawn. The mulching as well is great as it just redress the lawn and you cannot tel at all that any grass has been left behind.
I write this review, sitting in my garden, sun beating down on me with cold beer in hand, watching my robot lawnmower (named Mary Poppins by my three year old) mowing the grass as I relax and succumb to the delights of Sunday afternoon alcohol consumption.
The money I spent on this entirely unnecessary contraption is by far the best money I have spent on anything, ever.
If you value your time and like the idea of watching robots work for you – before they enslave us and we work for them – don’t hesitate – but the damn thing. Oh, and order some beers while you’re at it.
Once this is set up and running it’s a wonderful thing! I can already see the difference between sections of my garden that are automatically mown, and those that aren’t yet.
Originally I installed the boundary wire using the pegs provided which initially seemed fine. However, I also ordered more pegs because our lawn in quite large and I wanted to make sure it was properly secured in all places so it would be avoided by the mower blades. Unfortunately the third party pegs I used cut the boundary wire in several places (which I didn’t notice until I’d used several). This meant I had to get spare connectors and repair the cables. I then decided to bury the cable which took around 3 hours but is worth doing to avoid future breaks.
I’ve primarily been using the mower on the auto setting which started mowing at 7am every day until the end of the day, recharging itself as required.
It’s also worth pointing out they the power cable has a box that whilst it can be mounted outside, must be kept out of persistent rain. Mount it under a covered area, or even inside an outbuilding, and then feed the cable through… there is plenty of length supplied.
I have been using the 1200R for 3 years now (since June 2006) and it works just great.
I think probably as good as more expensive models but the big bug bear is the wire that you must peg around the border of the grass. This wire is a frequent problem, it gets broken and it takes a lot of effort to find the break and replace the section of wire. I think all robotic lawn mowers work this way though.
Having read a few reviews I decided to bite the bullet and order one. It was relatively easy to set up, but it was up and running within minutes once connected up to power. We decided not to bury the perimeter wire in case we needed to adjust it, so we pegged it down as described. We were a bit apprehensive about this as several reviews insist that she should ignore this advice as the mower will inevitably run over the wire and cut it. On our lawn though, which isn’t particularly flat, it has ben no problem at all as long as you put pegs close enough together. Had the mower running for 2 weeks solid without issue to the perimeter wire.
One issue we did have was the power cable was temporarily going through the window and the mower did run over it as it ran across the the lawn a little…and it cut it to shreds. The repair was simple enough and we have now fitted an outside socket and ‘house’ to store the mower in (and the slack in the cable is tucked away inside it).
We have called the mower ‘Snip Dog’. Rejected names were Farrah, Shreddie and Sir Lawnsalot. Have sat and watched it do its thing for hours. We do wish it went a bit closer to the edge of solid objects, but strimming the edges is easy enough and very rewarding as the rest of the lawn is constantly perfect.
The resulting lawn has never looked so good, the results are fab even after 2 weeks. It is particularly good for the areas of the lawn that the petrol mower was a bit harsh on as the cutting is much less aggressive and the mower is really light. We even have a few edges that have been seeded and the mower is running over them without stopping the new growth or damaging the area. Will certainly not be going back to the petrol mower any time soon.
Really pleased, and despite the cost have no regrets at all.
Easy contender for the best purchase I ever made!
I was really quite dubious about buying this but, I *HATE* gardening of any/all sorts and really fancied the apparent convenience.
Installing the guide wire around both my front and rear lawns was a somewhat of a challenge, though made more difficult because of how I had to run the cable and not having the right tools to hand. Overall it was the third day after I started that it was finished and operating but, if I was doing the same again armed with the knowledge of having done it previously, it’d be installed and operation on the same day.
I have it running automatically every Monday, Wednesday and Friday doing the rear lawn whilst we’re all out of the house at work/school etc. Then on Tuesdays and Thurdays I’ll take it andhave it manually do the front lawn.
It’s hypnotic watching go about its job – I could spend hours watching it I’m sure – which kind of defeats the object.
I did try running it at night that first night around 01:00 AM so I could see whether it was quiet enough to not wake the neighbours in the process but, it was a very still night with no wind… with my bedroom window open I could hear it fairly loud so I assumed my neighbours would probably be able to hear it too so reverted to daytime running only.
Had there been some wind/rain noise it probably wouldn’t have been so noticeable.
At 500 it’s more (considerably so) than I’ve ever spent on a lawn mower but for the convenience of not having to perform the absurdly tedious task of mowing the lawns and just perhaps once per week whipping out the strimmer to tidy up the edges, it’s the easily a decent investment and definitely a contender for the best purchase I ever made.
I absolutely recommend this.
Simply the best gadget money can buy
We needed a new lawn mower, so the decision was simple: buy a new lawn mower and spend an hour a week mowing the lawn or spend a bit more money (and more time setting it up) and then never having to mow the lawn again. Yes it takes a while (like most of a day) to get properly set up especially if you bury the cables (mine are half buried and half pegged). And you do need an outside power supply (luckily we already had one of these). When I finally connected everything up I was very glad to see no fault lights as that does look time-consuming. Occasionally ‘Mo’ (sigh) gets stuck but then our lawn is really uneven – maybe twice a week I have to go and find him and relocate him, but it’s a small price to pay. So far we’ve had him for just over a year and have had no problems at all. Fingers crossed.
Having read a few reviews I decided to bite the bullet and order one. It was relatively easy to set up, but it was up and running within minutes once connected up to power. We decided not to bury the perimeter wire in case we needed to adjust it, so we pegged it down as described. We were a bit apprehensive about this as several reviews insist that she should ignore this advice as the mower will inevitably run over the wire and cut it. On our lawn though, which isn’t particularly flat, it has ben no problem at all as long as you put pegs close enough together. Had the mower running for 2 weeks solid without issue to the perimeter wire.
One issue we did have was the power cable was temporarily going through the window and the mower did run over it as it ran across the the lawn a little…and it cut it to shreds. The repair was simple enough and we have now fitted an outside socket and ‘house’ to store the mower in (and the slack in the cable is tucked away inside it).
We have called the mower ‘Snip Dog’. Rejected names were Farrah, Shreddie and Sir Lawnsalot. Have sat and watched it do its thing for hours. We do wish it went a bit closer to the edge of solid objects, but strimming the edges is easy enough and very rewarding as the rest of the lawn is constantly perfect.
The resulting lawn has never looked so good, the results are fab even after 2 weeks. It is particularly good for the areas of the lawn that the petrol mower was a bit harsh on as the cutting is much less aggressive and the mower is really light. We even have a few edges that have been seeded and the mower is running over them without stopping the new growth or damaging the area. Will certainly not be going back to the petrol mower any time soon.
Really pleased, and despite the cost have no regrets at all.
Perfect.
My dad first bought a petrol Flymo in the seventies and then taught me to use it at thirteen years old! I have been cutting grass ever since. Here I am buying the new version n 2019 age 47!. Bought to mow my mum’s large garden. Set up has take me a good few hours because I have chosen to bury the boundary wire in the ground, using a half moon edger. I did this so I can mow in the autumn if necessary picking up leaves. Once I did this it was a simple set up and away it went. Have a good read of the instructions one evening before you start and it will be easy. Its early in its life yet but its doing just what I expected it would and very neatly with out fuss.
Buy it you won’t be disappointed!!
OMG this little grassbot is the business, keeps the grass cut perfectly all the time. I had it set up in 1 Day this was mostly time spent burying the cables. Next day (I let it charge overnight) off my little grassbot went and I’ve never had my bother except from the wife who complained that I was watching my new helper too much…..but it’s so therapeutic watching somebody else do my usual job while I enjoy the sun lol
This thing is so quiet it can cut the grass at night, pushes footballs out of its way but smaller items will cause problems so make sure you check the cutting area is clear before you let it loose, great invention!!
Bought it a year ago and finally got round to installing it 2 months ago: a 2 hour job. My advice – just sink the wire in your lawn as soon as possible – do it with a knife, not a spade, as the spade compacted the edges to the point that I now have outlines of the cable route that have dried out and need filling with soil.
It now trundles around the lawn saving me time and still doing a great job. Also you can go closer to edge than the instructions advise, particularly if there’s little “drop” off. This will minimize the amount of growth that will be inevitable that you’ll need to strim to keep tidy.
I moved it way down the garden and got an after market 30m low voltage power supply cable from Amazon. It’s better quality than the 10m version supplied with the mower! It’s now much further away and out of sight. Bright orange does stand out! – so we built a shed for it to sit in. Stops my kids and their friends inadvertently damaging it and keeps it out of sight.
I have found 2 small issues though:
1. If you have leaves or other debris falling on your lawn that would normally be “hoovered” up by a regular mow, then these will just get left on the lawn. It looks unsightly and you’ll need to mow or blow/vacuum the lawn to clear away debris.
2. If your lawn is bumpy, or has depressions (i.e. in mine where a pond used to be, we filled it in but it’s settled into a small depression relative to the rest of the lawn) then the mower will create a “crater” outline of short cut grass (or soil areas!) where the mower isn’t able to run level/flat. You’ll then need to raise/lower such areas to remedy this. If you were hand mowing you’d be “careful” and avoid such issues – robomower doesn’t care.
Remarkable.
So far so good. It’s a great little machine and mesmerising to watch. I had a lot of moss on one side of my garden and the grass grew over that side fast too, with only cutting once a week it was good for the moss but since having this little flymo coming on 3 times a week morning and evening it’s definitely improved. It’s quiet so can have it going overnight if you prefer but will set off motion lights. The only negative thing I can say is the day after mine arrived, Amazon had a spring sale where it was 100 cheaper! Gutted but I’d already set it up and I suppose that’s the way the cookie crumbles. I buried all my guide wire and to be honest it’s definitely worth doing. I just used an old handsaw and cut a line which I then pushed the wire into. If you are thinking about getting one and can afford it then go for i
Had this robot mower in use for a few days now. Wow! My lawn is rough due to previously chickens, so there are holes and it’s uneven. I have a pile of branches in the middle of the lawn. In three days, it’s transformed my rough mown grass into an evenly trimmed lawn.
We call him Murray. Given he is mowing my lawn, I looked out and saw him beetling about in the rain – and felt sorry for the bot. He carries on in the rain and the mowing works very well.
The dog took an interest in him for a few minutes, but it’s just part of the garden now and they ignore each other.
The boundary wire took some effort – probably because I wanted to bury two thirds of it near the patio. I shouldn’t have worried about a trip hazard as it disappears really quickly, so should have pegged the lot down.
Seeing him approach the charging station, back up and reverse into the station is cute. He hasn’t missed it once.
He got stuck three times. One on a branch I had cut down and twice on two holes I should have filled in (one was a brick I removed when digging in the boundary wire)… Most of the t8me, he surprises me by reversing or turning out of trouble.
Was this a waste of money? No way.
Does it give me time back? Certainly yes.
Do I have a nice lawn? I do now and I expect it will get much better as the lawn much helps feed the lawn.
This unit must be made by Husqvarna as the power supply has that name on it, so I feel this is great quality kit and at an OK price.
I did think I wanted a bit to create lawn stripes, but the result I have now is tidy, neat and better than the petrol mower I previously used.
Be prepared to have some attachment to the bot, as it very quietly sorts your lawn out. That said, he isn’t coming on holiday with us as he will be too busy mowing the lawn – and I have every confidence he will get on with it whilst we are away…
Yep, we named it 🙂 We’ve had ours for a year now and it’s fantastic. Trundles away quietly and serenely; even our cats aren’t scared of it anymore. 🙂
There are a couple of things to watch out for:
1) The original installation took a couple of hours for our 150 sq.m lawn, but once it’s done that’s it. We followed the instructions and laid ours on the grass, hammering the pegs down to the level of the soil. After a couple of weeks the grass had grown up around the wire and it’s now invisible. During this time, keep the cutting height high to avoid cutting the wire – again this is in the instructions;
2) Cutting frequency: For our lawn Flymo suggest 4 times a week with 10 hours of cutting time available, which left it looking trampled. Once I thought about it, I realised that a set once approach is never going to work: you wouldn’t stick to the same cutting frequency with a manual mower, so why with an auto? Also everyone’s lawns are in different conditions, so will grow at different rates. A more flexible approach is needed. What we worked out (by putting it on manual and leaving it till the battery ran out) is that one charge pretty much does the entire lawn once. So we’ve now reduced the cutting down to a couple of days a week and a couple of hours of cutting. As the season progresses and the grass grows faster we’ll up it. We’re also trying having it start mowing later in the day so that the morning moisture has gone. Yes, it’s designed to cut when it’s raining etc. but it just seems better to try to minimise wet cutting as much as possible.
3) Winter: I brought everything in: mower, base unit and power supply. Just disconnected the cables and put it all back in the box having given it a clean. Does mean you need somewhere to store the box, but it’s worth it.
4) Connectors / Wire: buy more connectors and leave plenty of spare cable. The wire is quite brittle, so has a tendency to break especially at the base unit. Then you need a new connector and will get through the supplied ones quite quickly. They’re inexpensive (<5 for 5), so worth ordering some more. Just search the internet.
5) Don't forget where you laid the guide wire: I did. Raked it up getting rid of some moss. Dohh. (that's why I used more connectors)
In summary, get one you won't regret it. Watch the pricing, it fluctuates wildly; buy at a price point you're happy with and don't look again! 🙂
Boundary and guidwire connectors not great.
The product is great, in the short time I’ve had it, all good, easy to install, the only down side is that the boundary and guidewire connectors are not great, just plastic which serve two purposes, splicing the actual wire, and connecting to the blade connector on the “docking station”. I’ve replace these with normal blade connectors which work much better in my opinion. The supplied ones might be ok for you, but weren’t up to scratch for my use, easy to fix though.
Yep, we named it 🙂 We’ve had ours for a year now and it’s fantastic. Trundles away quietly and serenely; even our cats aren’t scared of it anymore. 🙂
There are a couple of things to watch out for:
1) The original installation took a couple of hours for our 150 sq.m lawn, but once it’s done that’s it. We followed the instructions and laid ours on the grass, hammering the pegs down to the level of the soil. After a couple of weeks the grass had grown up around the wire and it’s now invisible. During this time, keep the cutting height high to avoid cutting the wire – again this is in the instructions;
2) Cutting frequency: For our lawn Flymo suggest 4 times a week with 10 hours of cutting time available, which left it looking trampled. Once I thought about it, I realised that a set once approach is never going to work: you wouldn’t stick to the same cutting frequency with a manual mower, so why with an auto? Also everyone’s lawns are in different conditions, so will grow at different rates. A more flexible approach is needed. What we worked out (by putting it on manual and leaving it till the battery ran out) is that one charge pretty much does the entire lawn once. So we’ve now reduced the cutting down to a couple of days a week and a couple of hours of cutting. As the season progresses and the grass grows faster we’ll up it. We’re also trying having it start mowing later in the day so that the morning moisture has gone. Yes, it’s designed to cut when it’s raining etc. but it just seems better to try to minimise wet cutting as much as possible.
3) Winter: I brought everything in: mower, base unit and power supply. Just disconnected the cables and put it all back in the box having given it a clean. Does mean you need somewhere to store the box, but it’s worth it.
4) Connectors / Wire: buy more connectors and leave plenty of spare cable. The wire is quite brittle, so has a tendency to break especially at the base unit. Then you need a new connector and will get through the supplied ones quite quickly. They’re inexpensive (<5 for 5), so worth ordering some more. Just search the internet.
5) Don't forget where you laid the guide wire: I did. Raked it up getting rid of some moss. Dohh. (that's why I used more connectors)
In summary, get one you won't regret it. Watch the pricing, it fluctuates wildly; buy at a price point you're happy with and don't look again! 🙂
A little time consuming to install, then an easy life
I like gardens and don’t mind looking after flowerbeds and planting new plants. However, I find lawn maintenance tedious to say the least. I was thinking of getting AstroTurf installed but actually this robotic mower from Flymo was a cheaper option, and I prefer I natural lawn especially if it requires relatively little effort.
The biggest effort with this mower is setting it up. It’s worth reading the instructions carefully and looking at the DVD that comes with the mower. I guess it took me around three to four hours to set the mower up. I was concerned that I don’t have a power outlet by the lawn but the unit comes with a 10 metre long low voltage cable so in reality all you need is an external socket which I have.
The unit is fully programmable and its secret is frequent mowing, so there’s no need for a grass box as the short cuttings mulch down. The mower is not over loud in use and simply gets on with the job.
Overall no problems to date. Five stars.
Excellent would have given five stars had I not encountered a slight snag.
Initially I had a flashing blue light after installation of wiring this is not good as it indicates a fault in boundary wire or guide wire. I then reinstalled all my wires again and this time I got a solid green light. At that point I should have been ready to go but kept getting a loop fault. I decided I knew that I must have installed correctly but still got the loop faults when I had a solid green light. Trolled through YouTube Flymo DVD and manuals etc and basically green light means no issues. This was in a Friday so I decided to leave as is and contact Flymo on the Monday wasn’t straight forward for the tech person but eventually was advised I had to go into settings then security then create a new loop signal.
Once I did that every worked great.
Excellent cutting very quiet and highly recommended by me.
Worth every penny
I bought this mower as I despise mowing lawns. I don’t have a huge garden, but it’s still a chore I would rather avoid.
Setup took around an hour, during which time the mower charged itself up fully so it was ready to go as soon as I’d finished the boundary wire.
Instructions are clear and straightforward to get you up and running with the minimum of fuss.
The mower is incredible quiet, I had no idea it was actually cutting the grass on its first run, I thought it was calibrating. I have now set this to mow overnight and there is no chance of it disturbing anyone. The loudest part of the routine is if it bumps into anything on its route.
My only dilemma now is what to do with the front garden – another mower or artificial grass…
When my mower had first arrived over a year ago I had read the manual from front to back. The initial set up took some time because I had over 400m of grass. Although laying the cable took a long time I quite enjoyed the task, measuring the distances from obstacles and making sure the wire was pegged down in to hollows and not exposed on mounds. I then gave the base unit a roof by buying a Door Canopy on Amazon for 27, does the job and doesn’t break the bank.
Then I powered up the circuit and let my mower go, now named ‘Herby 2’ after a dog I had as a kid. It got stuck in a couple of times in muddy holes in my rough lawn, which I easily filled with extra soil. It cut the wire a few times on mounds, so I cut the top of the mound off or buried the wire. But soon it was cutting away without any problems and chasing my dog around the garden. I had one concern at the start, it didn’t cut the full amount I had programmed, but after consulting the help desk I found it works like my Roomba, it estimates the size of your garden and stops once it thinks its cut it all.
As the summer progressed I lowered the cutting height and found the perfect grass length and have never looked back. The grass is greener and thicker and looks something akin to ‘Telly Tubby Land’ with its precisely mown undulations. Now I’m looking forward to opening up another 100m because it handles 400m easily on a 4 day week.
Finally, apart from cutting my lawn better than I could ever hope to with a normal mower, it is interesting to watch, travelling and bumping around my garden and hiding behind my shed so I think its disappeared. I would most certainly buy it again if I had the choice.
We have a moderate back garden 12mtrs x 20mtrs around 3/4 is laid to lawn. Moses (that’s our mower ’cause he “mows us lawn for us”) does a superb job of keeping under control. A few edges to finish off here and there but the bulk is always managed. One conventional mower to cut the first time in Spring then Moses takes over. You can sharpen the blades quite easily or simply replace. Two years down the line ..no regrets. I thought my wife would never forgive me when I first bought it, but she loves it now.
3rd season, still going strong. Might need to get a replacement battery soon as his times at work are getting a little shorter. Still does a great job. And the elecrtic loop if left on 24/7 365 keeps the moles away!
Bought one last summer for son who’s away all the time. Upto 3 months sometimes. I thought I’d leave a while before leaving a review. After a bit of setting up and 1 problem with cutting through guide cable he has (Hobbo) been amazing. Small 40 meter garden with newly laid turf. When it had been down a week, we let Hobbo loose. His grass looks fantastic and he’s been fault free. Son has built him a little house. There’s one small narrow angle Hobbo can’t get to but it only takes 5 mins by hand. Excellent product and well worth the trouble setting up. Saved him paying someone to cut it weekly. We sat in the garden, glass of wine in hand mesmerised. I hope it stays fault free. Hobbo will be back out again when spring arrives, problem is I want one now!
Having read the instructions from cover to cover I threw them back in the box and started again by just examining what had actually been delivered.
1. A very long real of cable. Peg this down around the boundary of the area you wish the lawnmower to be confined. Tip: save a decent length for the guide wire because it all comes off this 1 real. Don’t use it all up on the boundary.
2. A couple of bags of plastic pegs. Use these to peg the cables in to the grass. Smash them in deep so children, animals, the lawnmower and YOU cannot trip over them. Either that or bury the cable in the soil.
3. A large charging pad. Needs to be relatively close to the power outlet. Do not install the pad in direct sunlight. The mower will sit there and cook itself in the summer. Both ends of the boundary wire, the guide wire and the power supply all plug in to the sockets at the back of the charging pad.
4. A robot. This is the clever bit that cuts the grass. The cutting blades look quite pathetic at first glance, but don’t be fooled. Because the robot mower is cutting just the growing tips of the grass at regular intervals these little ‘razor’ blades do a good job. It doesn’t cut the grass like a good quality mower would do, but it’s good enough for a family lawn.
5. Power adapter. Steps down the 240v to 12v DC (I think). Either way it’s a sealed unit with a fairly long lead. Probably 5 metres.
After using the mower towards the end of last season I can visually notice the grass looks healthier. This is more than likely down to the mulching effect this mower has on the grass. I actually purchased three on these lawnmowers because I have several lawns. 2 I have yet to install as I wanted to see how 1 got on first. I’m happy enough with the first one so, come spring, I will be setting them all trundling across the gardens at midnight to take over mowing duties that would usually take me a weekend of manual mowing.
They are extremely quiet. You can hear the grass being cut over the noise of any motors inside!
They bounce off of objects, animals and people.
Be careful if you have overhanging trees. When dead wood drops to the ground this mower will typically run it over and whack it with the cutters for good measure. This will inevitably blunt the blades quicker than expected.
The theft alarm works well. I’ve set it off a few times. it cannot distinguish between a real theft attempt and the owner moving it.
It handles all terrains, that we have. Some mossy, more moist areas. Some barren areas. Some ares where, for reasons unknown to me, the grass grows 10 times quicker than anywhere else in the garden. We have inclines that could be described as small embankments I suppose. It cuts up and downhill as well as along the slopes.
In other words, the wheels are very gripful (I invented this word. It isn’t in the English dictionary yet but the more people use it the more likely it is to be included.)
You WILL name it. It’s natural for humans to name things that appear to have personality.
To summarise. I am a robot mower convert. I doubt I will never not own one again.
A few people have commented how slow this is at cutting and they’d be frustrated that it takes an age. Thats fine. I’m not cutting the grass. They aren’t cutting the grass, the machine is. I really don’t care how long it takes.
I had mine running twice a day (dawn and dusk), but that really was overkill. Its now been reduced to twice a week at 6AM and no visible mulch is left. I sleep through it mowing every day.
The mower is almost silent. If your grass is a bit long (first cut of the season) or there are leaves on the grass, you can hear this. Its not loud, but its audible. The motor whine driving the wheels makes more noise than the spinning disk.
The mower doesn’t go in straight lines, its not GPS or wifi controlled, just a timer and a random pattern.
The boundary wire is key. When setting this up, peg it out loosely where you want it to be and have enough slack cable. Its easier to cut wire off, than cut it on! Let the mower bounce around the lawn and try position the mower at different angles to the guide wire to check it doesn’t fall off (if you have a drop). The book says leave about 30 cm from the edge. I found I can get away with between 10 – 15cm YMMV I also turfed the area, so the cable was buried just underneath the turf without any issues
Top shell is a bumper, so it can operate forwards or backwards, so even if you mess the guide wire up (short of it falling off into a pond), it’ll bounce off something and probably take the heads off some flowers.
This is waterproof and will cut in the rain, but its always nice to make a little kennel for the device too. If you make it deep and short, its out of prying eyes and its fairly difficult to see as the orange is a bit shouty. As long as the return wire is straight for the last few meters, it will hide away nicely. Its fairly satisfying to see it reverse back into its kennel. Its even better not having to cut the lawn too.
Tool 2 hrs to set up. Now saves me 30 min every week. I run mine 3 evenings a week for 2 hrs at night. Very quiet and low maintanence (clean it monthly for 5min). Lawn always looks immaculate and whenever ‘Shaun’ is out it puts a smile on my face. Love it!
Tool 2 hrs to set up. Now saves me 30 min every week. I run mine 3 evenings a week for 2 hrs at night. Very quiet and low maintanence (clean it monthly for 5min). Lawn always looks immaculate and whenever ‘Shaun’ is out it puts a smile on my face. Love it!
Great Little Robot Lawnmower, My contribution is for it’s little all weather garage …….Use a SAMLA Box Transparent 130L from IKEA…..10,…..Get Blade / Saw to Cut Away Part of Front section……….Add Spray can to the inside (If so wishes) or doll it up with a bit of imagination (Something as you can see I am lacking in….”Johnny Cash Black” will do ) …..but all ready to go in 30 min. The little robot fellow deserves a bit of comfort.
Great Little Robot Lawnmower, My contribution is for it’s little all weather garage …….Use a SAMLA Box Transparent 130L from IKEA…..10,…..Get Blade / Saw to Cut Away Part of Front section……….Add Spray can to the inside (If so wishes) or doll it up with a bit of imagination (Something as you can see I am lacking in….”Johnny Cash Black” will do ) …..but all ready to go in 30 min. The little robot fellow deserves a bit of comfort.
I have had this amazing mower for over four years now.
All I do, is replace the three blades (cost 50p) every three months.
My lawn is always perfect and, because it mulches the grass, which helps the lawn, there is no green bin issue.
I recommend this wonderful machine.
Brian J Garside
I’m now into my fifth year with this Brilliant mower. It is still superb. Glad I bought it when I did for about 550. Clearly it’s catching on as it now costs almost 800. It remains great value for money. My lawn always looks great. All I do is replace the blades every three months. Cost around 50p. I think Flymo should employ me as one of their salesmen. I can honestly sell this to anyone who simply doesn’t like mowing lawns, or is elderly and can’t deal with a heavy mower.
Full marks to Flymo.
As always, before buying anything on Amazon, you review the one star ratings. I did. Then I reviewed the five star ratings.
Having had my robotic flymo since 2 August 2018, I will say it is awesome. Those people who have posted negative reviews must either have had too much vino, or have been influenced to post such reviews.
I do accept that the instructions are all over the place and unessarily technical. They should focus more on the setting up of the perimeter wires and the basic digital controls.
But, once the mower is set up it is amazing! I set mine up on 2 August 2018 and have not touched my motor mower since! My refuse collectors are confused that there has been no green bin. This must save the Council a fortune.
Each morning, at 7:00am my mower starts and, after returning to charge itself every hour or so, continues to mow until 5:00pm. Amazing.
Definitely worth the 535 I paid.
It’s quite hypnotic watching it so it’s work when you are in your garden reading the newspaper or having a BBQ.
It has my maximum 5 star rating with no reservation.
Took me about a day to set up for a lawn that’s in the 100 – 150 square meters region. I did a proper job though and buried the cables rather than pegging them to the surface. I was also very careful with my measurements (distance between the edge of the lawn and cable). The mover has done well over 100 hours of mowing since I set it up a few months ago and has only once needed my intervention. I arrived home from work one day and found it half in the flower bed and half on the lawn – stuck. Maybe one of my cats got in the way or something, but one time out of many dozen times is a good average. You really can ‘set it and forget it’. Only minor niggle – as expected, it doesn’t cut right to the edge. You have about 10cm of unmowed lawn. Just means getting out the strimmer or conventional mower briefly once every few weeks.
Oh, and it’s fascinating to watch, is a real talking point for visitors and works in all weathers. VERY quiet too. Hardly sounds like it’s doing anything. Oh, and no, you don’t notice any grass cuttings (unless you leave it a very long time between cuts).
Honestly this is amazing – I couldn’t be happier!
Robomow goes off every night (you can programme him) and cuts the lawn while we sleep – it is so quiet!
The lawn is in excellent condition.
We have him installed on a couple of paving slabs in the corner of the garden under a little garage that keeps him out of view for the most part.
This works! I installed the boundary wire which took about 2 hours following clear video instructions. My garden is on the upper end of the mowers range at about 400 square metres and the supplied boundary wire was just long enough. There is also a guide wire that needs to be installed but I only had about 10m remaining after completing the boundary – I installed it and hoped it would be ok. Powered up the charger base and started the mower. Off it went, not making much noise at all but also looking like it wasn’t doing anything – seemed like cutting the grass with hand scissors! My kids were skeptical if entertained!
The shorter guide wire meant the mower took about 10 minutes to find its way back to the charging station. I decided to purchase extra guide wire, pegs and waterproof 3 way joints – this was about another 40 all in. After 2 days the lawn was perfectly mowed. Once the extra wire arrived the mowing process became much more efficient so I was able to set the mower to work every other day rather than daily.
The mower has been working for 2 months now, it’s got stuck 3 times over that period, normally manoeuvring close to a boundary. 2 minutes gets it moving again.
Overall highly recommended as I have not had my lawnmower in use at all this summer!
Honestly this is amazing – I couldn’t be happier!
Robomow goes off every night (you can programme him) and cuts the lawn while we sleep – it is so quiet!
The lawn is in excellent condition.
We have him installed on a couple of paving slabs in the corner of the garden under a little garage that keeps him out of view for the most part.
Our new best friend
One of our best buys ever. ‘Mo’ has been mowing the garden since the day after we bought it, and has put in over 150 hours of mowing. It is out there rain or shine, keeping the lawn perfect.
We only have a very small garden (typical new build) but that meant that the effort involved in getting the old Flymo out, cleaning it and putting it away was disproportionate to the actual mowing time.
It was a bit of a pain to set up by putting the wore around the garden (we chose to bury it) and you should allow rather more time than they suggest.
We have programmed ‘Mo’ to mow every other day during hot weather, but daily if the grass is growing quickly.
Now we don’t have to think about the weekend weather, and we don’t have to put aside time to mow the lawn. It just happens!
I’ve had my mowbot for a couple of months now and overall it’s brilliant. Not cheap, took some effort (and further expense) to get it up and running but now that it’s working I absolutely love it.
Price: when I first set eyes on it a year ago it cost 999. By Christmas it was down to 600. In March when I bought it, it was 487.50. Then it went up again. So if price is an issue for you, keep checking back until it reaches a level you’re happy with.
Setup: You can learn a lot by reading these reviews and the Q&As. You can also download the manual from the Flymo website before you buy to help understand the installation process. A key question is where you are going to position the base station and how you are going to get power to the base station. It comes with a power supply which you plug into a socket at one end and at the other end you either plug it straight into the base station, or into a 10m low voltage cable that is supplied (3m or 20m cable can also be purchased) which in turn plugs into the base station. I didn’t want to plug the power supply in inside the house and then run the low voltage cable out to the base station, as I didn’t think that would be safe. So I had to pay an electrician to put in an outdoor socket for me. (I got him to do two sockets while he was at it. They are very handy.) This meant the outdoor sockets were right by where i wanted to put my base station. So I didn’t need the low voltage cable.
However, the power supply must be kept dry at all times. My solution to this, which I had decided on anyway, was a robot mower garage. There are some very snazzy Swiss ones but they cost more than the mower! I found a wooden one online that came flat-packed and didn’t break the bank. It protects the mower from sun and rain, and it keeps the power supply dry (the power supply sits on top of an old hummus pot to keep it off the dew).
You have to choose whether to bury the boundary wire, or just peg it down using the pegs provided. I went for pegging because it’s less work and if there was a break in the circuit I wanted to be able to see it. It took several hours to lay the boundary wire and the guide wire. If you have a small or medium size garden then the pegs provided should be plenty. I have a big garden and the ground is quite uneven which means you need more pegs to keep it flat, so I ended up buying more. If you’re in a hurry to get the mowbot going, buy extra pegs in advance.
Once this was done I only had a couple of false starts, in both cases because I hadn’t followed instructions closely enough and in both cases I was able to identify the problem quickly using the troubleshooting guide.
Coverage: my garden is 400 sq m which is the upper limit of what the mowbot is said to cover. In fact it manages this quite easily and I think it probably could handle 500 sq m, maybe even if you ran it 7 days a week.
Slope: the mowbot is said to be able to handle 1 in 4 slopes, but the manual says not to lay the boundary wire on more than a 1 in 6 slope. Eh? My lawn has the same slope at the boundary as it does everywhere else. So I just laid it anyway down my 1 in 5 slope lawn. It hasn’t been a problem. (You can measure the slope of your lawn using Google Daft Logic tools to measure length of a line, and height above sea level at either end of the line.)
Mowing times: It’s important to understand that it doesn’t run all the time. It has a built in down time of 12 hours per day, so you can only run it for 12 hours per day. Within those 12 hours it will spend 6 hours recharging, so the most it will do is 6 hours mowing per day. The manual gives some figures for coverage to help you calculate how many hours you need, but I found it impossible to make sense of these figures so I just used trial and error. In any case I’m not there all the time, and I don’t like to leave it out when I’m away for security reasons, so I just run it to the maximum possible when I am there. This works for me.
Security: this was an issue for me as my garden backs onto allotments and anyone could walk in. I don’t worry about the allotment users but people do sometimes break into the allotments at night looking for things to steal. The mowbot comes with a pin code and you can’t use it without that, and it comes with a sticker that says so to put on the machine, but I’m not sure thieves would necessarily see that in the dark or believe it if they did. They would probably only find out later that it has no re-sale value, but I doubt if they’d bring it back. So I keep it on the highest security setting which means it screeches if you lift it and you need to enter the pin code to make it stop. This means I can leave it out overnight when I’m home knowing I’ll hear if anyone tries to move it. But when I’m away I leave it indoors.
Improvements: the mowbot works very well as is but I think it could be improved with a bit of smart technology. It would be nice if error messages to say it’s stuck or it’s been lifted could be sent to my smartphone. It would also be nice if I could tell it from my smartphone not to mow today if I can see it’s going to pour with rain. (It does work in the rain but it’s not ideal). No doubt future versions will have these features. But if I didn’t have one now would I buy one now or wait until it’s perfect? Get one now, no question.
Great little mower! Not left a review until it’s had a few months’ work.
It took a little longer than expected to secure the boundary wire, but well worth it! You can get away with ~5 cm less boarder edge distance if you measure accurately, meaning less strimming every couple of weeks.
Our garden is a very odd shape too, and having the return wire not in an ideal location, it still manages to find it and re-charge itself.
Our kids have taken to calling it Edward (scissor hands!).
Very happy and would recommend.
Given it 4 stars but may increase to 5. Installed per instructions, which is a bit laborious when you are getting older. A route in your lawn has to be dug for the boundary wire and then another route for the guide wire. Took me two days. All wired up, green light on charging station. Set mower to calibrate and off it went to great cheers. Tended to follow the boundary wire (don’t know if this is the wire fence at the side of the boundary wire causing this) then moved across to the guide wire. When it got to the junction of the boundary wire and the guide wire nothing seemed to happen, it just seemed to wander. I was waiting for a motor like sound but there wasn’t one.
After reading the manual over and over again and restarting over and over again I eventually lowered the cutting height as nothing else left to do.
Then I could see bits flying about. I had previously strimmed the lawn quite low. There doesn’t seem to be any indication as how low your cutting blade is. The next thing it cut through a boundary wire, so higher cutting blade and check for exposed boundary wire. Now have to connect wires, but with hope Louis will be great!
Positives:
Very quiet – doesn’t disturb us or the neighbours, we can even set it off at night with no problems.
Efficient – easily cuts our grass in one charge
Easy to use – we use it manually (we move it to the grass ourselves when we want it cut). All you need to do is put in the pin, press start and close the hatch.
Negatives:
Setup – it was a pain to setup and to get our head around. But this only needs to be done and, once we understood it, the setup wasn’t that complicated.
The wire – there is no easy, neat solution to having the Flymo. As the base must be permanently connected to the wire and a power supply it leaves wires trailing unless you have an elaborate way of hiding the wires (perhaps under your paving/decking etc).
Perimeter/Fencing/Walls – You have to place the perimeter wire about 30cm away from fences (I’m not sure why so far as the Flymo reacts quite well to bumping into objects and then choosing an alternative path). This leaves a very large amount of grass which then needs to be cut manually – not quite meeting the objective of having a robotic lawnmower.
Overall, we are very happy with the purchase. It’s much cheaper than alternatives and does a great job.
I have had my robotic lawn mower for 3 months now and I absolutely love it. I am disabled and have been unable to manage my lawn, but this took me just over an hour to set up and I now just sit back and watch as my dog follows this round the lawn with his nose glued to the ball roller! I had to adjust the edges as initially I set it up as per the instructions with a 20cm depth from the edge. This wasn’t necessary and I now have the mower so it goes right up to the edge of my lawn. I have several trees and one large planted area in the middle of the lawn, but the mower happily bumps into the trees and I set up a boundary around the planted area, so no problems! The lawn also has quite a few ‘bumpy’ areas that were difficult to maintain with the standard lawn mower, but my little robot copes with them all fine! The instructions said to set it up for 4.5 hours 5 days a week (I think!), but I now let it just run for 3 hours 3 times a week and the lawn looks better than its ever looked.
I have had my robotic lawn mower for 3 months now and I absolutely love it. I am disabled and have been unable to manage my lawn, but this took me just over an hour to set up and I now just sit back and watch as my dog follows this round the lawn with his nose glued to the ball roller! I had to adjust the edges as initially I set it up as per the instructions with a 20cm depth from the edge. This wasn’t necessary and I now have the mower so it goes right up to the edge of my lawn. I have several trees and one large planted area in the middle of the lawn, but the mower happily bumps into the trees and I set up a boundary around the planted area, so no problems! The lawn also has quite a few ‘bumpy’ areas that were difficult to maintain with the standard lawn mower, but my little robot copes with them all fine! The instructions said to set it up for 4.5 hours 5 days a week (I think!), but I now let it just run for 3 hours 3 times a week and the lawn looks better than its ever looked.
I have had this for 2 months now and it’s been really great. I could not fault it. I have set the schedule for it to cut ever other day for a couple of hours. My garden is circa 70m2 so doesn’t need it every day. I decided to bury the boundary wire to keep the dog from going at it. That has lead to some trial and error. When I installed the wire I followed the instruction but I’m retrospect I could have put at far closer to edges. For patio slabs level with the grass I would recommend going right up the slabs. If you install it the 30cm recommended you end up with a line of uncut grass around the boundary. Other than this it was very easy to set up. The only niggle for me is the connectors at the back of the base unit. They just sit on there so check them regularly.
I have now used the 1200R for 5 weeks.
In the past 30 years, I have used many other traditional mowing methods but none with the superb results that I have now.
.
The 1220R has rejuvenated my lawn in a few weeks and I am very pleased.
The key to this result is the Flymo Robotic philosophy of “cutting often but little” and that the cuttings are mulched (refetilisation).
The 1200R requires careful setting up, although it is easy. The manual is very thorough. Once you have done a proper set up, there will be little else to do but a bit of tweaking of the boundary wire.
I would advise any user to read the manual thoroughly. The videos supplied by the product and also available online at fly.com, give additional assistance.
It is very important to keep the spinning cutting disc clean and to ensure that the cutting blades are spinning freely. It can best be done with a dish brush , wearing gloves as the cutting blades are very sharp.
This must also be an excellent product for persons suffering from hay fever or back problems.
I have waited a couple of months to write this review so that I could give an informed feedback – the result is that the mower is amazing, if you are considering buying this product you will have no regrets, I will have saved the money it cost me to buy it in 10 months as I have now got rid of my gardeners, the garden looks amazing all the time and in great condition as other reviews said it would, once you have this you can forget about your garden.
I bought what they call a robotic lawnmower garage roof for mine and I think it should house under some protection when recharging/resting although the manufacturers do not say too.
But here is the ‘biggy’ I can’t encourage everyone enough to bury the boundary wire in the dirt and do not run on top of the grass just using the pegs, the lawnmower kept cutting the wire in various places even though we pulled the wire tight and pegged it right down, this caused me so much hassle in the beginning, I almost gave up on it, and every time it was because it cut the wire.
I had to call the manufacturers to send me new wire connecters as there were only a couple in the pack and even then I had to buy more from ebay, I decided to put the effort in and bury the wire, it is simple, I literally used a large kitchen knife, cut into the ground about an inch, wiggled it side to side a bit and kept slicing though unil I finished, then open the cut grass and push the wire in just so its level with the dirt and not above it – since doing this about a month ago I have not had this problem again and love my garden and mower. If you found this review helpful please give it a like
What you need to know is that it must go on the edge of a lawn with a straight edge of at least 3 metres, 1.5 metre either side. It says it needs a 2 metre straight run in to charge but it actually needs 3 metres of free from any obstacles including the laying of boundary wire. You must not miss out any of the settings in the manual as it won’t work correctly. It must not be in direct sunlight or you will need a garage for it. On the whole, i love it as i now it takes me 5 mins just to strim the edges. But if i had known all of this in advance i might of changed my mind for another model. Please check out flymo website that have video tutorials.
Yes, set up takes a little while – but is easy – just read the book!
We have a 500 sqm lawn, separated in 2 sections by a stone chip path. I thought it would only be able to do one of the sections… but no, copes with going across the path without batting an eyelid. When I say eyelid, my kids have laminated a set of eyes and added them to give it the “human” look – and he is now called “mo!” – and is a real character
The grass cutting is great, no visible mulch on the grass, ours has been going for 2 months trouble-free, it is near silent, and you could run it 24 hours without annoying the neighbours. The lawn quality looks very good as the cuttings sink into the lawn. You won’t get stripes, but everyday the lawn looks well cut and tidy……
I am a busy dad, commute to London in the week and my time at the weekends is at a premium – so when it saves 90-120 mins a week, at 500, an absolute bargain. Once in a while I strim and edge (have near buried the boundary wire) and it looks great. I left the cut height just under the full height and it is more than short enough.
Don’t delay, buy this awesome little chap, he’ll pay you back in time, entertainment and a pretty decent cut lawn……
If you’re looking at these, just buy one! I can’t believe I’ve been cutting the lawn by hand all these years. The feeling I get when I come home from work to a perfect lawn, every day, justifies the cost multiple times over. Don’t know why you’d need to pay for a more expensive one, other than garden size.
One point of caution on size of lawn, if you think, like I did, that you’re over the maximum lawn size of 400m^2 but you’ll cope with that by leaving it out longer that the recommended 12 hours per day, you can’t. The mower has a built in ‘downtime’ of 12 hours per day, which can’t be changed. This gives a maximum ‘active’ time of 12 hours (including charging). thereby defining the maximum lawn size. My lawn is at the upper end of the max and keep the lawn perfect with about 8 hours per day.
I’ve never been great at consistently cutting the grass once or twice a week. I’ll always leave it slightly too long, so I’m cutting longer grass and doing more damage to it than necessary. And given I live in an area where moss takes any opportunity to get a foothold, it’s always been a battle. My Flymo, baptised Trimothy (or Trimmy) has fixed that. He goes out every other day, rain or shine, and cuts just millimetres off the grass. The razor blade gives a much cleaner cut than whacking lawnmower blades could ever do (causing less disease and discoloration). I also love just thinking about the weight of a binfull of grass I’d throw away every week (95% of which was water, and 5% useful nutrients just waiting to decompose) which is now going back to the soil to feed the grass. The fact I’m not leaving big long cuttings has also improved the thatch build up in the lawn.
I do still have some trouble with moss, but that’s a local issue. The grass is greener and healthier than its ever been before.
It’s so relaxing to drive home from work, pull into the drive, and see Trimmy working away, so I don’t have to!! The little computer tells me he has done 550 hours of cutting so far. I reckon his random nature means he takes about 3x longer to cut the grass than me (but then I’ve got all that emptying and setup/pack away to do too) so I estimate he has saved me between 150-200 hours of grass cutting since bought. Now the time can be spent tidying the rest of the garden, and the green bin can be filled with weeds and leaves instead of grass cuttings.
Just a great little machine!
I called mine Homer,
We have a 425mt2 garden in a large U shape and he seems to be coping very well with it so far, quite surprised that he hasn’t got stuck even once, and always finds his way home (unlike me) hence the name. Despite having 5 trees, many bushes, two cats, a fox, paths and kerbs to drop off into gravel etc he just got to work flawlessly, straight away! The set us is no problem, I actually enjoyed it as I couldn’t wait to see him working. Quick tip; cut the lawn quite short before you set it up, then when laying the boundary wire just run two fingers either side of the wire to help the grass lift higher than it and follow the destructions and you will be fine. Great fun to be had with the guests and neighbors, you can make up any story you like to tell them how it knows where to go and when to come home!
Great buy, highly recommended!
keeps my lawn looking nice and smooth, but if the dog leaves a tennis ball out then it tries to chew it up and I have to resharpen the blades. You do have to mow any edges near flower beds as it only cuts to the edge where it runs flat to a path say Putting in the guide wire is the hardest work. We found a quick way to bury it was to use a large sharp kitchen knife and slice the grass down to the earth and then lay the wire in the groove. The grass is otherwise so matted, its like trying to cut carpet with a spade.
I was a bit skeptical when I bought this but I hate gardening so was willing to give it a go.
The set up is a bit of a pain especially if you have multiple bits of lawn across the garden – we have a two tier garden at the rear and two separate bits of lawn at the front of the house. It connected fine but needed to trail the boundary wire across both gardens and accepted that I need to use the manual mode for the areas that the mower can’t return to the docking station and auto charge.
The boundary wire needs to be laid on pretty short grass otherwise the mower will cut the wires which can be a bit of a pain to fix, you can dig a trench to sit the wire in but having tried this for about 5 metres, I gave up!
I was also worried about someone randomly walking off with the mower but it’s alarmed and you need a pin number to turn it on etc.
Overall the cut and finish is pretty good but you’ll still need a strimmer to finish off the edges, especially if you have grass that is next to a wall or a fence.
Not having to mow 100 square metres of lawn is really quite a treat. Also not having to dispose of the trimmings from it is also a real benefit. Setup was a bit tedious, but pretty easy (top top: leave a small spare ‘loop’ of wire at the corners, and use pegs pretty liberally, and bash them in with a rubber mallet, even if your ground is quite soft). Once up and running, it’s pretty much leave-it-alone, although you will need to keep your lawn reasonably clear for it to work reliably. You’ll also need to manually strim/mow about 20-30cms all the way around your lawn and any obstructions because it absolutely does not do the edges. It’s not very big, and so can comfortably get underneath trampolines, or overhanging branches that are in the way when mowing manually – a very nice benefit of having a robot to do it for you.
The issues with this mower are actually quite numerous. You can’t have it start off in a corner of the lawn – it has to start with at least 1.5M either side of it, which means you end up putting it’s base unit somewhere really visible rather than somewhere nicely hidden away. You’re also not supposed to leave it in direct sunshine, and of course it needs permanent power (via quite a long low-voltage cable), which again limits where you can put it. Not only do you need a boundary wire all the way around your garden, but you also have to have a guide wire intersect your garden somewhere to connect the base unit to the boundary somewhere so the mower can find its way home again. Consider using an edging spade to make a sort of groove in the turf to push the cable into, because having it accidentally cut the cable is a hassle to figure out and to resolve.
Almost anything can turn into an obstruction – things like twigs and branches can stop it, although hopefully it’ll move them a little each time so will eventually get to the grass underneath them. I’m finding apples are a significant issue too – sometimes it happily goes over the top and chews them up a bit, but often it’ll sort of ride up on one and then think it’s upside down (how!?) and immediately stop (needing human intervention to make it resume). I suspect that when our beech tree drops vast swathes of leaves in the autumn it’ll also struggle, although so far it’s cruising over the beech nuts quite well. It hasn’t yet mowed any kids toys – it would probably kick a fly-away football around, but a proper weight one would probably be an obstruction. Small toys will probably succumb to the blades though (bad news if they’re metal toy cars or whatever).
In terms of coverage, it uses a random pattern to get around the garden, so may miss the odd tuft of grass for a couple of days, but will eventually get to everything. That more or less means you do need it to run daily, or else you’ll start to see the bits it misses if the grass is growing quickly. It seems to do a decent job of mowing around trampoline legs and whatnot that aren’t specifically marked by the boundary wire. It can’t cope with long grass, so it’ll need a decent manual mow if it’s got long because it got stuck for a few days or it’s a first use of the season or whatever. If it’s set to any grass height above about half way, you’ll see lots of track marks in the grass where the mower’s been tootling about on it.
Whilst I have to go and check on it more or less daily right now (mostly to get the apples off the grass), the lawn is looking pretty nice. The majority is getting cut, the edges don’t take long to take care of, and there are no obvious ‘clumps’ of cuttings anywhere. It’s so quiet that if I hadn’t heard it starting the blades up after moving about a bit, I’d have wondered if it was mowing at all. That’s great because it really, genuinely won’t annoy the neighbours if it’s running late at night. When it runs right, it’ll probably keep your lawn in a better state than you can do yourself, and definitely saves a lot of time and clippings disposal.
So I waited three months before reviewing this because I wanted to be able to give an honest assessment of how it works and the short answer is it’s fantastic. The longer answer is…..
Like many people who’ve reviewed it we named ours – he’s called Freddie – so I feel the need to get that out of the way first. Laying the wire was simple enough and I’ve since learnt I was a bit too anal with the whole 20cm and depth thing in the beginning. Near the edge and reasonably flat works fine, after a few weeks you won’t even see it – except you’ll probably be pulling it up to move it because you didn’t get it right.
It is a bit trial and error with the wire, but it is far less laborious than it looks and once you do have it right it’s fine. I ended up re-edging my lawn and laying stones to compensate for the fact Freddie couldn’t get to the edges and I wasn’t about to have a robot lawnmower and then have to keep strimming every week! This meant one time I managed to cut the perimeter wire once, but it’s a simple fix and they give you loads of wire, pegs and joiners.
Operation is simple, turn him on and let him go, just be aware if you manually send him home, he stays there until you put him back into auto – it’s a mistake I made a couple of times before realising.
Every morning I get up and look out the window and there is Freddie, chugging around the lawn. He must go out at least three or four times a day, but for me he seems to do more in the morning than the afternoon/evening, although you can manually set windows of time to suit. It is so quiet you almost have to bend down next to him to check if the blades are turning or not, you won’t hear anything from more than a few feet away — it’s nothing like a traditional mower in that respect.
He has occasionally got stuck so it is worth just checking you don’t have tables or chairs or things with low bars he can get stuck on. He’s fine (yes I know I’m anthropomorphising a lawnmower, but he’s been Freddie for 3 months now, it’s like he’s a pet) with large items, say a rotary line or a BBQ, he’ll just bump into them and turn around, but something small like a tennis ball or a blanket will either get chewed up or cause him to stop (or both). It does mean if you have children you have to be a bit more diligent in getting things up after play, but you can just turn him off the for the day if you’re having a party or something.
He works fine come rain or shine (sometimes we feel bad for him when it’s lashing it down and he’s out there working, but what can you do?), but in my garden where the soil is just awful rocky clay, he can churn up the ground where there is no sunlight and leave you with bare patches when it gets very wet.
So, that aside, he’s a great addition to the family, but how is Freddie as a lawnmower? Well, fabulous! The grass is always at the desired length all over and there is none of the long clippings left on the ground I got with my old manual lawnmower. And I have to say my grass has never looked better as a result. I started with a patchy, weed filled mess and now I have a thick, slightly less weed filled, lawn.
The grass seems to have grown much better, it looks much lusher and it even feels better underfoot. I’m still working on the weeds, but that is slightly beyond Freddie’s remit – he’s done the best he can with them!
I hate mowing the lawn and my wife didn’t do it regularly enough so I’d lusted after a robotic lawnmower for a long time and now we have him, we would be without Freddie. He’s brilliant even though he ignores me when I tell him not to come my way when I’m doing something.
The one PSA I will give is if you watch the DVD that comes with the 1200R, it appears you are supposed to watch your lawnmower toil from afar with a beer or glass of wine in hand, but I can confirm it works fine with or without you drinking alcohol at the same time!
My lawn is a nightmare! It is uneven with a slope down to a 3ft drop off a wall. The robot mower copes reasonably well with these extreme conditions. I have had to reposition the boundary wire a few times to stop it falling off the wall but seriously if it can cope with my lawn it can cope with anything. I am very impressed.
My lawn is a nightmare! It is uneven with a slope down to a 3ft drop off a wall. The robot mower copes reasonably well with these extreme conditions. I have had to reposition the boundary wire a few times to stop it falling off the wall but seriously if it can cope with my lawn it can cope with anything. I am very impressed.
This has really been an excellent buy. It is a bit fiddly to set up but after that it zig zags across the lawn until it needs charging then it returns to it’s base reverses in, charges and sets off again. It is quite hypnotic at first as I found myself sitting watching it’s random progress and enjoying the fact that I was sitting and it was working. With quite a large garden the robot has freed up my time for all the other tasks that I need to get on with.
I have had some problems though. I have an issue with foxes in my garden and they have chewed the perimeter cable on a regular basis, I also have a lawn that is not level and far from perfect so the robot has also managed to chew the perimeter cable which I have had to repair. This is a bit of an irritation and can be fixed by burying the cable which I will be forced to do when I have time. The edges also have to be strimmed as it cannot cut right to the edge but that would have to be done anyway.It also does not cut in straight lines so if this is important then this is not for you.
All in all I still regard it as an excellent purchase at an excellent price as I bought it on Amazon Prime day !
Easy installation and perfect results just in first week. The only question witch i have are: My working time setting are:07:00 to 22:00 but flymo stop mowing at 16:00. On the screen have message that today mowing are complete.
The flymo is now in its second year of operation.
After being stored in the garage over winter it was released back into the garden just a couple of week’s ago (when the spring flowers had finished). It does a great job in a very varied garden – the area cut by the mower is approx 300m2 with a perimeter of circa 170m. This includes lawns and parts of former field/orchard (that is now a ‘lawn’).
The signal wire is very easy to install – simply peg on the surface (with small black plastic ‘tent peg’ style pegs) – it took me about 2 to 3 hours. But you need many more pegs and much more cable than comes with the package. I bought a 100m reel of 1.5mm conduit cable (about sixteen pounds) from an online retailer plus a couple of hundred extra pegs (from an Amazon retailer) and a bag of 100 crimp style wire connectors (very useful when the cable is inadvertently cut when digging!). The signal in the cable is a radio signal (like AM radio) and is very low voltage.
Its not a cheap device but it means that every day I can look out and enjoy the garden rather than heading to the mower shed (for that bit of the garden anyway!)
I bought this lawnmower in June last year and have waited until now to review it. I can honestly say it’s the best house&garden tool/product I’ve ever bought. The last time I cut my lawn with a conventional mower was May last year, yet today it looks an absolute picture with the grass about 1cm high. I have to admit that my lawn is ideal for this product, being quite large (about 500 sqM), relatively flat, a fairly rectangular shape and with very few obstacles. At the moment, with the grass growing at probably the fastest rate it does in the whole year, I have the mower cutting every day, at the lowest height setting (although I tend to switch it off when I’m going out for more than a few hours). I’ve had no problems to speak of, very occasionally it gets stuck in an unseen rut in the lawn, but that’s easily sorted out. It takes quite a while to set out (and then bury) the various boundary cables at the start, but compared to the 00’s of hours it’s saved me in lawn mowing time, that’s a very small price to pay. In fact, I’m now about to extend its range into a second lawned area that I never thought would be possible – thus saving me even more time!
When I received the robotic lawnmower I was very excited, I had mixed emotions about how effective it would be. I read the detailed but easy to understand manual and watch the helpful DVD which shows you how to setup, use and look after the lawnmower to get the best results.
I started by finding the best location for the base station, close to a power source inside. I then laid the boundary cable which took about 2 hours, I have a 20m x 20m lawn. After that I was ready to go and couldn’t wait.
Off it went and did its thing. It was addictive to watch and incredibly silent thanks to its razor like blades. You could see where it had cut, it cuts about a 15cm strip. It took about 24 hours for the whole lawn to be cut working with its random pattern.
I was totally impressed and so were friends and family who saw it who have now also bought one! I can’t fault it, it is totally effective and safe, I haven’t had to mow the lawn for 7 months!!! Just the odd strim around the sides. 5*
Thanks Flymo!!!
I was a bit apprehensive with parting with 800 for this product, as it seemed a lot for something that may not work. But I took the plunge.
Setup
It was relatively straightforward. We watched the flymo video on you tube before receiving the robot. It was easy to peg the wire around the edge. My garden was L shaped and approx 430 sq metres (which is over the manufacturers lawn size recommendation)and actually ran out of wire so I went to my local diy hardware store and purchased more wire and cable connectors. Laying the wire took approximately 4 hours.
Programming
It was very easy navigating the menus through the button keypad. Setup a PIN code and alarm if it gets lifted. It was simple to program a timer for it to cut.
First use
In the first week the flymo managed to cut its own wire once but this was due to the geographics of my undulating garden where I had a small peak where the boundary wire crossed. Otherwise it did very good despite the wet conditions the robot had to operate in.
Grass cut finish
I’ve had the robot for over two months. There are no stripes. But despite I have an oversized lawn the grass is evenly cut and it is very pleasing to come back home to have a short lawn. In the two months the blade was set at maximum and slowly dropped the blade height to 2.5cm which is right height for my undulating lawn.
Maintenance
As the robot goes out everyday rain or shine does get very wet and picks up wet grass to the underside and wheels so does require cleaning when particularly wet as found mud and grass collects in the rear trailing wheel. The blades needed sharpening after 3 weeks usage.
It also had issues docking itself. Had watched it a few times one weekend. 2/5 times would not dock on the first attempt. When this happened it drove back out and straightens itself up and tried again with better success.
Overall this gadget has changed my life. I’m no longer a slave to mowing and raking a lawn. It’s fun to watch the robot cut the grass for you and to try and second guess which way it will turn. The grass always short. It is user friendly to operate.
I’m in technology so I liked the idea of this. Our garden is quite big as well and we don’t really have the time to cut it as often as we’d like. We live on the sea front with lots of people walking by so our street is quite ‘well kept’. With all our other interest, a back that keeps ‘tweaking’ and work finding time for hours of mowing…it’s not our priority.
I convinced my wife we should try one of these after a day of cutting the grass…she quickly agreed.
It took less than two hours (we were still cutting the grass – badly at the time as well) to get the cable laid and set up the machine. We’ve put it in a temporary position whilst we tidy more of the garden. It charged quickly, the boundary was easy to get sorted. One thing, don’t forget to put the guide line in!
Now, we have a robot cutting grass beautifully. The kids have named it. ‘Mo’ just does his job from 7am. The dogs don’t fuss, the rabbits don’t care, the kids have mild interest, but the garden grass is perfect.
Our front and back are gate separated, with dogs it’s a problem. The Flymo has been that good on the rear garden, we’ve agreed to buy another!
We used to have a gardener, he retired, and we couldn’t find someone else to cut the garden. At 25/week, this’ll pay for itself. Very good so far!
We have just installed the mower this weekend. We have around 300sq m lawn, with a narrow L shape around the corner of the house. We buried the wires and attached the guide wire at the top of the narrow L shape. We did a couple of things wrong, but overcame those. Firstly, it was difficult to know if the unit was charging, but fiddling around got it there after a while. I resorted to switching the power off an on again whilst the robot was in the charging station. It beeps when you do that. Secondly, I forgot to hit Start so it sat in its station fully charged for a while. Until we made it go. It does say that in bold letters in the manual to try and make it idiot proof. It clearly didn’t.
Once off and running, it’s worked really well. We lowered the cutting level to a 3 and its coped really well. The factory settings run the robot every day between 7am and 10pm. We’ve left it as that for the while.
Installation was pretty easy if you read the manual and watch the videos online. It comes with a DVD but we haven’t watched that. The hardest work was digging the lines for the boundary and guide wires.
It’s mesmeric, and you end up yelling at it to turn around when it’s clearly doing something that won’t help it out of a corner. I am sure this will wear off.
I’m delighted with how it’s going so far and I’d recommend it.
I purchased this about 1 month ago and I have to say I was really dubious – but fed up with cutting the grass with the little time I had and particularly after coming home from holiday and confronted with 2 weeks growth.
I am extremely impressed! We have a reasonable sized lawn of around 300 SqM with some tricky shapes and sections – I could not believe that this little mower would cover it all and I was not convinced about the cuttings mulching into the lawn. However the results are fantastic and all I need to do is occasionally deal with the edges.
It does take time to set up but done properly and carefully it is a good investment – the pack is a little stingey on pegs (used all of them) and cable clips (if you make mistakes) – I also tweaked the perimeter wire in a few places after a couple of weeks of cutting to pick up some missed patches – but well worth getting it right. Also took a while to set up with timer etc – TIP – always press start after re-setting anything, even if its only charging – yes its in the manual but I missed that and couldn’t work out at first why it wasn’t following the programme. Highly recommended.
We have an orchard containing semi-standard trees, so while they are tall enough for weeds to grow underneath – and hence to require mowing – they are also so low that going under the trees on either a lawn tractor or with a walk-behind mower means that you get scratched to pieces, and lots of twigs and spiders (and worse) in your hair. It’s also on about a 10 degree slope in places, is very much ex-field rather than lawn, and has suffered visits in the past from my dairy farmer neighbour’s milking herd, so it is not exactly the velvet smooth lawn so beloved of lifestyle magazines. I’ve added some photos of the mower itself, the docking station and also a general view of terrain and trees to show what it faces.
In summary it is quite a difficult proposition: rough grass, bumpy surface, reasonable slope and plenty of obstacles in the form of trees, and its area is 400 square metres which is at the top end of this machine’s capability. Yet this little chap (and he’s definitely male) copes really well.
Installation: is straightforward. Read the instructions, then read them again to make sure you’ve understood all the concepts. In particular obey the minimum spacings recommended for the various cables, and if you need to route cable through a narrow gap I suggest that you peg it down first and try it out, as you may end up adjusting its location once you see how it is used. Note that it tracks a variable distance to the *side* of, not on, the homing wire (to the left as viewed going “home”) to avoid leaving marks, so you need to leave more space on that side than you might expect. As others have remarked once you’ve got the cable routes worked out you need to bury them, especially if your surface is rough. This is a time-consuming and messy job, but is simple enough.
Coverage: as I have remarked above I have plenty of obstacles in the form of trees, and this means that there is a fair bit of “bump into tree, stop, head off in a different direction” going on – it’s a sort of slow-motion pinball game effect. This works, and the random choice of a new direction works reasonably well, however there is no getting round the fact that an area of garden densely populated with obstacles will get more mowing attention than a more open area, and you should consider this when siting both the docking station and the intersection where the homing wire meets the loop of wire that goes around the boundary. The mower can be programmed to start mowing at the far end of the homing wire (at its intersection with the boundary wire) at various frequencies ranging from rarely through to always, and if you have both open and congested areas it will probably pay you to locate either the docking station or the intersection point in the open area, since this will give you some degree of control over the time it spends in these different areas.
Terrain: it copes surprisingly well with rough ground, but you will soon learn from observation if you have any localised holes that flummox it. Either they cause it to “nosedive” in, think it has hit an obstacle, stop and head off in a different direction; or in the worst case it simply gets stuck. The solution is simple enough, just fill in the hole; however if your lawn is at all rough be prepared to find it stuck a few times in the first weeks of operation until you have identified and filled in these hollows. Molehills present less of a problem since it just hits them, stops and moves away, and molehills can be a convenient source of earth for filling in the aforementioned hollows!
Rain: doesn’t seem to affect it much, although it does increase slightly the chances of it getting stuck in “difficult” areas where rough ground is combined with a confined space. This is fair enough, and you soon learn where these are and sort them out. So far as I can tell rain does not affect the quality of the cut, although it does increase slightly the chances of leaving wheelmarks in difficult regions where it has experienced some wheel-spin or has had skidded when turning.
Safety: I would say that it would be near impossible for a dog, child, chicken or anything else to get injured. It moves at a slow walking pace, detects any sort of contact via a very soft bump at which it stops immediately, and it also knows if it has been lifted up or toppled over and again stops itself immediately. Sorry to any personal injury ambulance-chasing lawyers reading this, you’ll have to look elsewhere for business.
Cut quality: I’ve only used it on the highest setting (it gives a range of 1cm to 5cm) since my ground is rough. Where is has made sufficient passes the grass looks as if it has been cut by a conventional rotary mower, ie short but no stripes. It does miss the odd tuft in the more open areas, but as I have remarked above I think this is a feature of the variable “obstacle density” in our orchard, which has clumps of trees in some areas and open expanses in others. The good news from my point of view is that it does lots of bumping into trees which, in turn, means it does lots of mowing *under* trees, which is exactly the bit I find difficult. I’m happy to whizz over the more open areas occasionally with the lawn tractor, and I think that a more conventional lawn would not suffer from this problem anyway.
Edges: our orchard is fenced, and I have buried the the perimeter wire about 8 inches (20cm in heathen units) in from the fence. Since the cutter is a rotating disk that is about half the width of the machine this means that you will inevitably end up with an uncut fringe of grass if your lawn is bordered by obstacles of any height and you need to be prepared to cut these manually. You’ll get the same fringe effect around any interior obstacles – but then you’d get pretty much the same effect with an ordinary mower, so it’s not really very different in that respect.
Timing: it has a built-in clock and can be programmed to mow within a set period. The default setting is 7am to 11pm, but despite our orchard being 400 square metres, the supposed maximum for this machine, I have cut its hours down to 9am to 8pm since it clearly did not need all that mowing time – and this is in warm wet Devon where grass grows like crazy. Perhaps this is because I have it on the highest height setting (5cm), but nevertheless I think it could easily cope with at least a 30% larger area in our conditions, and probably more in a dryer area with less grass growth.
Noise: as near silent as makes no difference. There is a whirr from the drive motors and another from the motor spinning the cutting disk, but the loudest noise is from the blades hitting the grass and you’d need good hearing to pick that up above ambient noise from more than 20 yards away. The beeps it makes when it stops after it thinks it might have hit someone are loud enough to be audible without being intrusive. While charging in its docking station it is absolutely silent.
Security: it has a PIN number that has to be typed in to re-activate it any time is it stopped manually, picked up or generally handled. This is the lowest level of security and you can go to higher levels which will sound alarms and things if it is picked up. We live 1/2 mile from the public road so I’m not too worried about thieves and use the lowest setting, but if you are going to use it in a very public area that doesn’t have someone nearby who would investigate noises promptly you will need to give this some thought. I suspect a thief would feel a bit embarrassed walking around with a bright orange terrapin shaped object under his arm that was shrieking its head off, but that might not stop him smashing it out of annoyance. Realistically I think this sort of technology is only suited to reasonably enclosed and secure areas which, to be fair, is probably a description of most large lawns.
Aesthetics: Flymo colour their products orange, bright orange. Yuk! Hopefully even the marketing folk will eventually twig that not everyone wants a bright orange thing burbling around their lawn, and produce it in different colours. In the meantime a judicious application of black silage tape works wonders…
Maintenance: I’ve found that the blades have got pretty blunt after about 6 weeks so that it barely cuts which – in theory – means removing and replacing both blades and screws, which is a two minute job requiring only a screwdriver. It uses three blades, and Flymo provide 9 spares + screws in the box with instructions to change the screws as well as the blades in case wear of the former leads to blades flying off. When I took mine apart a visual inspection showed that the screws were absolutely fine and the blades were just blunt, so after a bit of honing on a whetstone the original blades and screws have gone back on, and it is cutting beautifully again. Make up your own mind about whether to replace or sharpen, but I think inspection and common sense is the way to go. Otherwise I muck out compacted grass and mud from its underside about once a fortnight, or after very wet weather, and that’s it – no other maintenance has been required during the cutting season.
Problems: so far no significant ones. The setup needs tuning, and in particular I’ve had to learn where and why it gets stuck and adjust things accordingly. Given the variable congested / open nature of our orchard it is a bit frustrating not to have more control over where and how it cuts but you get what you pay for. I think I may in fact end up adding artificial obstacles to the more open areas as a way of forcing it to spend more time there, but then I’d still have to hand mow around them, so maybe it’s not worth it. Bigger wheels to give a better capability on rough ground would be useful for us, and in fact the bigger Husqvarna models have this … at a price.
Quality and performance: after three months I am increasingly impressed. The grass obviously likes the “little and often” treatment since it looks better now than it has ever done in the past. My wife thinks it looks better than when I cut it which – given how much I hated doing it – is a definite case of mixed emotions! Despite bumping into trees 100s of times a day the machine shows no obvious signs of wear and is still working perfectly.
In summary I’m impressed, in fact more impressed than I expected to be. It’s not perfect, and it’s a hideous colour, but I really hated mowing that orchard and now I don’t have to. In other words it does what it says on the tin, and does it better than I expected. If you are dithering because you are not sure whether it will do the job my experience is that it will, and I would recommend it.
[Update March 2016] I bought this in summer 2015 and after a winter’s hibernation it is back working again. When first reinstalled it simply would not work properly, detecting “false” collisions every few seconds and stopping repeatedly. Finally it showed a “rear sensor faulty, get it serviced message”.
Well, it has a 2 year guarantee so I could have sent it back, but instead I decided to attempt a bit of amateur fault-finding and solved the problem really easily. The instructions state that you should store it upright, and in fact I left if (one could say this is “upright”) on its nose all winter, which led to the four flexible rubber supports which connect the shell to the body become permanently bent forwards. This meant that the magnet attached to the shell was not central in the collision sensor slot on the body, hence the detection of false collisions. It was easily fixed by rotating two of the rubber mounts by 180 degrees, cancelling out the overall bending, and now it is absolutely fine and back working happily. So, with hindsight, my fault – but if you get one don’t store it “upright”, but rather “flat” on its wheels!
Also I was so impressed with it that I have bought a second one, which is now busily cutting a different area of lawn. That’s a pretty serious endorsement of how good these machines are.
One word of warning: these little machines will not cope with the long (eg 4+ inches) and dense wet grass that grows over a typical winter, so when you first install them in the spring you need to cut the grass manually. Cutting once a year is a small price to pay for relief from weekly slavery, but I’m afraid that you can’t throw away the conventional mower altogether.
[Update June 2016] Herbie I (orchard dweller) is fine; Herbie II, installed at the beginning of April, is doing well in his separate area of grass.
Herbie II’s domain is a much larger area, probably around 650 square metres (the 150m metre drum of cable that came in the box wasn’t enough to go round the perimeter, and I had to buy another reel) yet he is keeping it down without any trouble. This is a more garden-like area with flower-beds as well as shrubs, and it is roughly “U” shaped so I have his docking station in one leg of the U and the junction with the boundary wire going round the bend into the other leg. This is the solution given in the destruction manual, and configured to start remotely at the far end 50% of the time it seems to work well with even coverage in both legs of the U.
There are various “tight” areas and near cul-de-sacs in this patch of garden, and I have had to leave the tightest of these outside his working area to avoid his getting trapped in them. The manual suggests that 2 metres is the minimum width and, based on observation of his behaviour, this feels about right. We have one salient that is about 3m x 3m and when he goes in there he can end up doing a lot of toing and froing before he finally escapes again. Not only does this waste time and battery power, it also results in the ground becoming a bit trampled by the continuous turning.
I couldn’t be bothered to lay boundary wire around all the flower-beds, and anyway if you use a spade to tidy up the edges you could end up exposing or cutting the boundary wire if you forget exactly where it is. So instead we have been experimenting with different edging solutions, and at the moment the favourite is pieces of wood, about 8″ long x 1.5″ wide, wired together in a roll. (Available pretty cheaply from the nation’s most ubiquitous supermarket.) Held in position in the “precipice” around the edge of the bed by short bamboo canes these extend about 2″ or 3″ above grass level forming a low-level barrier which doesn’t look too bad. The arrangement has a little bit of give so Herbie hits gently, pushes it back slightly in the process before stopping, and so cuts pretty much up to the edge of the bed without leaving a fringe of longer grass. And where this doesn’t quite work you can strim up against the wood without damaging anything. It’s not a perfect solution, and I have been mulling over alternatives, but so far haven’t come up with anything better that is cost-effective.
He is currently working at the factory preset of 7am to 10pm, 7 days a week, and that was necessary in May when we had a flush of grass. However now that growth is slowing down I will cut his hours back a bit since he is coping easily with this area. Like our orchard it is ex-field, hence rye-grass which doesn’t look good if cut too short, so I have his height set to about 4.5 cm.
So, once again, I’m very pleased and the grass looks miles better than when I did it myself. I think this improvement in appearance is a feature of rye-grass and uneven ground: my tractor has a 42″ cut so, inevitably, grass on raised areas gets cut too short exposing the lighter-coloured base of the blades of grass. Herbie rides over the bumps and only cuts a swathe about 8″ wide, so he follows the contours of the ground more closely and gives a more even cut as a consequence.
[Update April 2017] After a winter’s hibernation (horizontal this time!) Herbies I and II are back out at work. The machines themselves seem to have survived the winter OK: I charged them fully before storing them last autumn, and also gave them another charge before setting them to work this spring. I also stored the docking stations and power supplies indoors over the winter, but reinstalling those is quick and easy.
I get the feeling that their battery capacity (as in time between recharges) is starting to degrade, but I haven’t made any quantitative measurements and after 2 years they clearly have enough oomph to continue doing the job for at least another year.
The grass was definitely too long for them by the time it was dry enough to turn them out to work, so I had to cut it manually, but once that was done they seem happy enough to get on with the job once more. (As I’ve remarked above this is warm, wet Devon where things grow like crazy; if you are somewhere drier you may not have this problem.)
Problems: only two, and both mole-related. Maybe the worms here have a high kryptonite content, but whatever the reason the moles managed to cut through the homing wire in one location, so I had to locate and fix that. Also excavation by said moles, plus digging by the dogs trying to catch the moles, mean that we have a new crop of bumps and hollows in which the Herbies can get stuck. So I have been busy shovelling earth from molehills to hollows, and then rolling, to try to flatten things out. I’m now down to about one “rescue from hole” operation a day, which is no great burden, and it is getting better all the time.
[Update September 2018] Herbies I and II have had another mostly successful year. I turned them off during the dry spell this summer because the grass had stopped growing and they were chewing up some edges a bit. I think the problem was that the way they turn is by skidding their single rear roller, and when the ground gets dry and the grass sparse this can ending up moving soil rather than skidding over the grass.
Our moles have also had a good year 🙁 and I have had to spend quite a lot of time filling in holes where their tunnels have collapsed in the dry weather, otherwise the Herbies get stuck. The moles can also lift the boundary wire to the surface when the grass cover is eroded, whereupon it can get cut through, so I have had to do some mending. I have found that the wire tends to get cut in similar locations, and to speed up the process of finding the break I now feed both ends into a short section of plastic pipe (say 6 inches long) which I drive vertically into the ground leaving the top and connector exposed. The connectors have 3 holes, and you only use two to fix a break, so you can put the terminal of a multi-meter into the 3rd hole which makes finding the broken section a *much* faster process.
They have done 3 and 2 years respectively and are still working well, with no obvious signs of reduced battery life, and are coping easily with the size of their working areas.
Problems: only one this year. After their winter hibernation I, like others, found that the connectors on the wires that attach to the back of the base unit fell apart, so I have replaced them with automotive spade terminals. This is easy and cheap to do, but begs the question of why Husqvarna saved fractions of a penny by using such grotty ones in the first place!
Like others I have had to replace the shoddy connectors to the base unit with automotive spade terminals, but that is a cheap and easy job.
I sadly had to return this unit as it really needs for the base station to be powered, wired in and left out on the lawn area. My lawn is also not next to my house and it would have been a challenge to get power that far out. My biggest fear was that if left out, it would have been stolen. It does have good security and alarms if removed from the dock without the code being entered. That said it doesn’t stop it all being taken or damaged. When buying I thought I could leave it on charge indoors and just put in to use when needed. Otherwise I really rate the unit, the instructions are very clear and the unit very robust. If you have the right environment for one of these don’t let my situation put you off, it’s a great unit. Also like to note that Amazon were great in dealing with this, both for the delivery and return.